Panda RGB Controller
Revision History
| Version | Date | Update Content |
|---|---|---|
| v1.00 | September 12, 2025 | Initial Version |
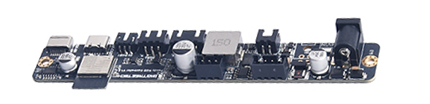
Product Overview
The Panda RGB Controller enables wireless control of up to two RGB light strips. You can set them to a custom display pattern or synchronize them with your 3D printer's activity.
Product Features
-
Onboard multiple light strip connectors, with included adapter cables for customer convenience.
-
Reserved fast programming interface for easy DIY firmware flashing and future firmware upgrades.
-
Onboard ESP32 WIFI module, supporting wireless control.
Product Specifications
-
Control Board Size: 100mm*25mm
-
Main Control: ESP32-C3-MINI
-
Power Input: DC5.5x2.1: 24V 3A
-
Logic Voltage: 3.3V
-
5V RGB Output Interface: PH2.0 3P: 5V 1.5A (peak), XH2.54 3P: 5V 2A (peak)
-
24V RGB Output Interface: Two XH2.54 4P: 24V 2A (peak)
-
24V Output Interface: XH2.54 2P: 24V 1.5A (peak)
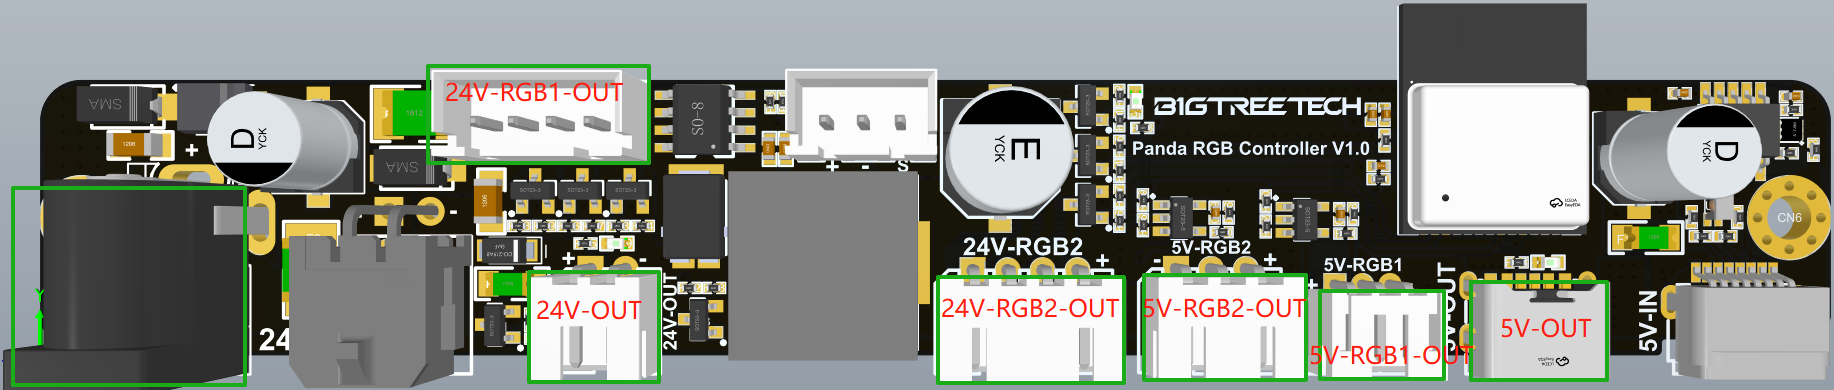
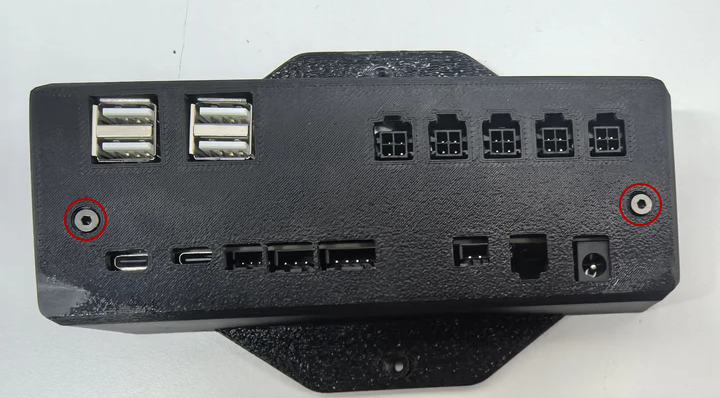
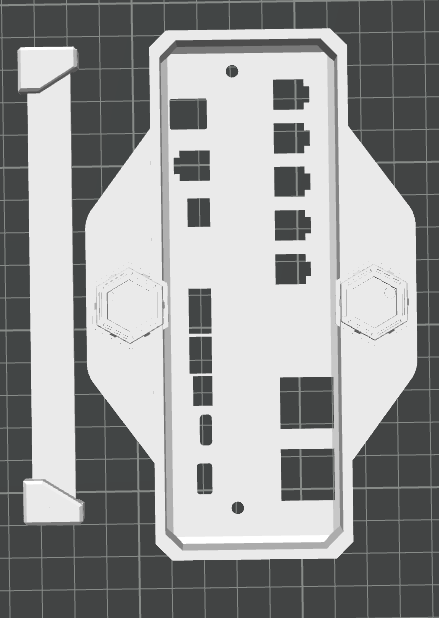
Product Interface Diagram

Installation Guide
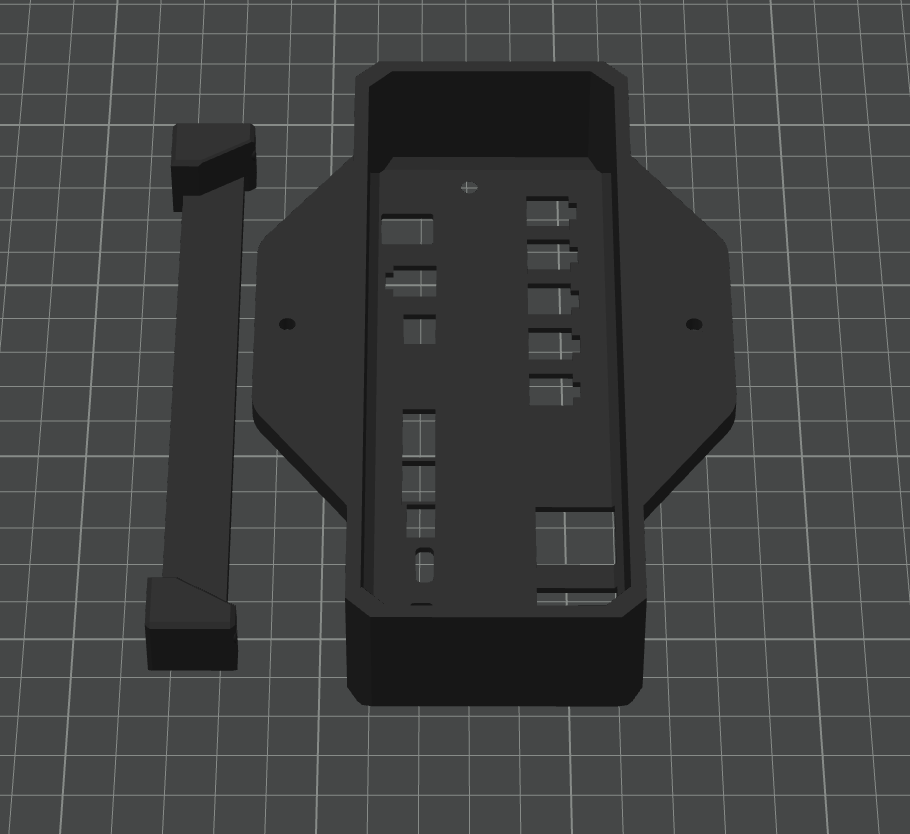
Installation on Panda Station
-
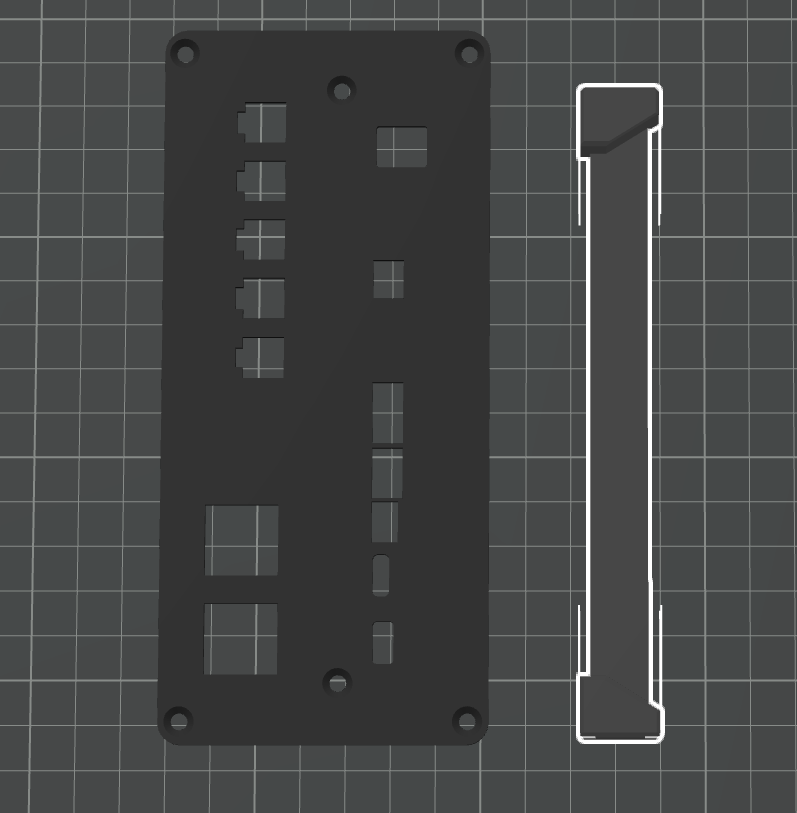
Download and print the Panda Station RGB Controller shell.
-
First, secure the device to the support bracket using the included M3x10 screws (HA), and then fix the bracket to the shell using the M3x6 screws. This shell is compatible with both the Panda Branch and Panda RGB Controller.
-
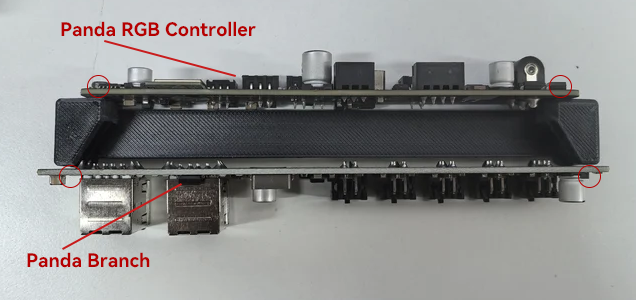
Next, remove the existing screws from the back of the Panda Station, and then use the M3x15 screws from the Panda RGB Controller Kit to secure the box in place.

-
Installation on Panda Station
-
Installation on Naked Panda Station

-
-
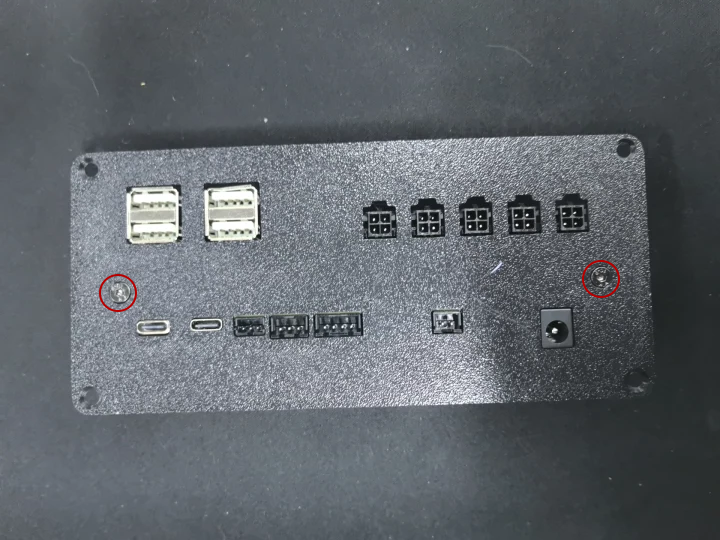
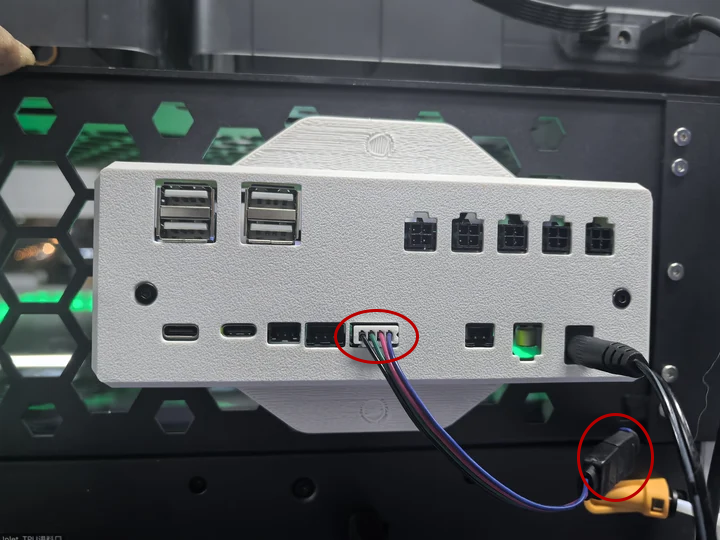
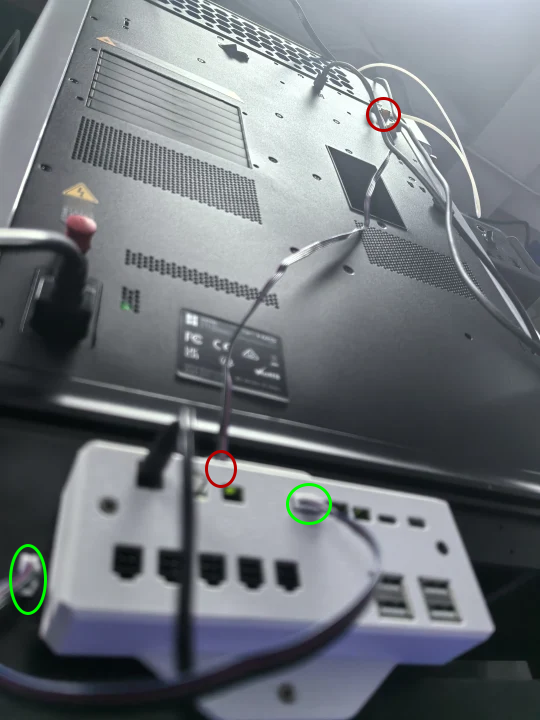
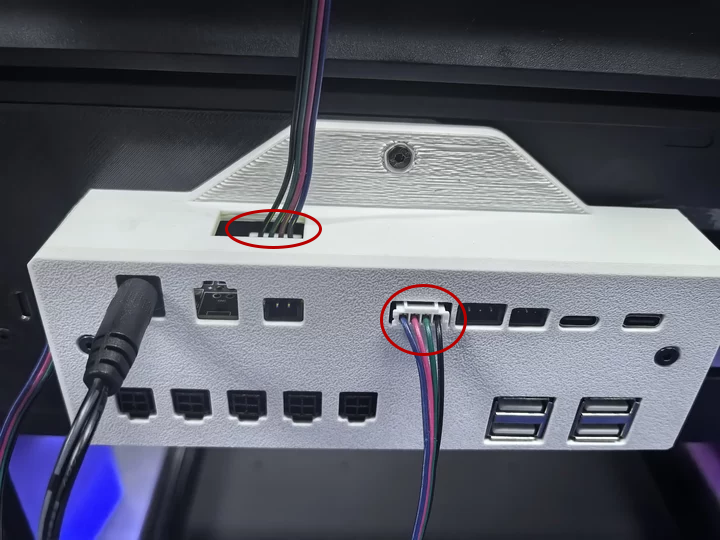
Wiring Diagram
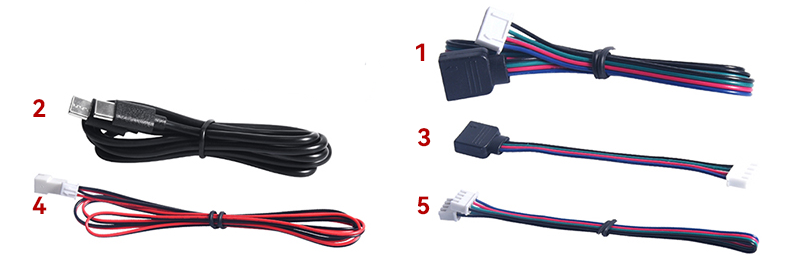
Insert the wire labeled "5" from the controller into the red-marked port to control the bottom RGB light strip. Then, insert wire "2" into the green-marked port to power the internal lighting strip. Please note that the Naked Panda Station requires an internal lighting kit to use this feature.

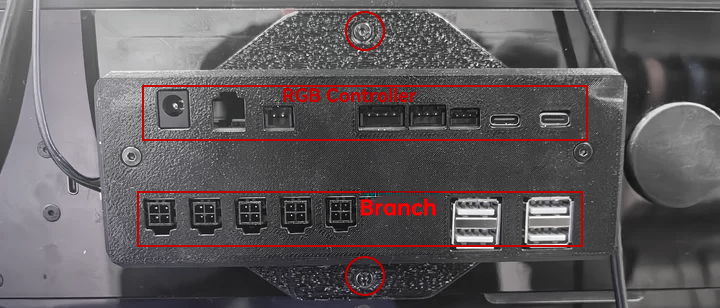
When using a Panda Den, the controller can be installed on the back of the Panda Den as shown below.

Installation Guide on Panda Den
-
Download and print the Panda Den RGB Controller mounting plate.
-
First, secure the device to the support bracket using the included M3x10 screws (HA). Then, attach the bracket to the shell using the M3x6 screws. This shell is compatible with both the Panda Branch and Panda RGB Controller.
-
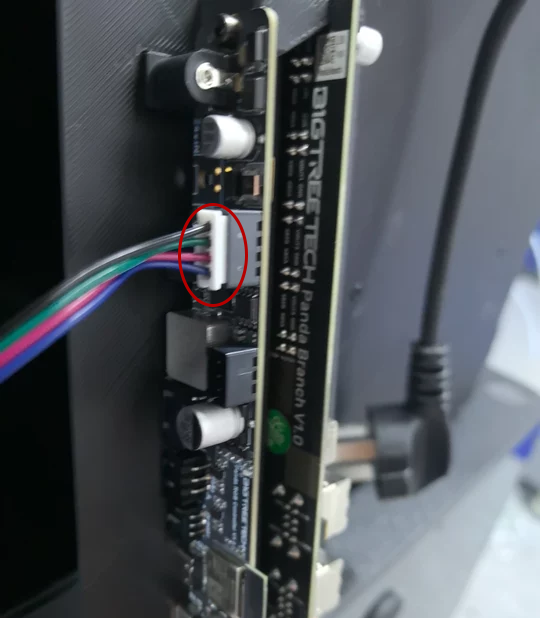
Next, remove the metal cover plate from the back of the Den. Connect the Panda Den RGB light strip to the control board using wire "3" from the RGB Controller (as shown in red), and then replace the mounting plate.

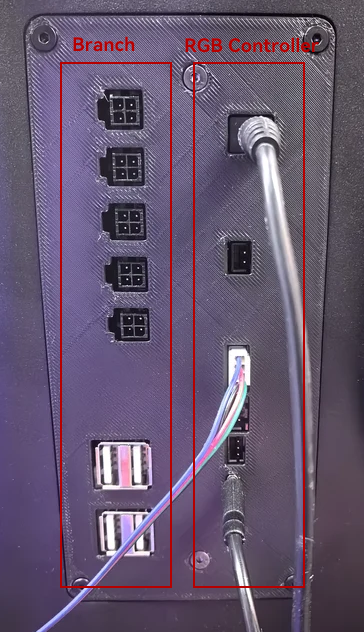
When using the Panda Station, you can connect its control board to the back of the Panda Den. For this, use wire "5" for the red-marked RGB control port and wire "2" for power, as shown in the accompanying image.
When using the Panda Perch PX with a purchased lighting kit, connect the control board to the back of the Panda Den and use wire "4" to connect the light strip to the Controller.
Installation Guide on Panda Perch PX/H2D
-
Download and print the Panda Perch RGB Controller shell.
-
Secure the unit to the support bracket using the included screws, and then attach the bracket to the universal shell, which is compatible with both the Panda Branch and Panda RGB Controller.
-
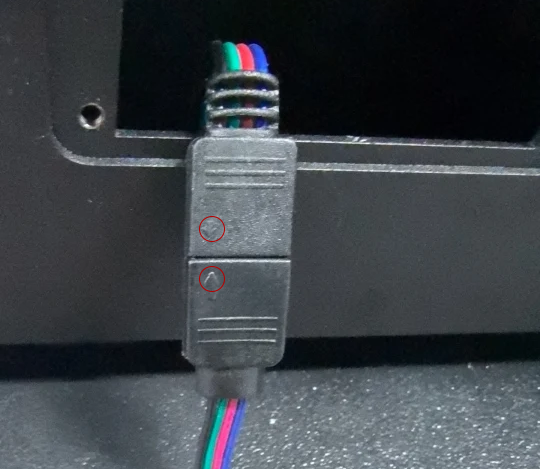
Next, clip the Panda Perch PX/H2D RGB Controller shell onto the hexagonal expansion holes of the Perch, and use RGB Controller's wire "3" to connect the Panda Perch H2D RGB light strip (ensure the arrows align) to the control board or use wire "4" to connect the Panda Perch PX lighting strip to the controller.

-
When using Panda Station, wire it as shown below.
First Connection
When you power on the device for the first time or after a factory reset, a flowing blue light indicates that the Panda RGB Controller is in pairing mode and ready to be bound to your printer.
WiFi Connection Guide
-
Connecting to the Panda RGB Controller's WiFi_AP Hotspot
-
Connect to the Panda_RGB_Controller AP hotspot:
Panda_RGB_Controller_XXXXXXXXXX. The default password is987654321.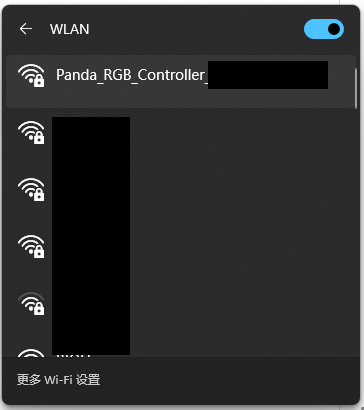
-
-
Accessing the AP Webpage
- After connecting to the AP, open a browser on your computer and enter the default IP address:
192.168.254.1. On mobile devices, the Panda_RGB_Controller Web UI will automatically appear, or you can manually enter the IP address in the browser:192.168.254.1.
- After connecting to the AP, open a browser on your computer and enter the default IP address:
-
Select Language (Default: English)
-
After selecting a language, click
Next.
-
-
WiFi Connection Page
-
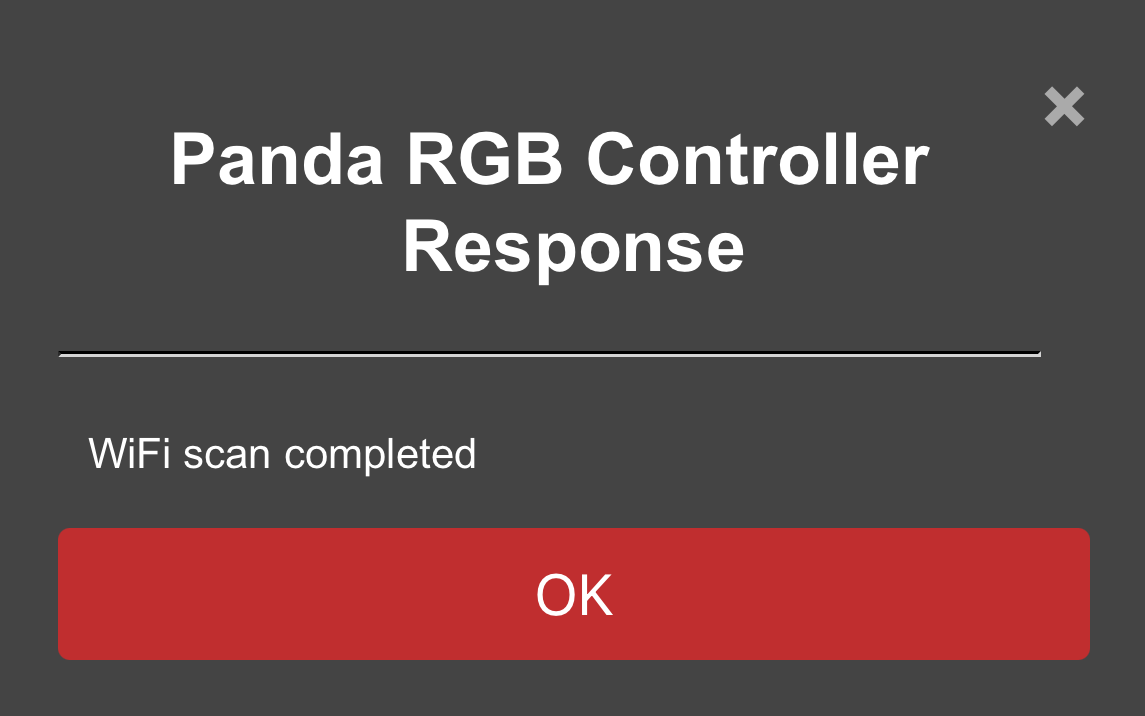
Upon first setup or after a factory reset, this page will automatically scan for available Wi-Fi networks. You can also manually initiate a scan at any time.

-
Once the scan is complete, a pop-up notification will confirm that it has finished.
-
Select your desired Wi-Fi network from the list.
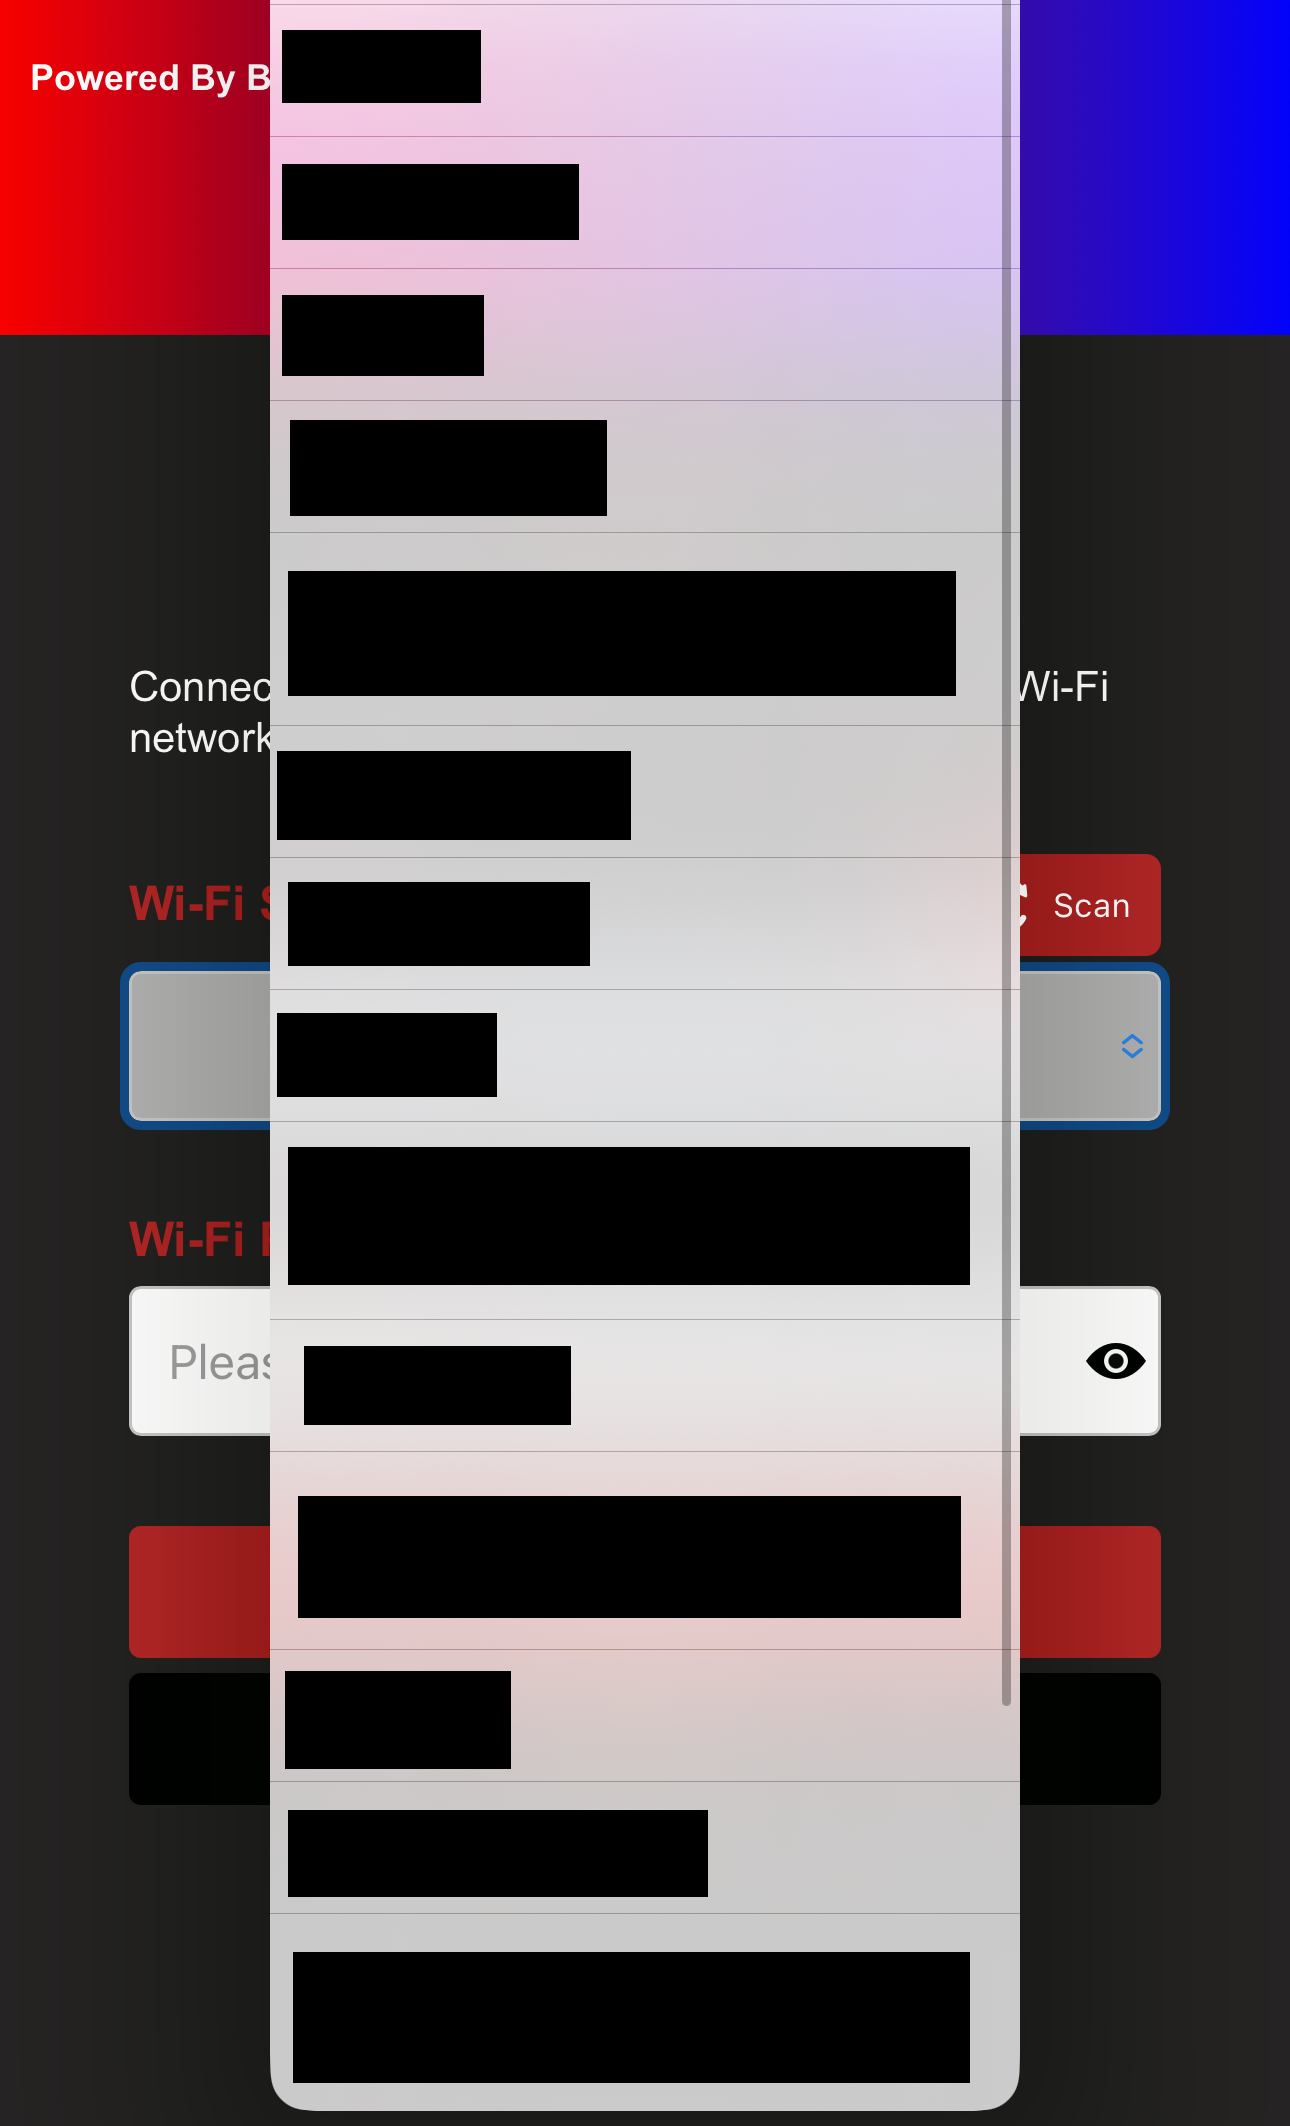
-
Type your password and tap the
eye iconif you'd like to see the password you've entered.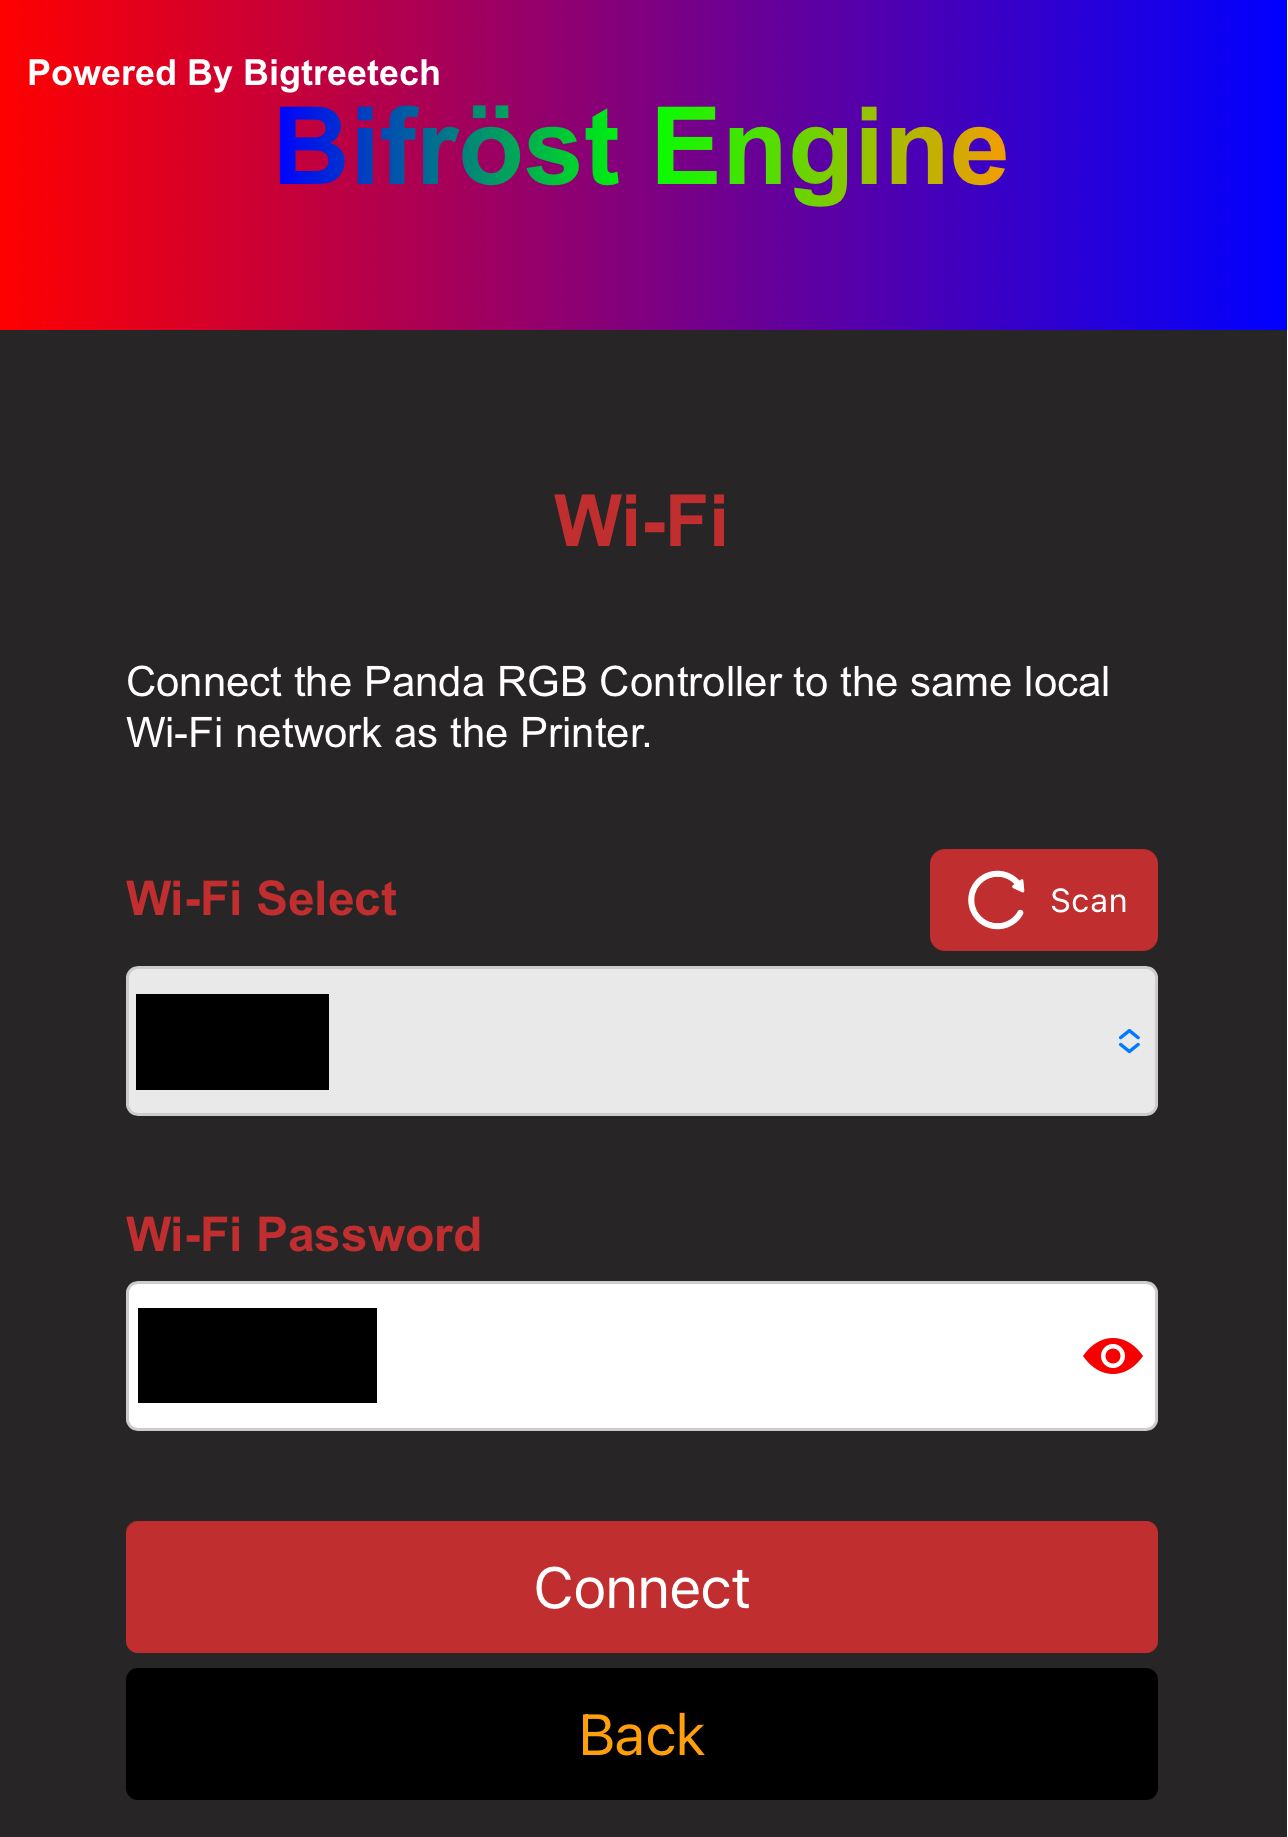
-
Click Connect, and the interface will switch to the WiFi connection page, showing
WiFi connecting....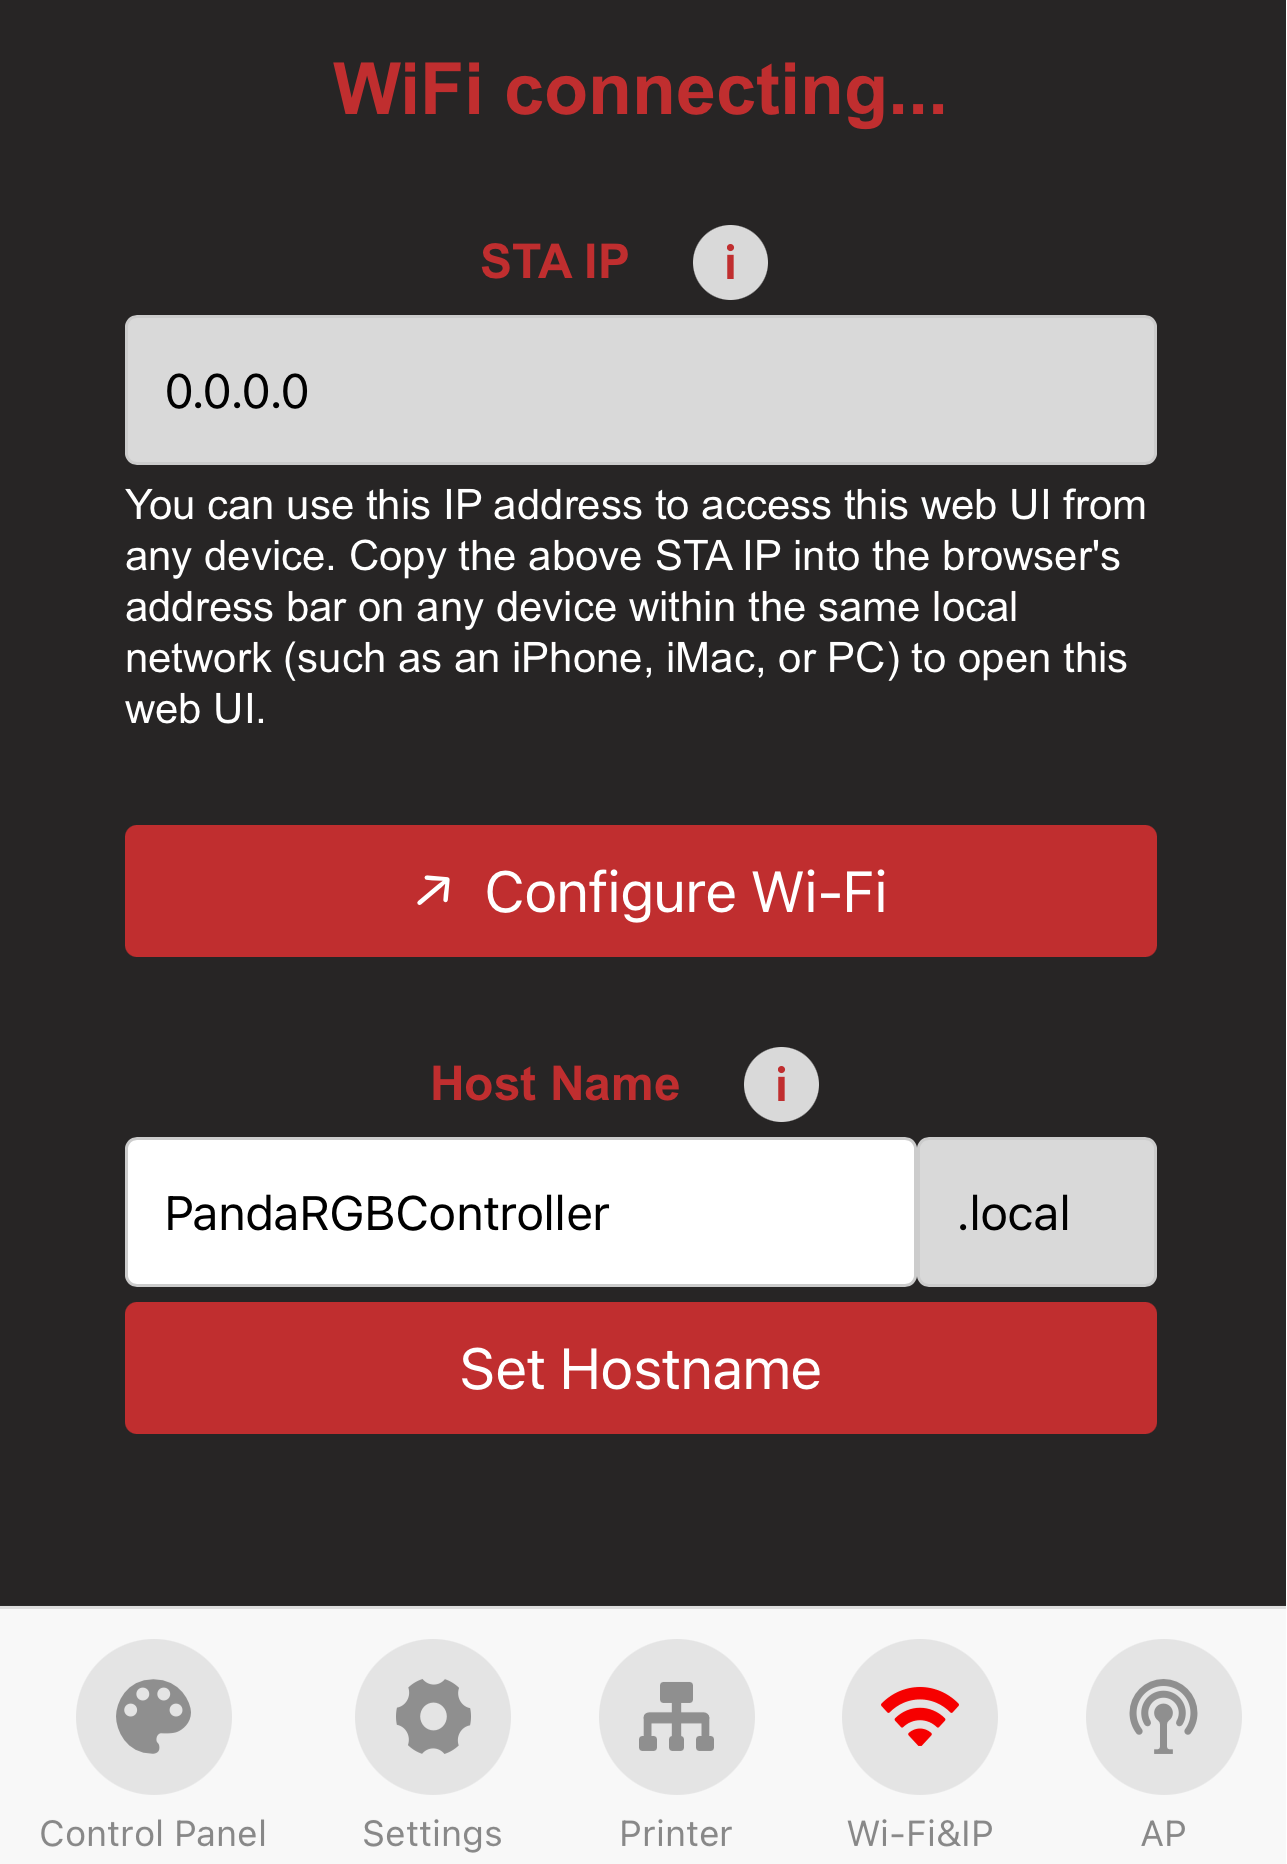
-
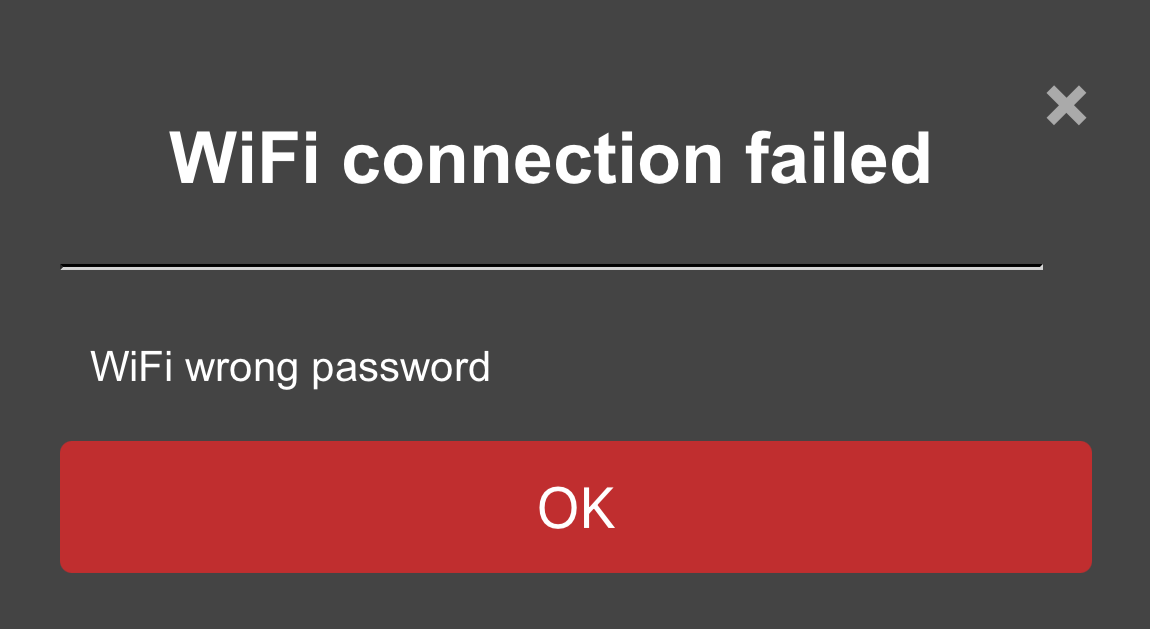
After a moment, a pop-up will display the status of your Wi-Fi connection.
-
Connection Failed:
-
Connection Successful: You can either bind the printer and proceed to the printer interface or click
Cancelto stay on the WiFi page.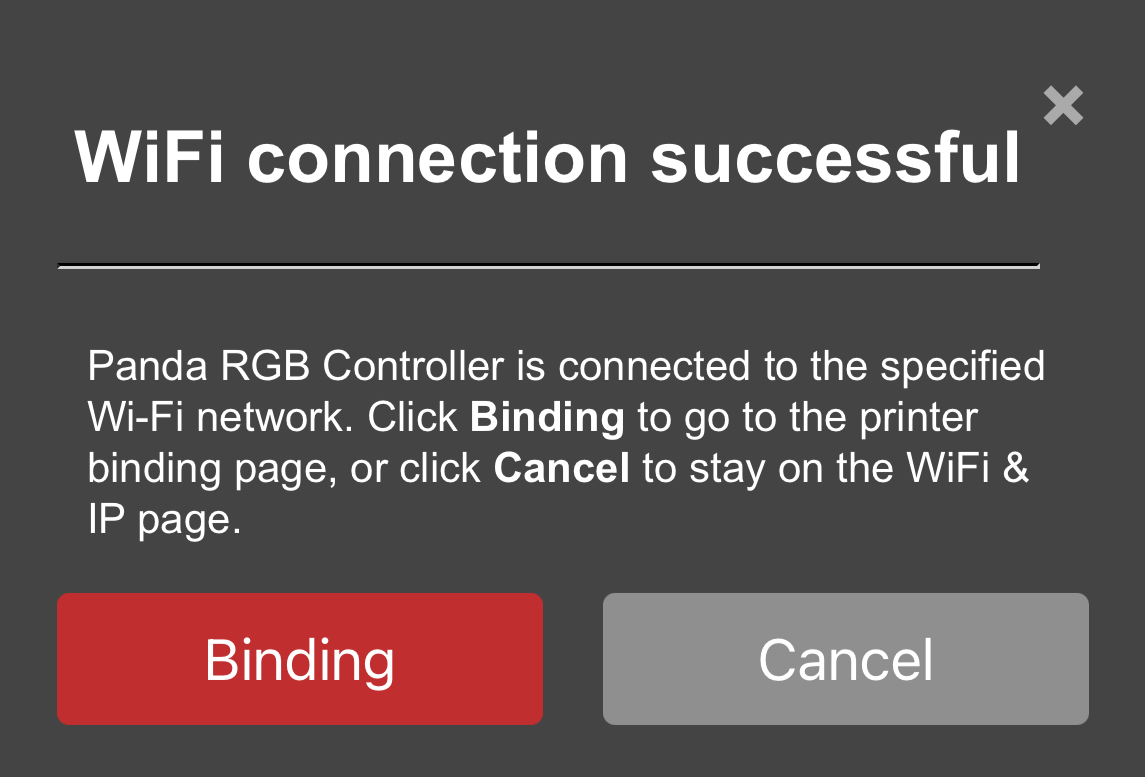
-
-
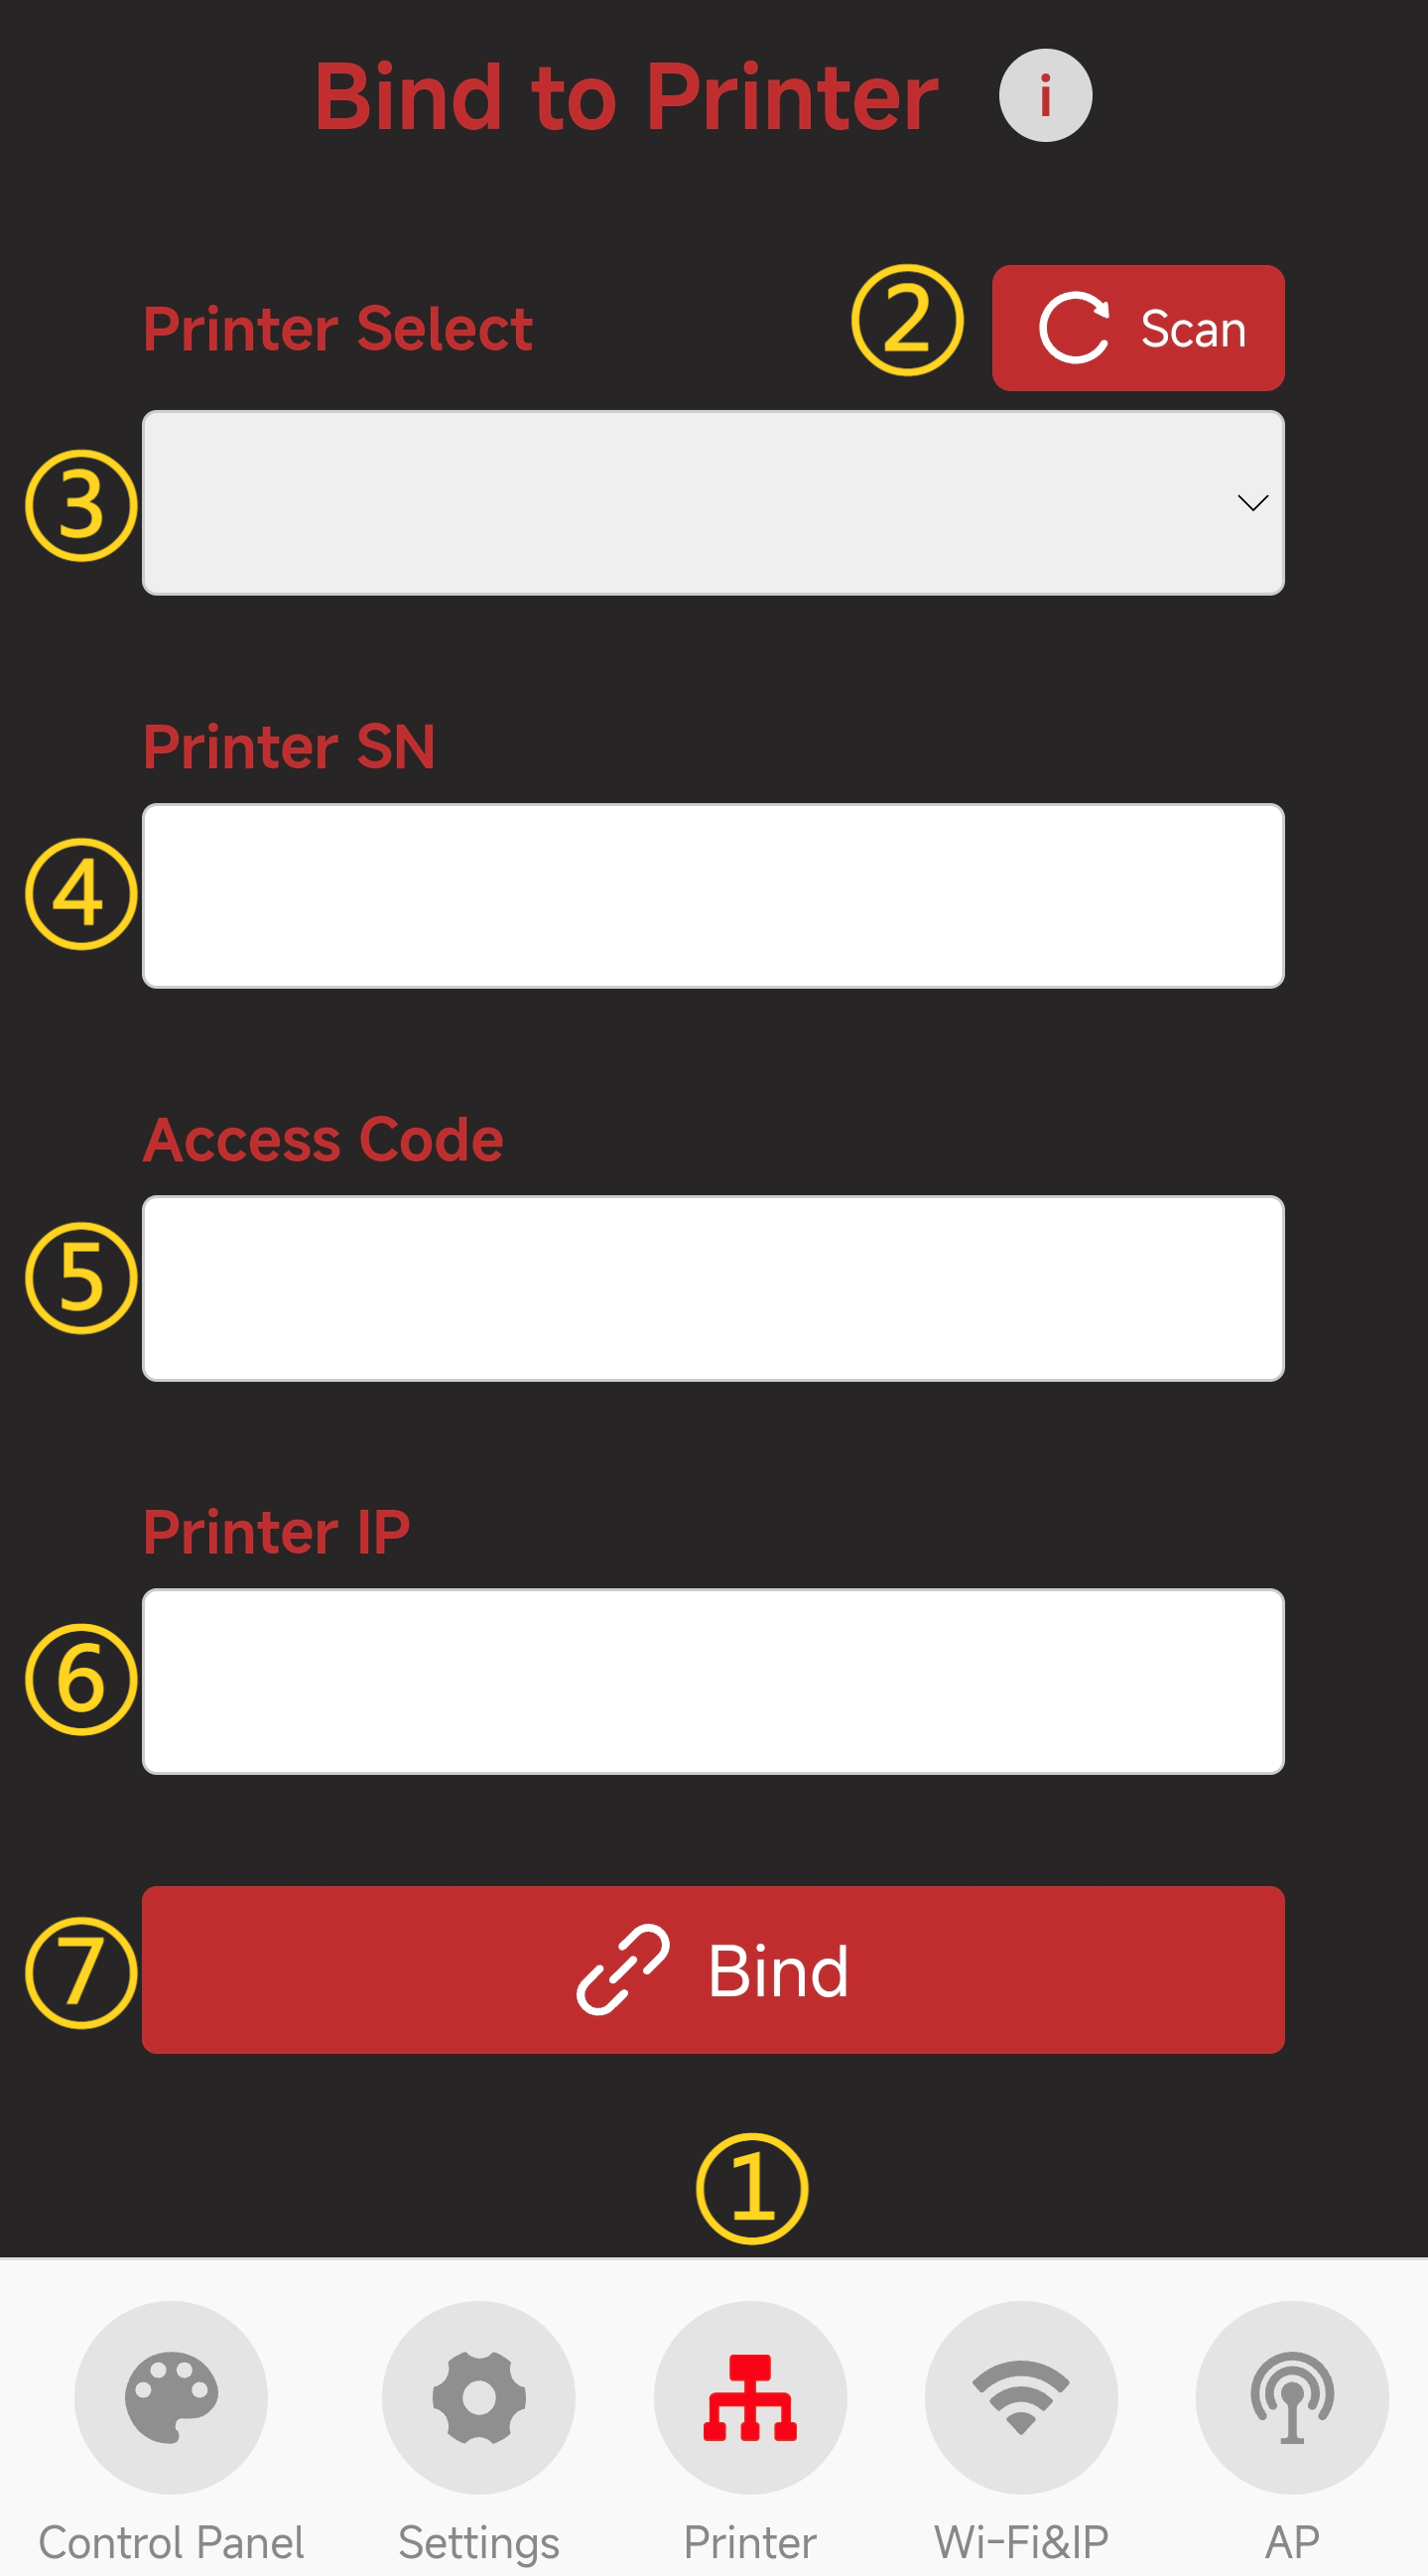
Printer Binding Page
-
Feature Introduction
-
① Printer Page Selection: When you click the icon, it will turn red to indicate that you are on the Printer page.
-
② Scan for Printers on the Same Local Network
-
③ Select the Detected Printer
-
④ Enter Printer's SN Code
-
⑤ Enter Printer's Access Code
-
⑥ Enter Printer's IP Address
-
⑦ Confirm to Bind This Printer
-
-
How to Bind a Printer
-
Tap the
Scanbutton; a pop-up will appear shortly to confirm a successful scan.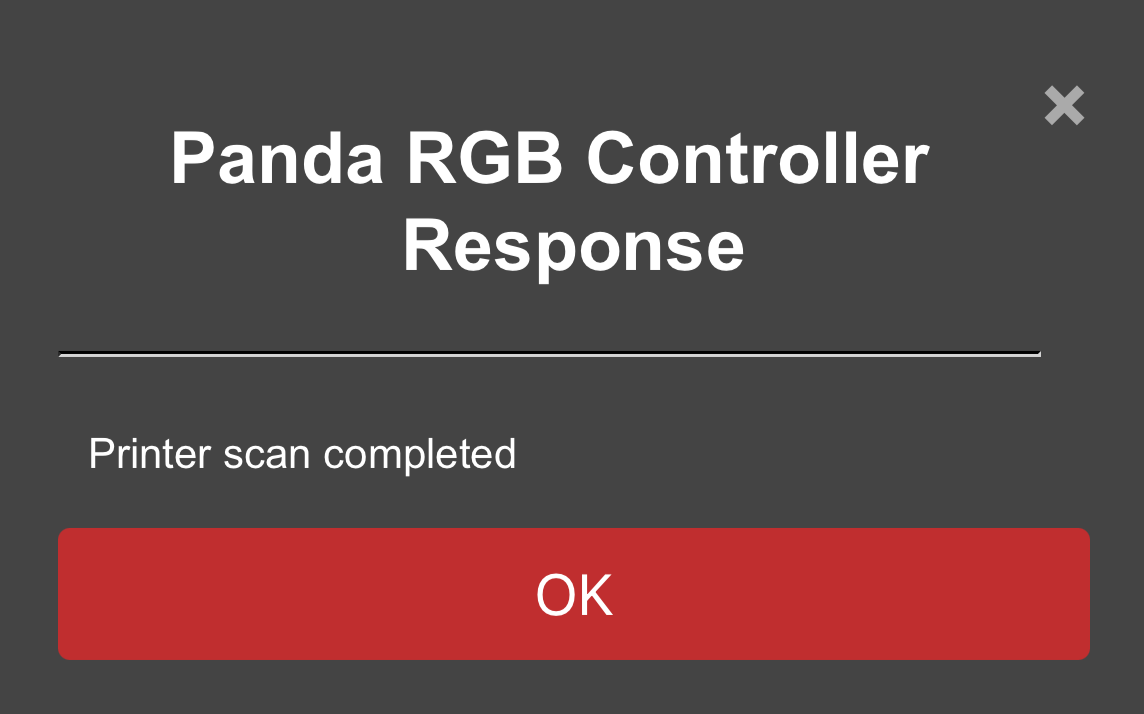
-
Select your printer from the list, and its SN code and IP address will be automatically filled in.

-
Enter the printer's
Access Code-
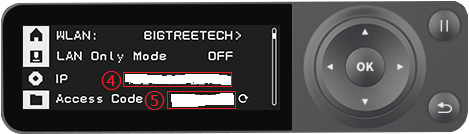
Find the
Access Codein the printer (Using P1 series printer as an Example)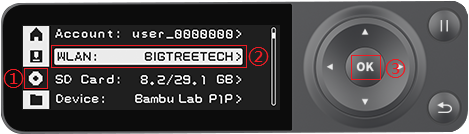
-
Enter
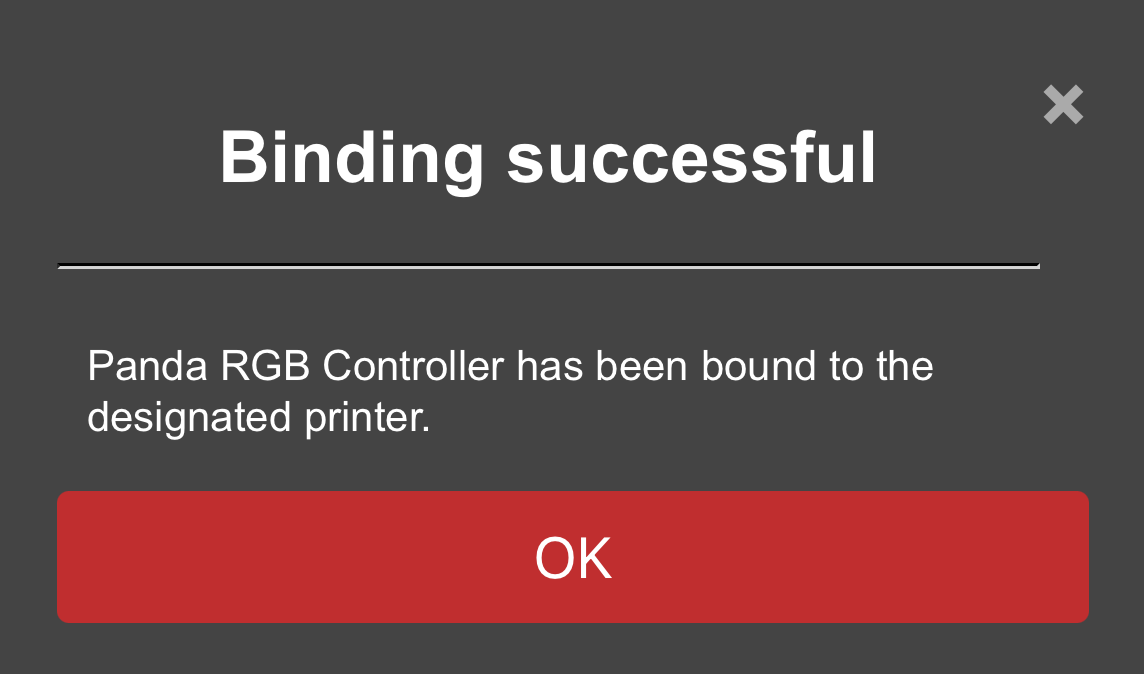
Access Codein the input box, and tapBindto bind the printer.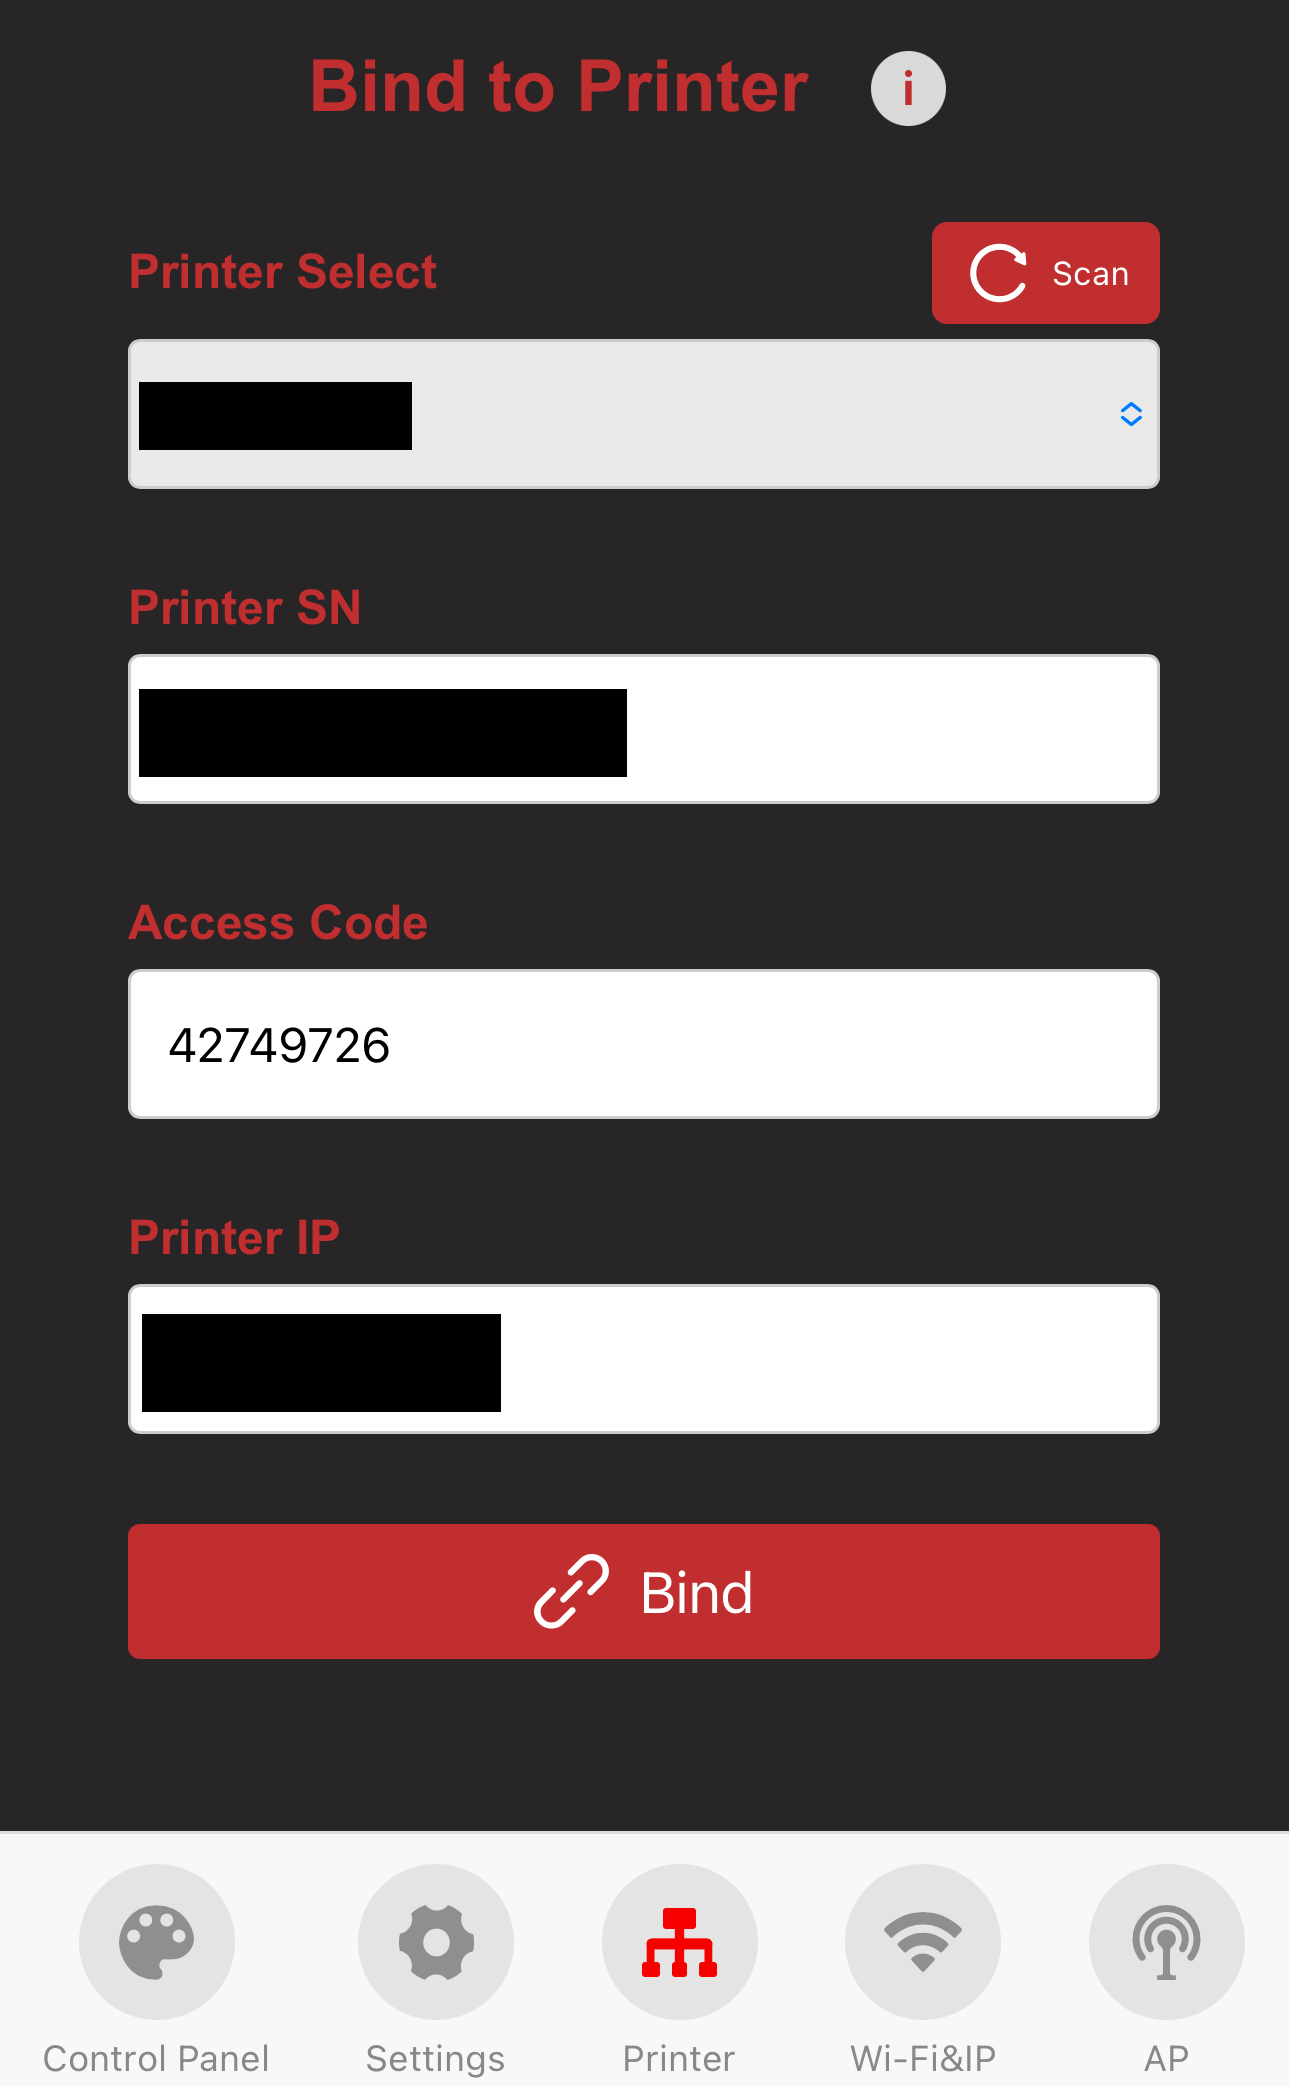
-
-
Webpage Usage Guide
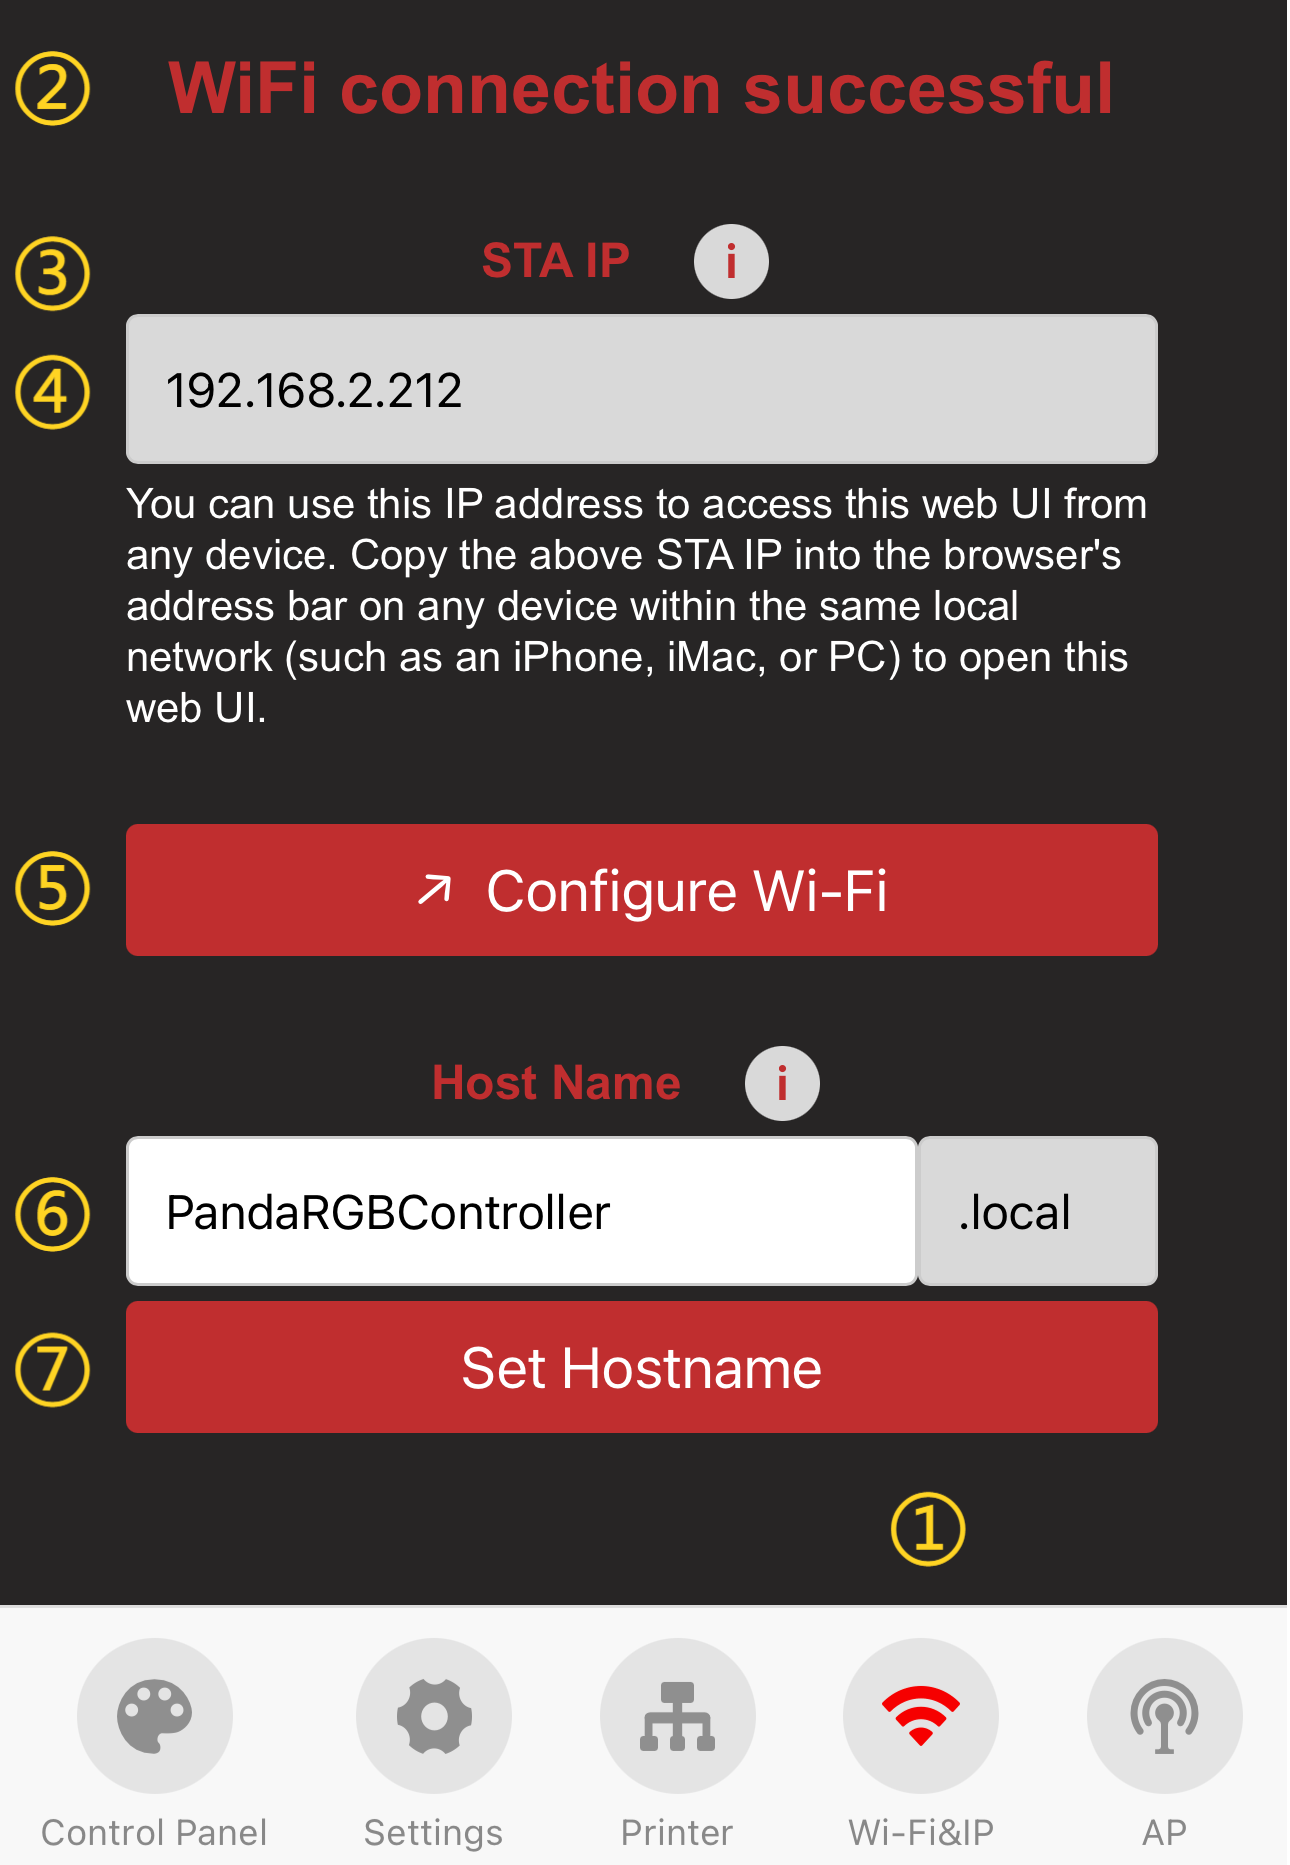
WiFi Page
-
① WiFi Page Selection: When you click the icon, it will turn red to indicate that you are on the WiFi page.
-
② Current WiFi Connection Status
-
③ IP Address Icon: Click the icon to display a pop-up. If the IP field is blank, ensure Panda_Status shows "Connected." If it says, "Not Connected," check your network settings.
-
④ IP Address Display: Entering this IP in your browser will take you to the Web page, as long as you're on the same local network.
-
⑤ WiFi Network Configuration Button: Click to go to the WiFi connection page
-
⑥ Host Name: The default hostname is "PandaRGBController." If you forget the IP, you can use the hostname followed by "local" in the browser (e.g., http://PandaRGBController.local). To modify the hostname, click the text box to edit it, then click "Set Hostname" to confirm.
-
⑦ Confirm Hostname Modification
AP Page

-
① AP Page Selection: When you click the icon, it will turn red to indicate that you are on the AP page.
-
② AP Hotspot Switch
-
③ AP Name: Default is
Panda_RGB_Controller_XXXXXXXXXX -
④ AP Password: Default is
987654321 -
⑤ Hotspot IP: Default Hotspot IP is "192.168.254.1." If your router's IP range is "192.168.254.xxx," an IP conflict will prevent the device from binding to the printer. Change the Panda_RGB_Controller hotspot IP to a different range.
-
⑥ Confirm Button: Clicking this will restart the device, after which you can connect to its AP hotspot. (How to connect to the AP hotspot)
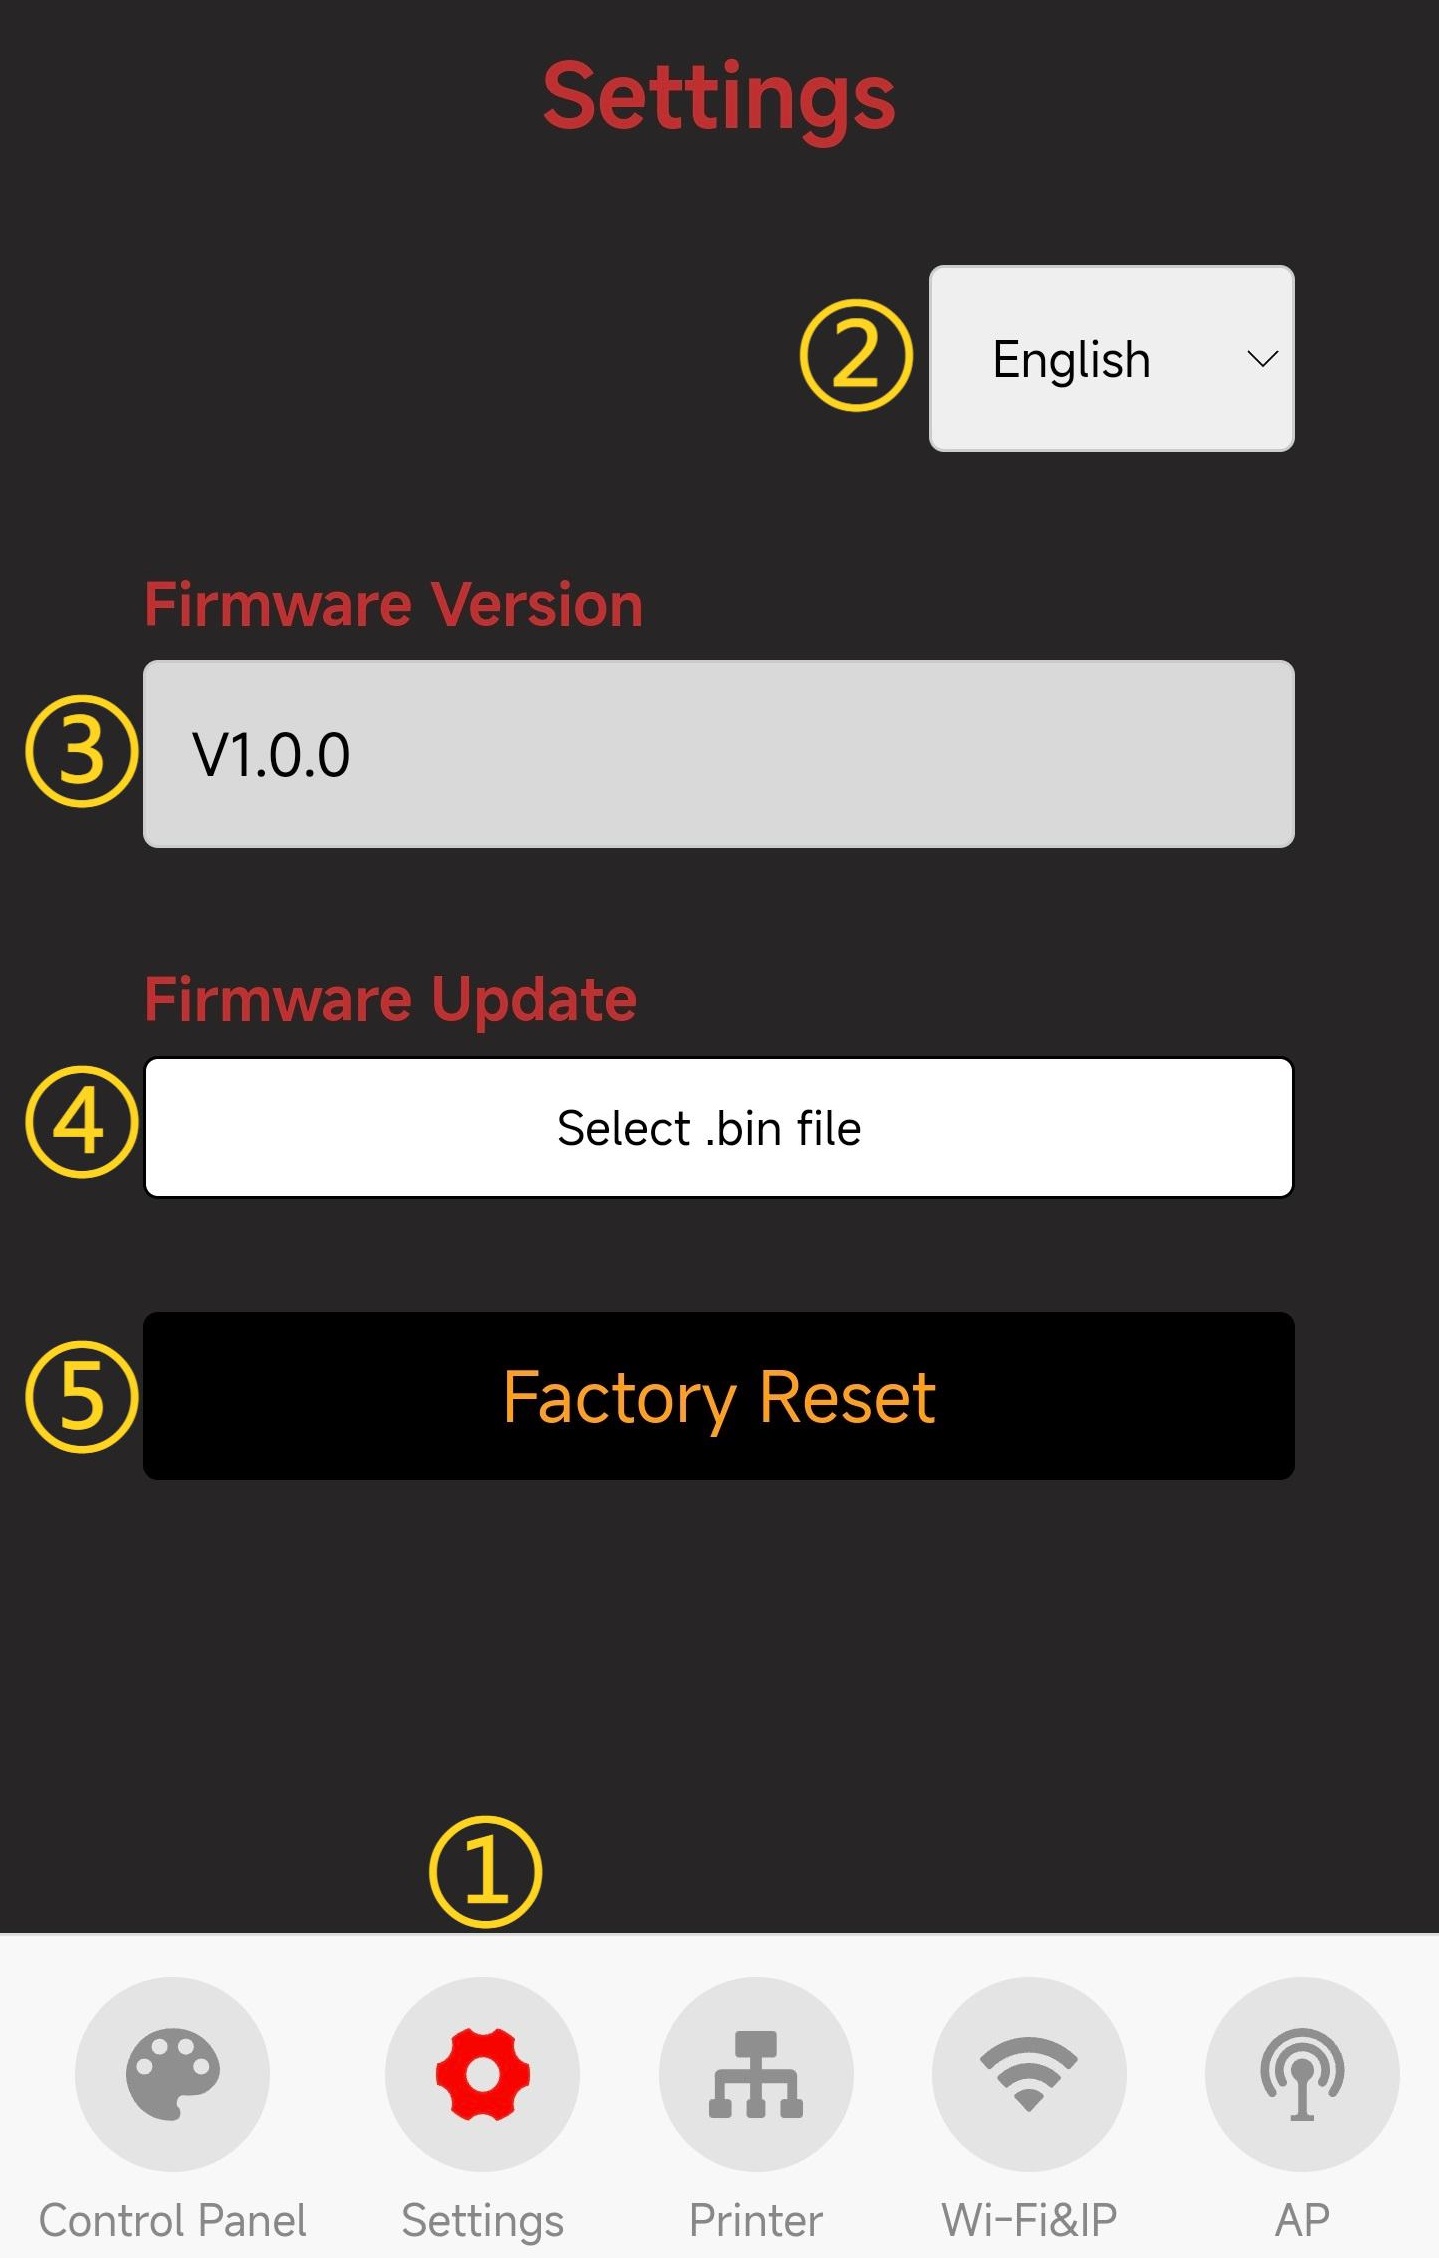
Settings Page
-
① Settings Page Selection: When you click the icon, it will turn red to indicate that you are on the Settings page.
-
② Choose Language (Default: English)
-
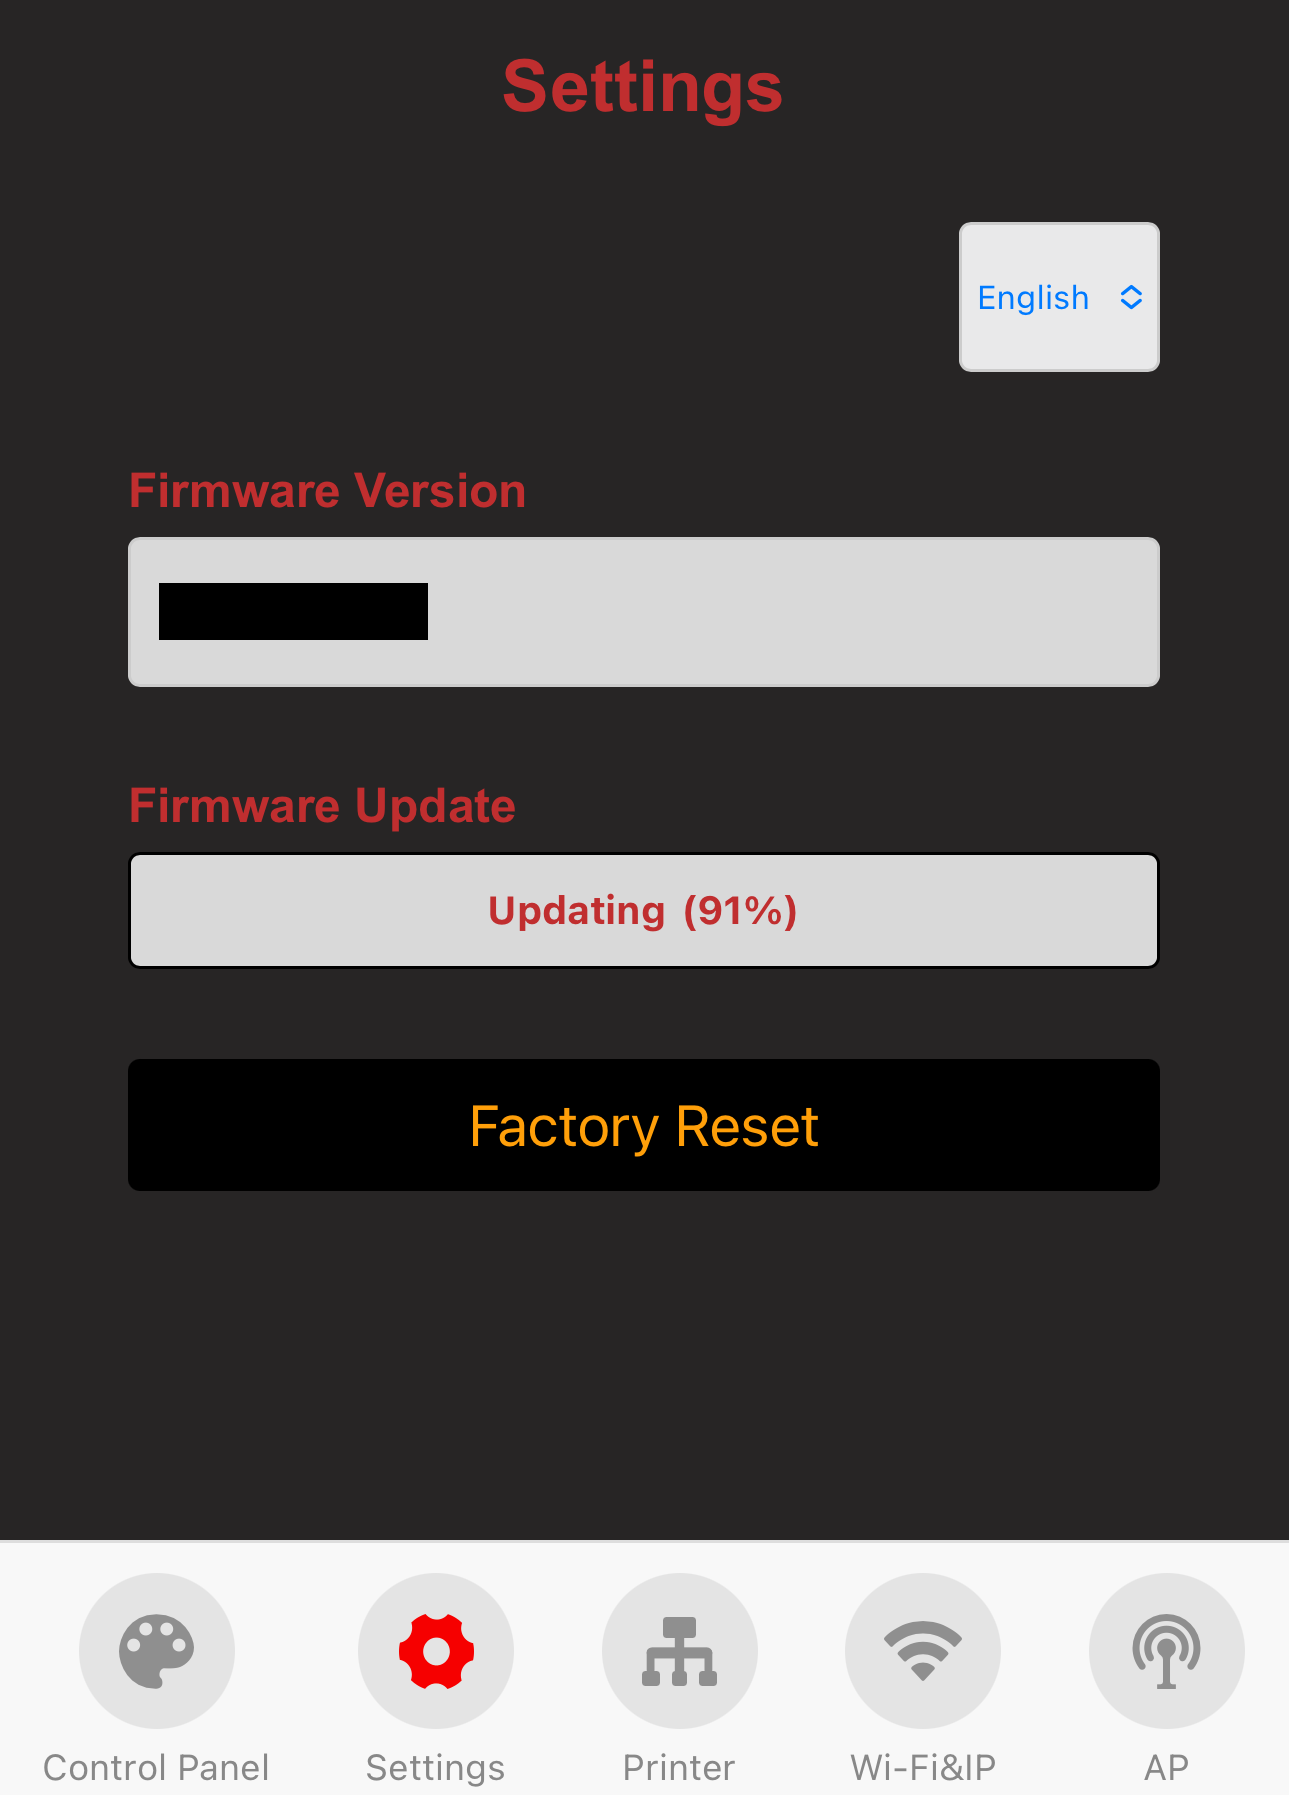
③ Show Current Firmware Version
-
④ Firmware OTA Update: Select a
.binfile for the update.-
Click the 'Select .bin File' button to choose the bin file that requires OTA.

-
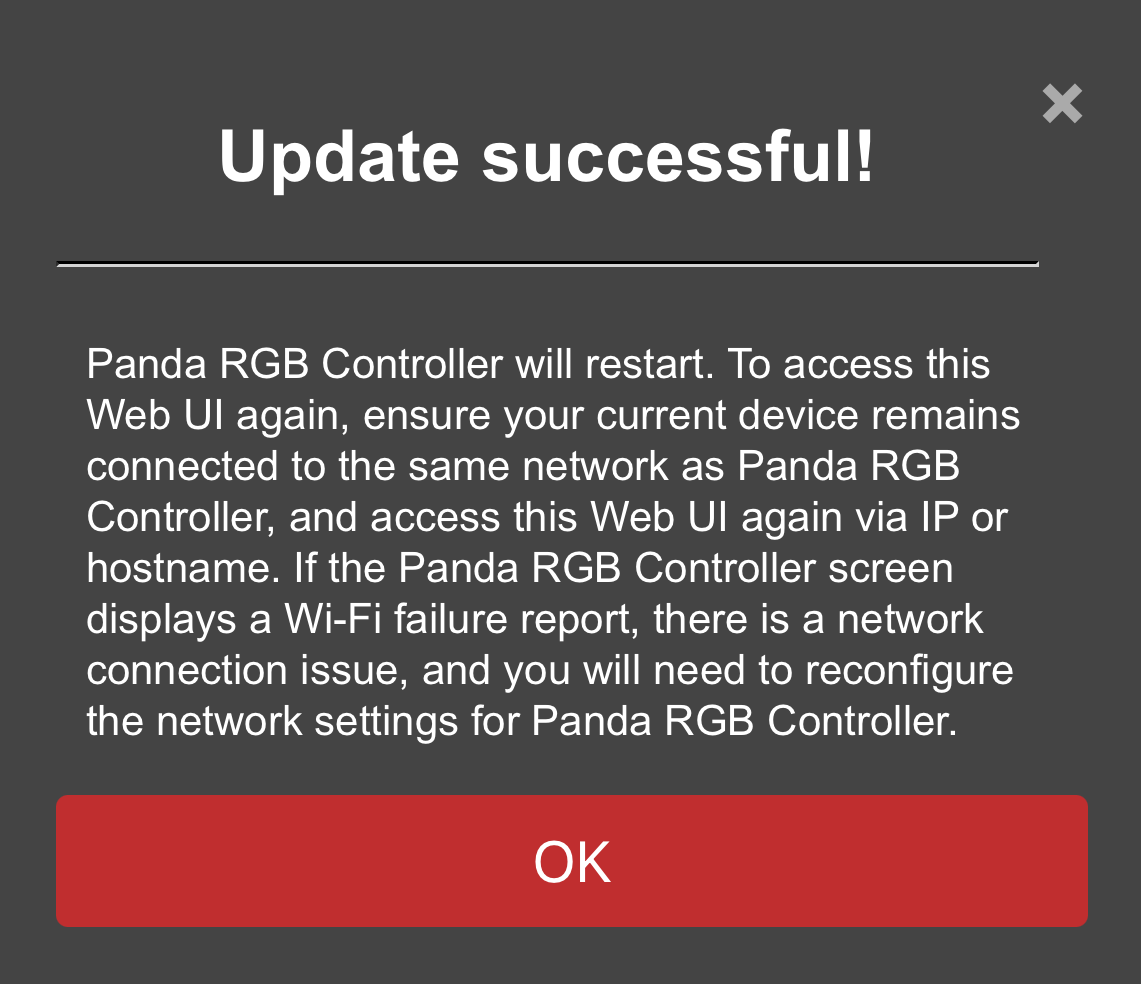
Wait for the progress to complete, and the device will automatically restart once the update is finished.
-
-
⑤ Click to Confirm Restore Factory Settings
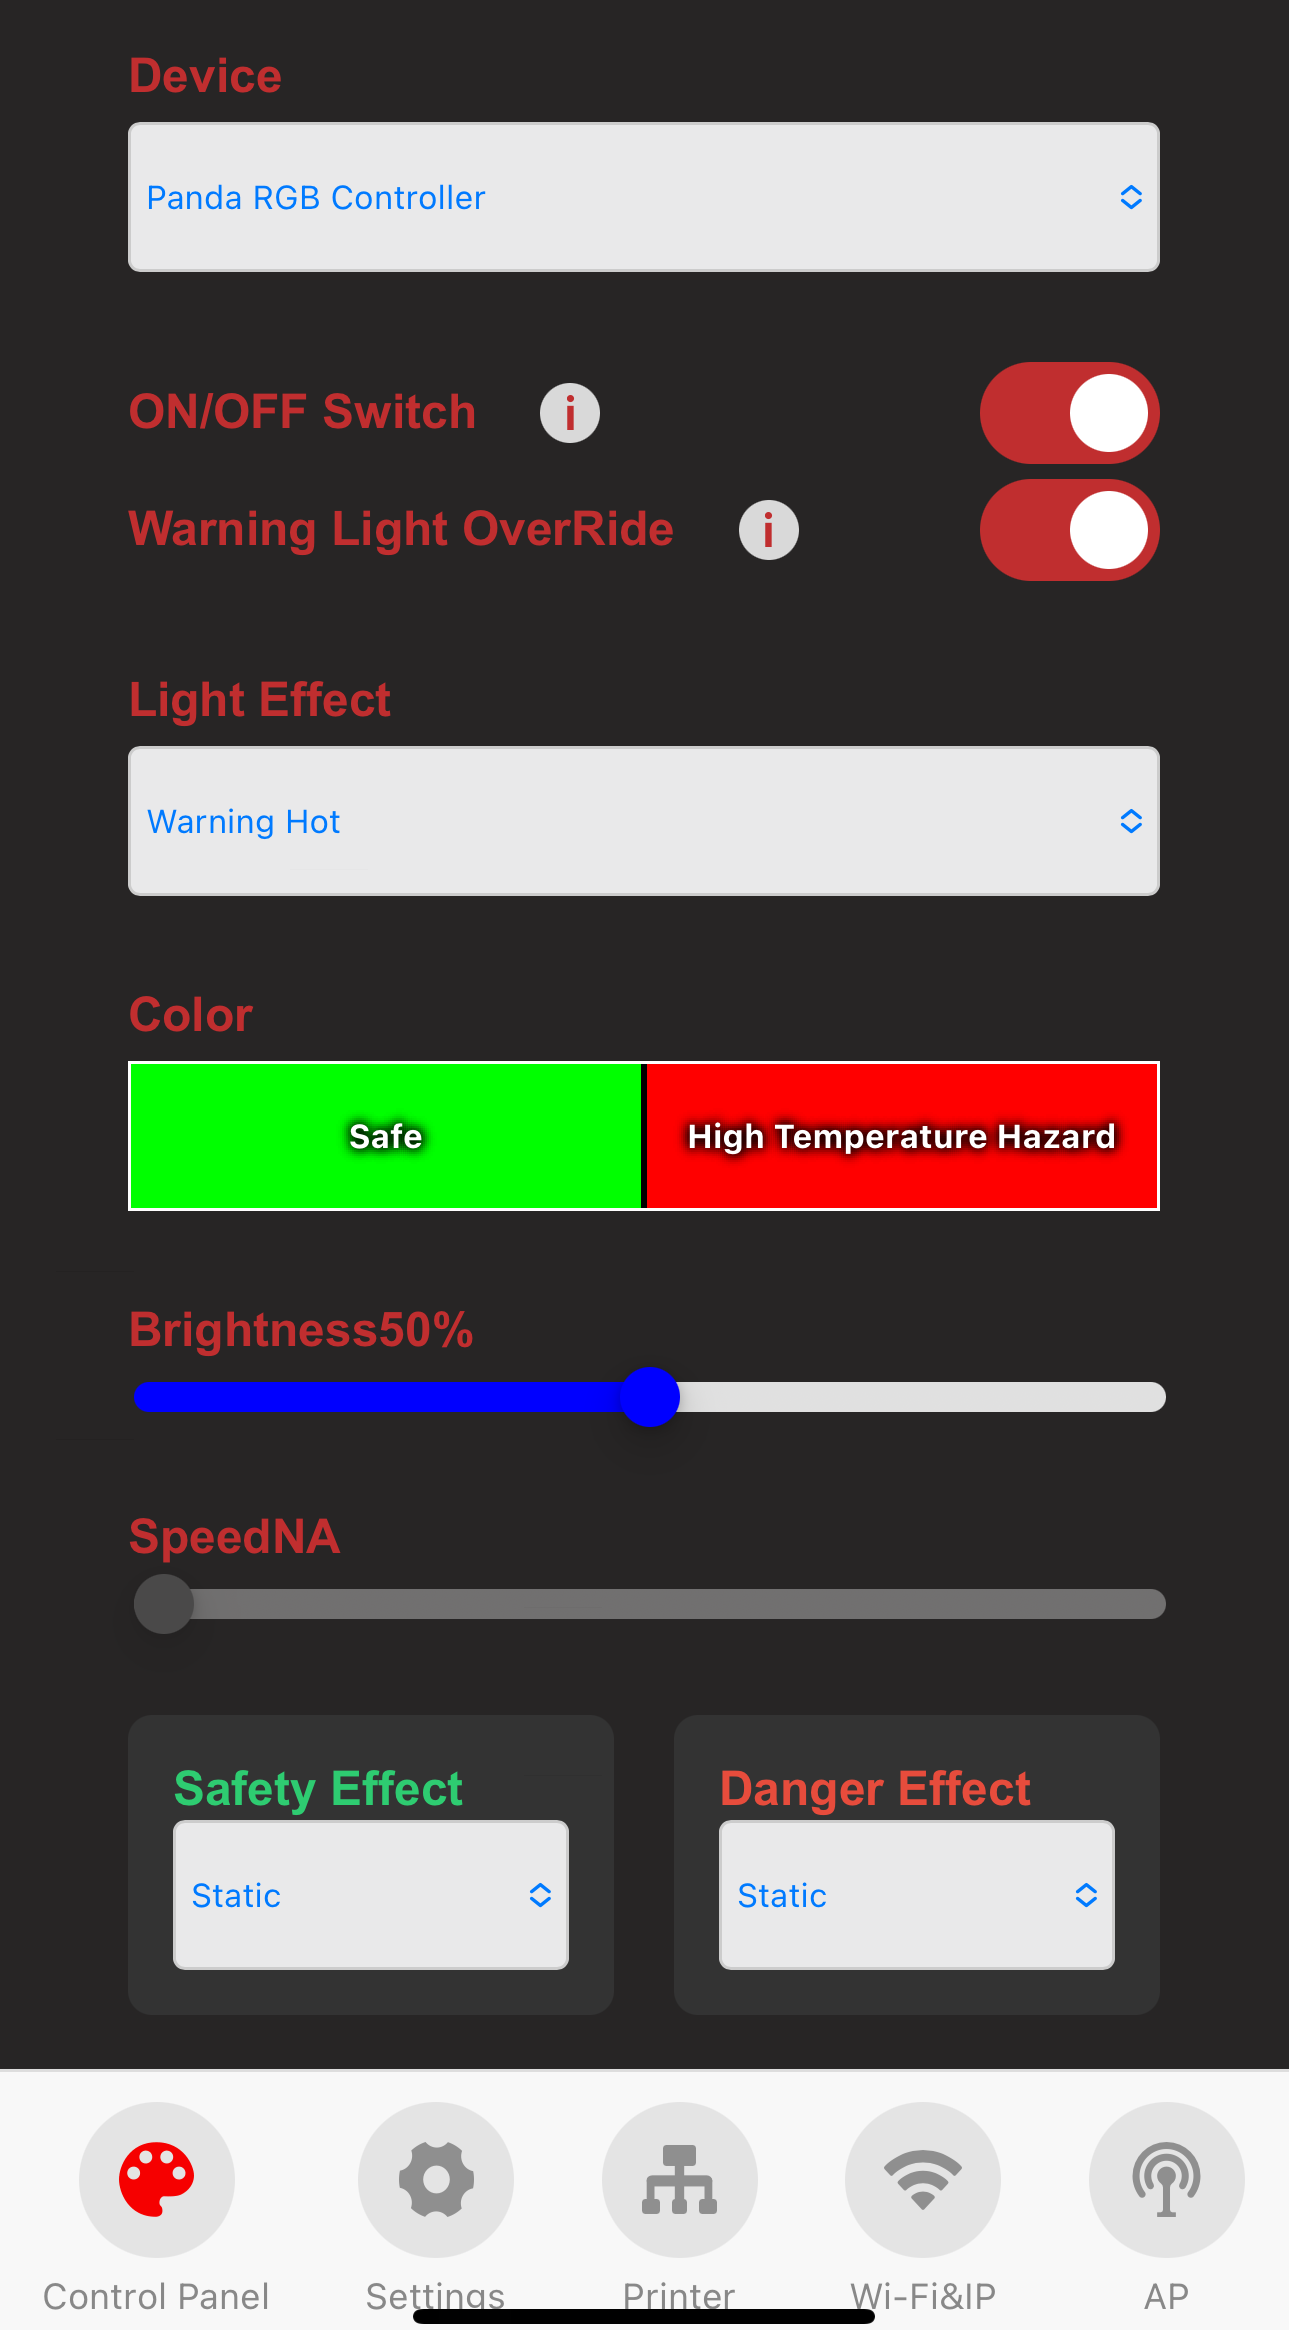
Control Page
-
Feature Introduction
-
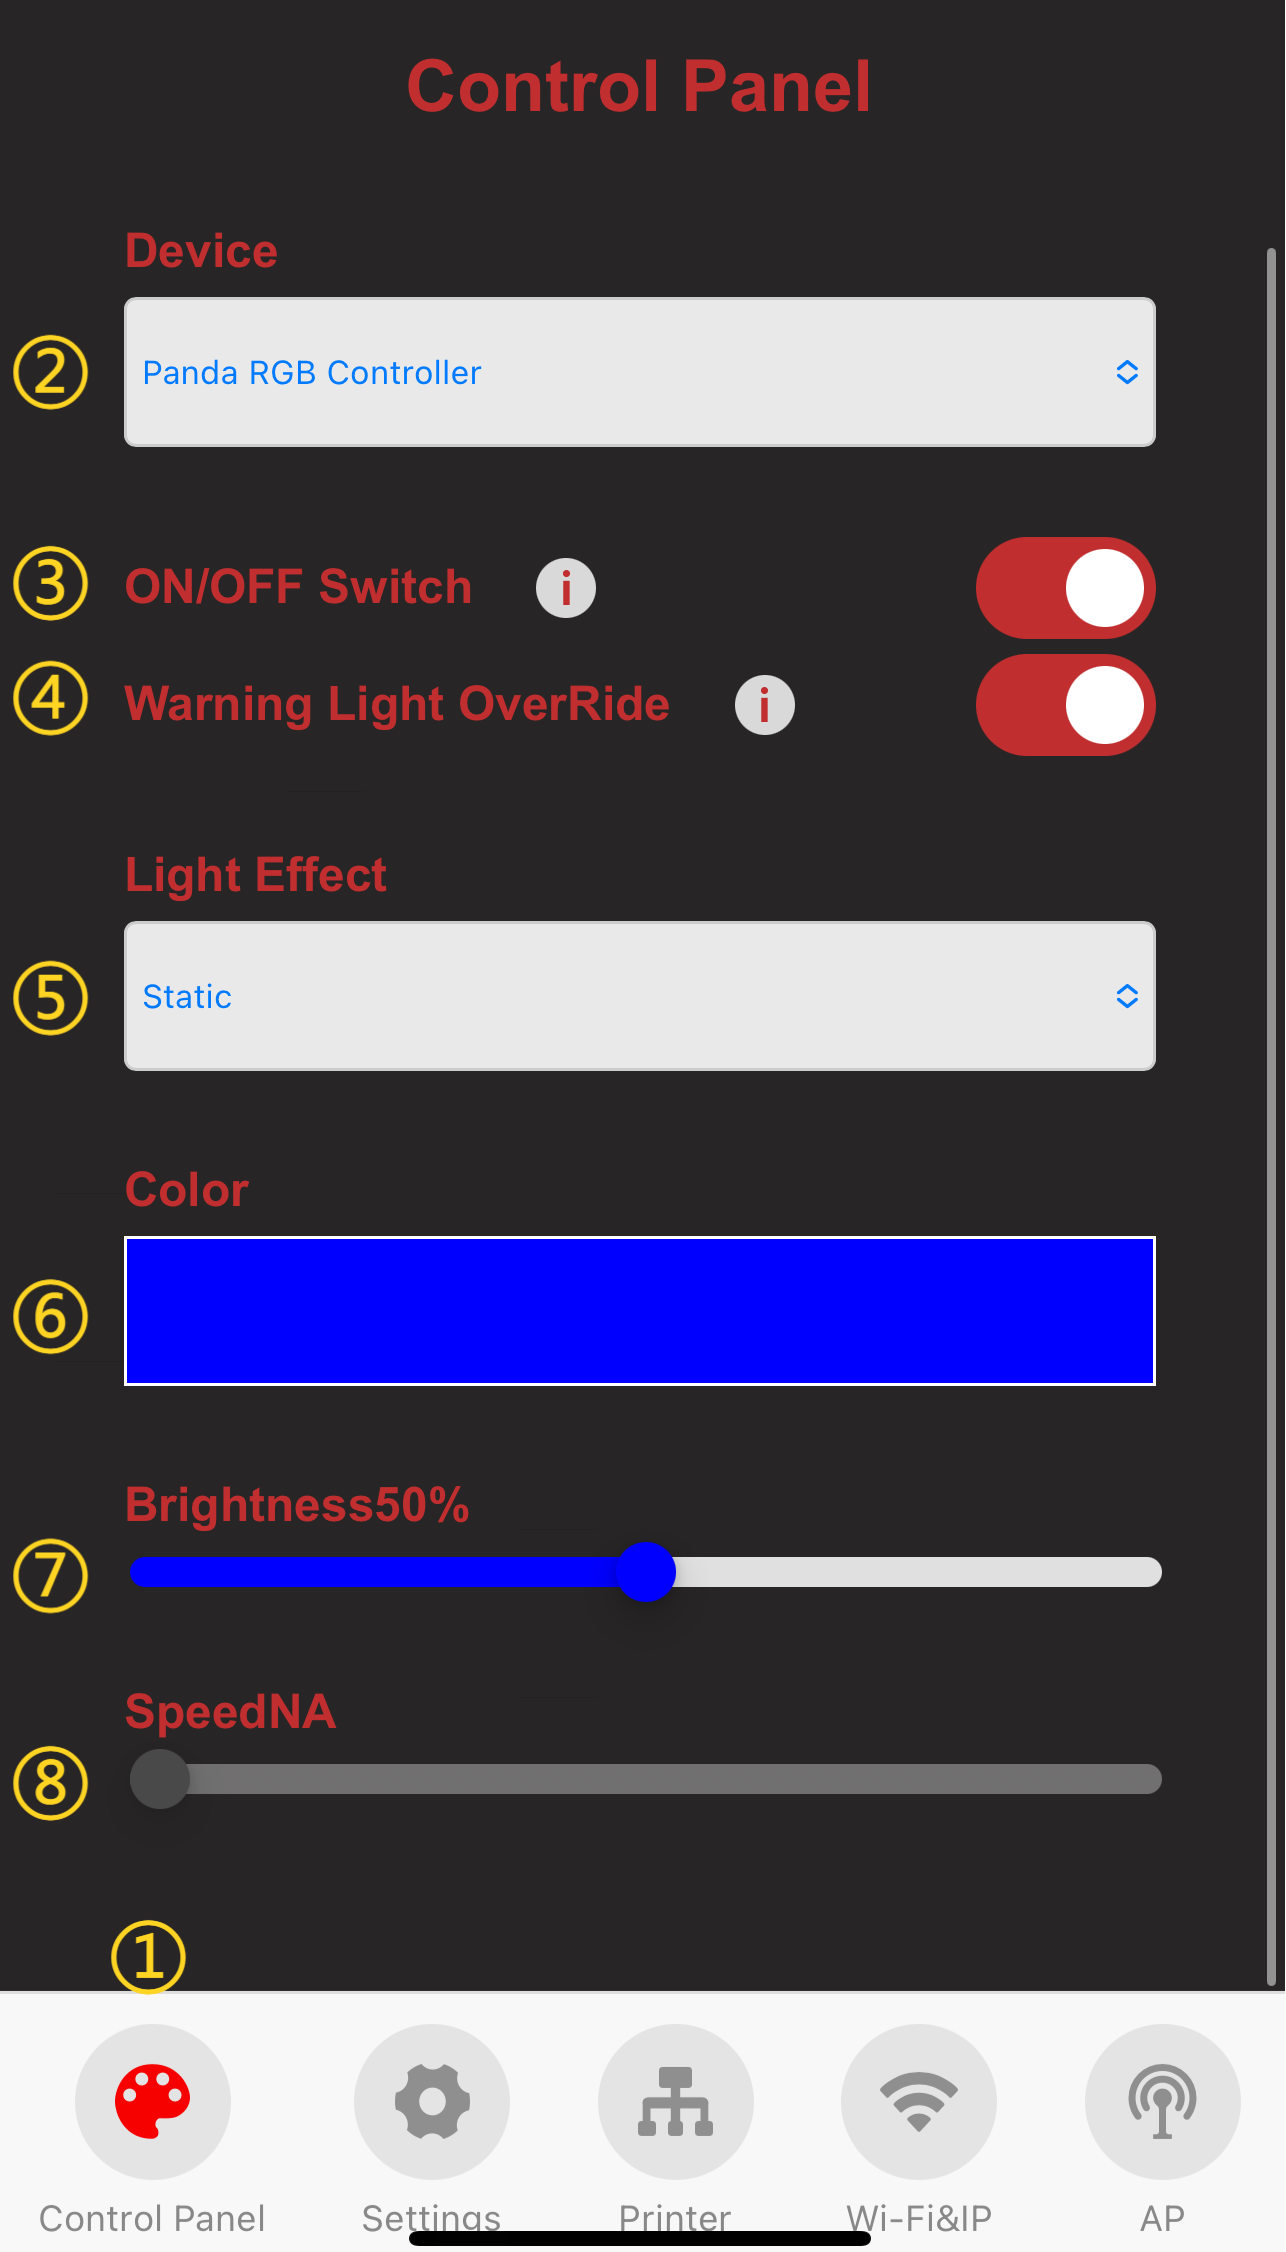
① Control Page Selection: When you click the icon, it will turn red to indicate that you are on the Control page.
-
② Current Device Name
-
③ Click Switch to turn on and off the RGB Light effects.
-
④ Click switch to override Red flashing warning light when printer is in error state.
-
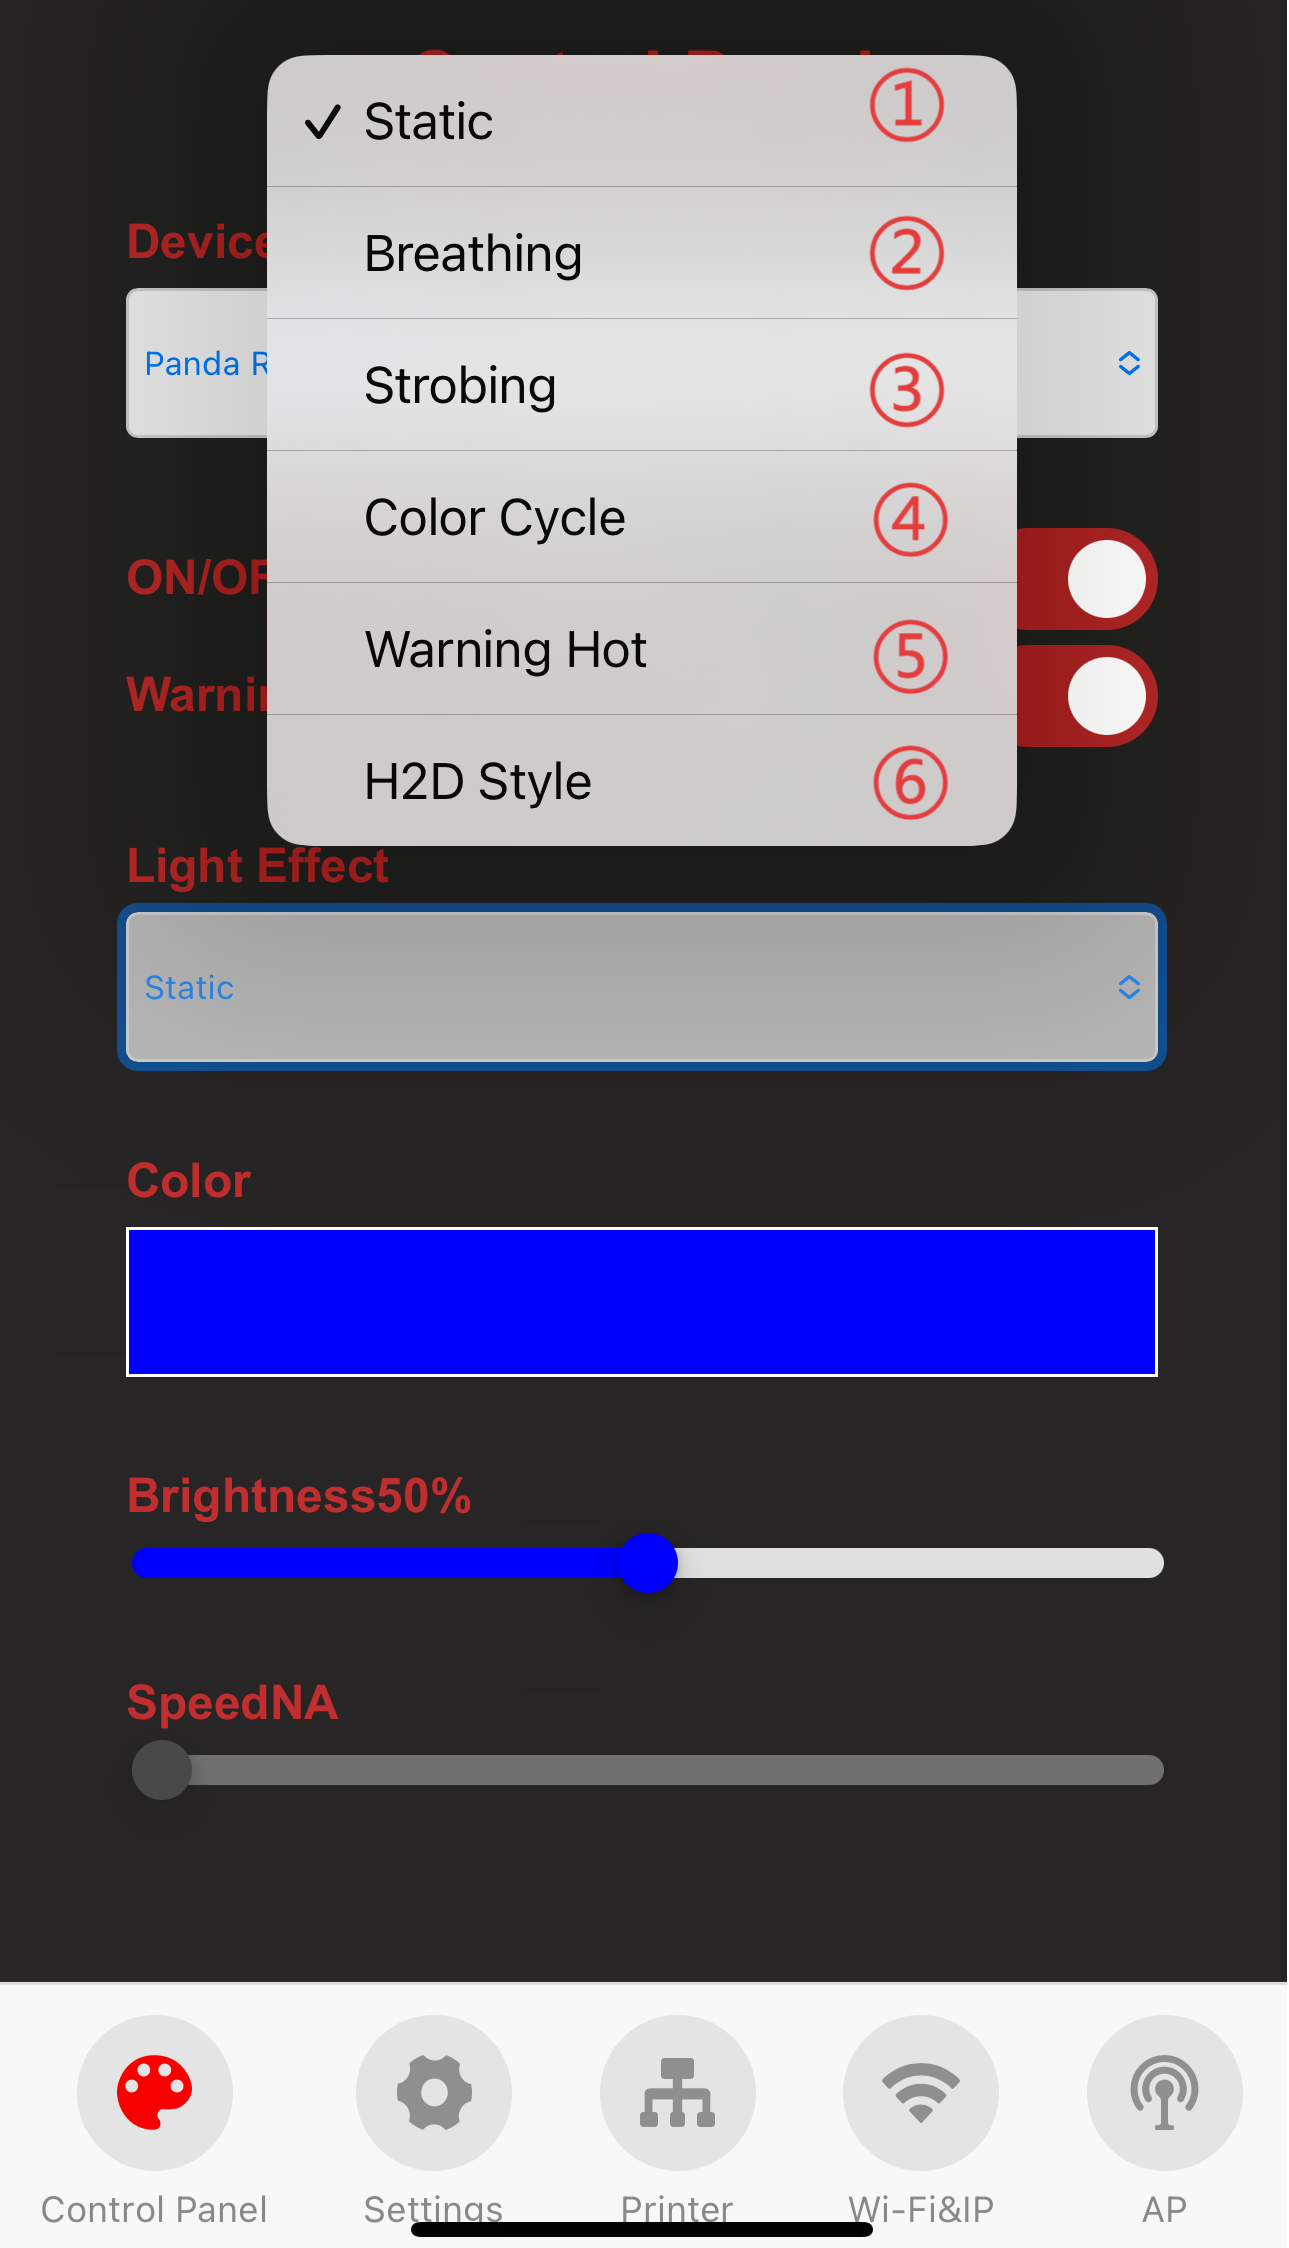
⑤ Select the lighting effect and the current effect.
-
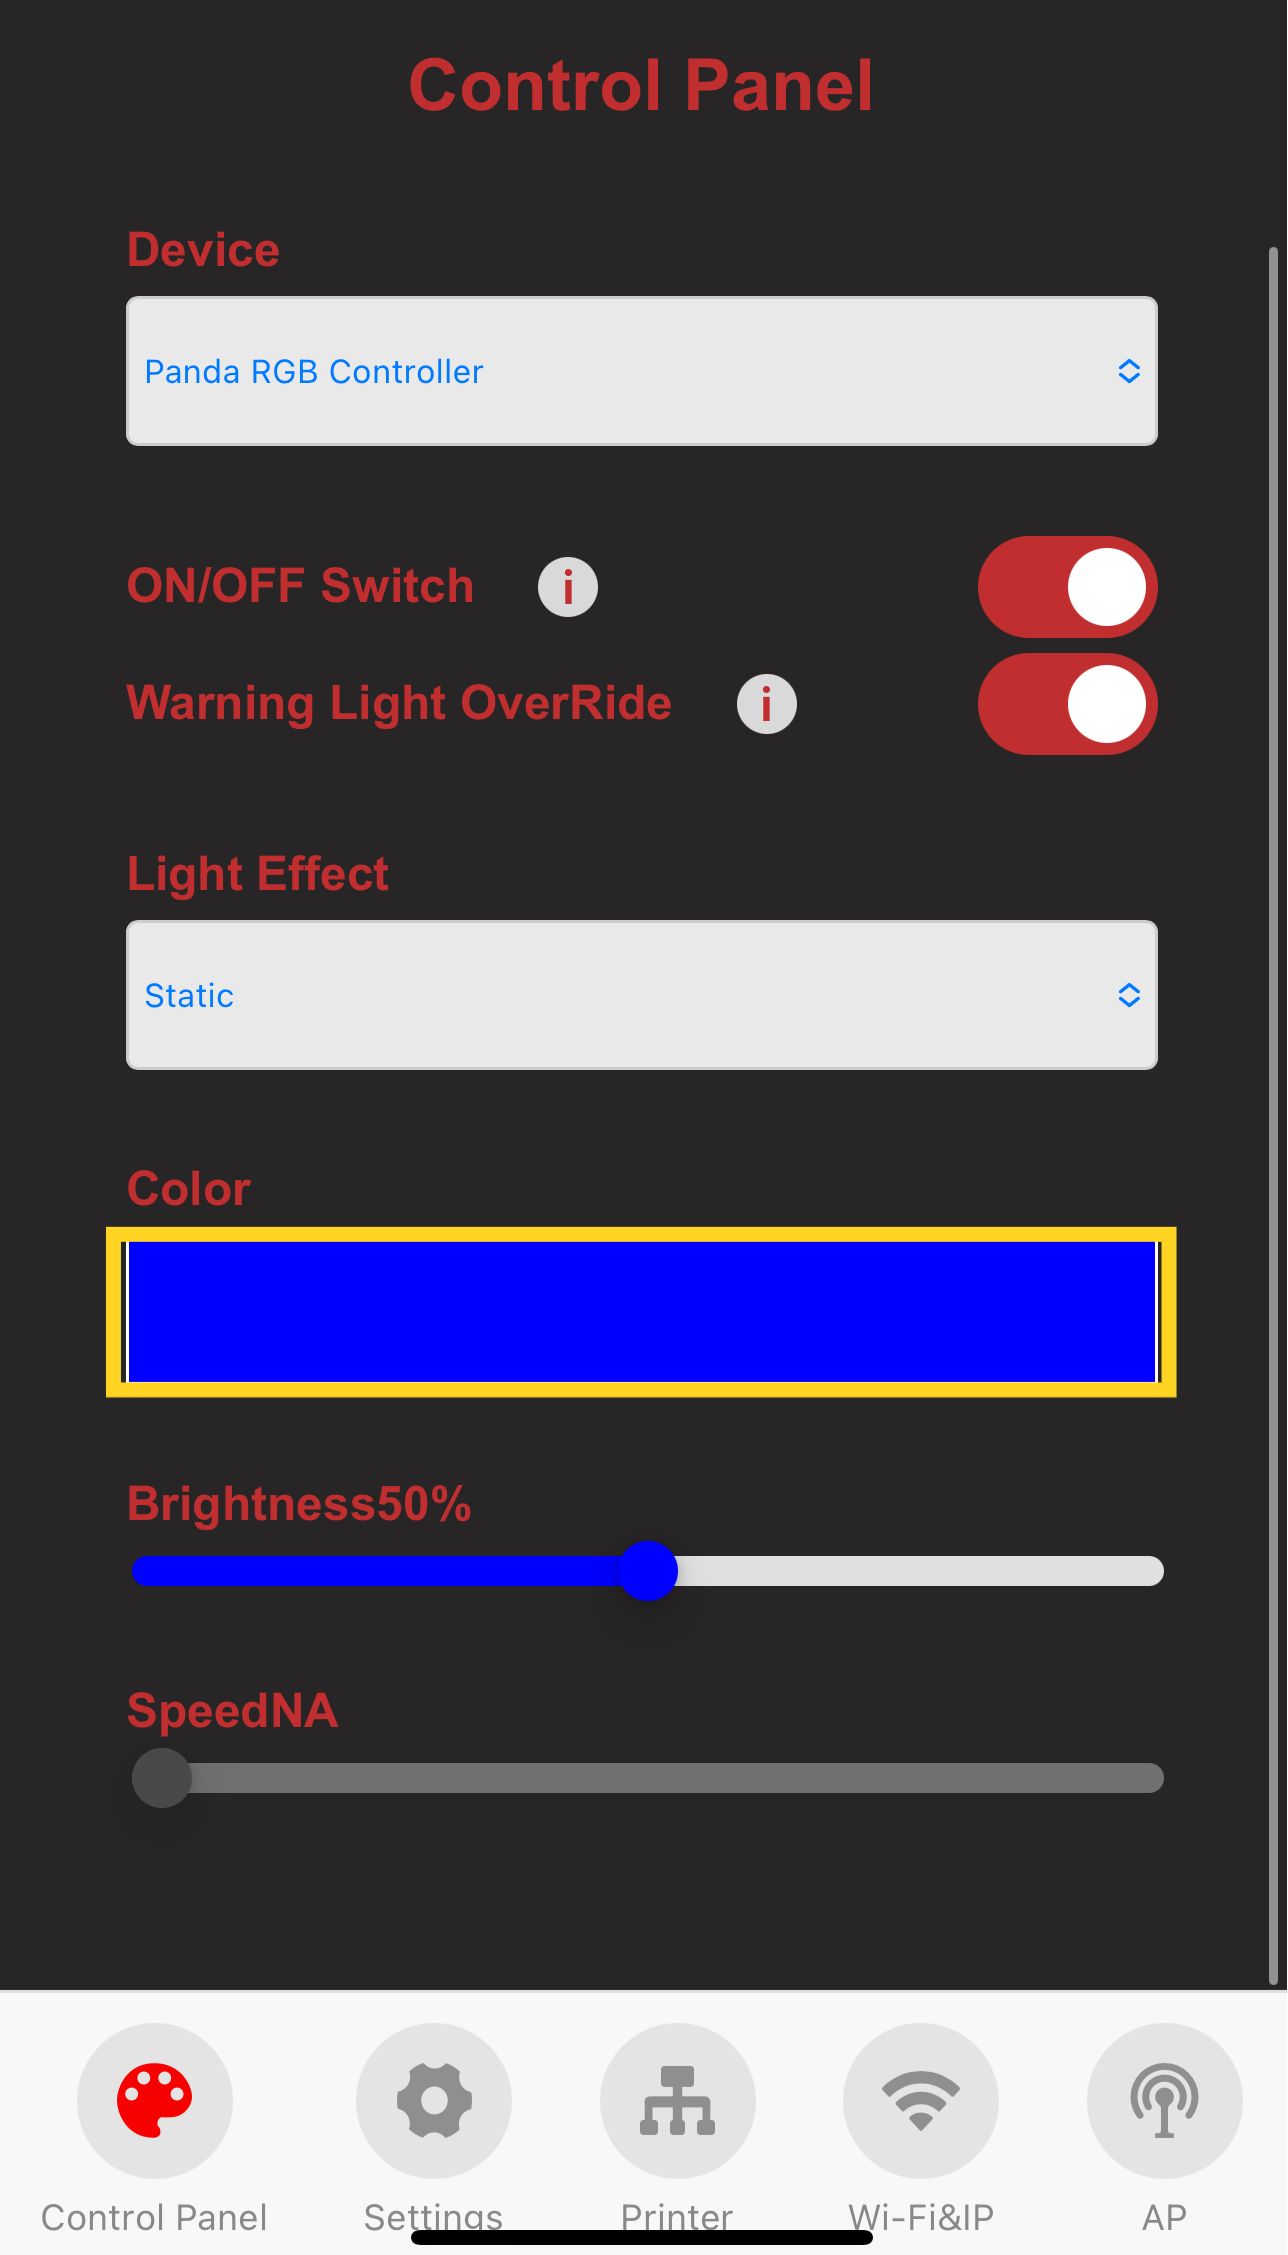
⑤ Light color setting.
-
⑦ Brightness.
-
⑧ Speed.
-
-
Device Light Effect
-
①-④ After selection, the corresponding lighting effect will be displayed immediately.
-
⑤The color of the light can be adjusted according to the temperature of the printer. You can choose between two lighting effects, Static or Strobing, under Safety Effect and Danger Effect.
-
⑥After selection. The color of the light can be adjusted according to the printer. You can click "idle" to customize the light color when the printer is idle.

-
- Customizing Light Color (using the Static mode as an example):
-
Click on the color setting option. You will then be directed to the color selection page.
-
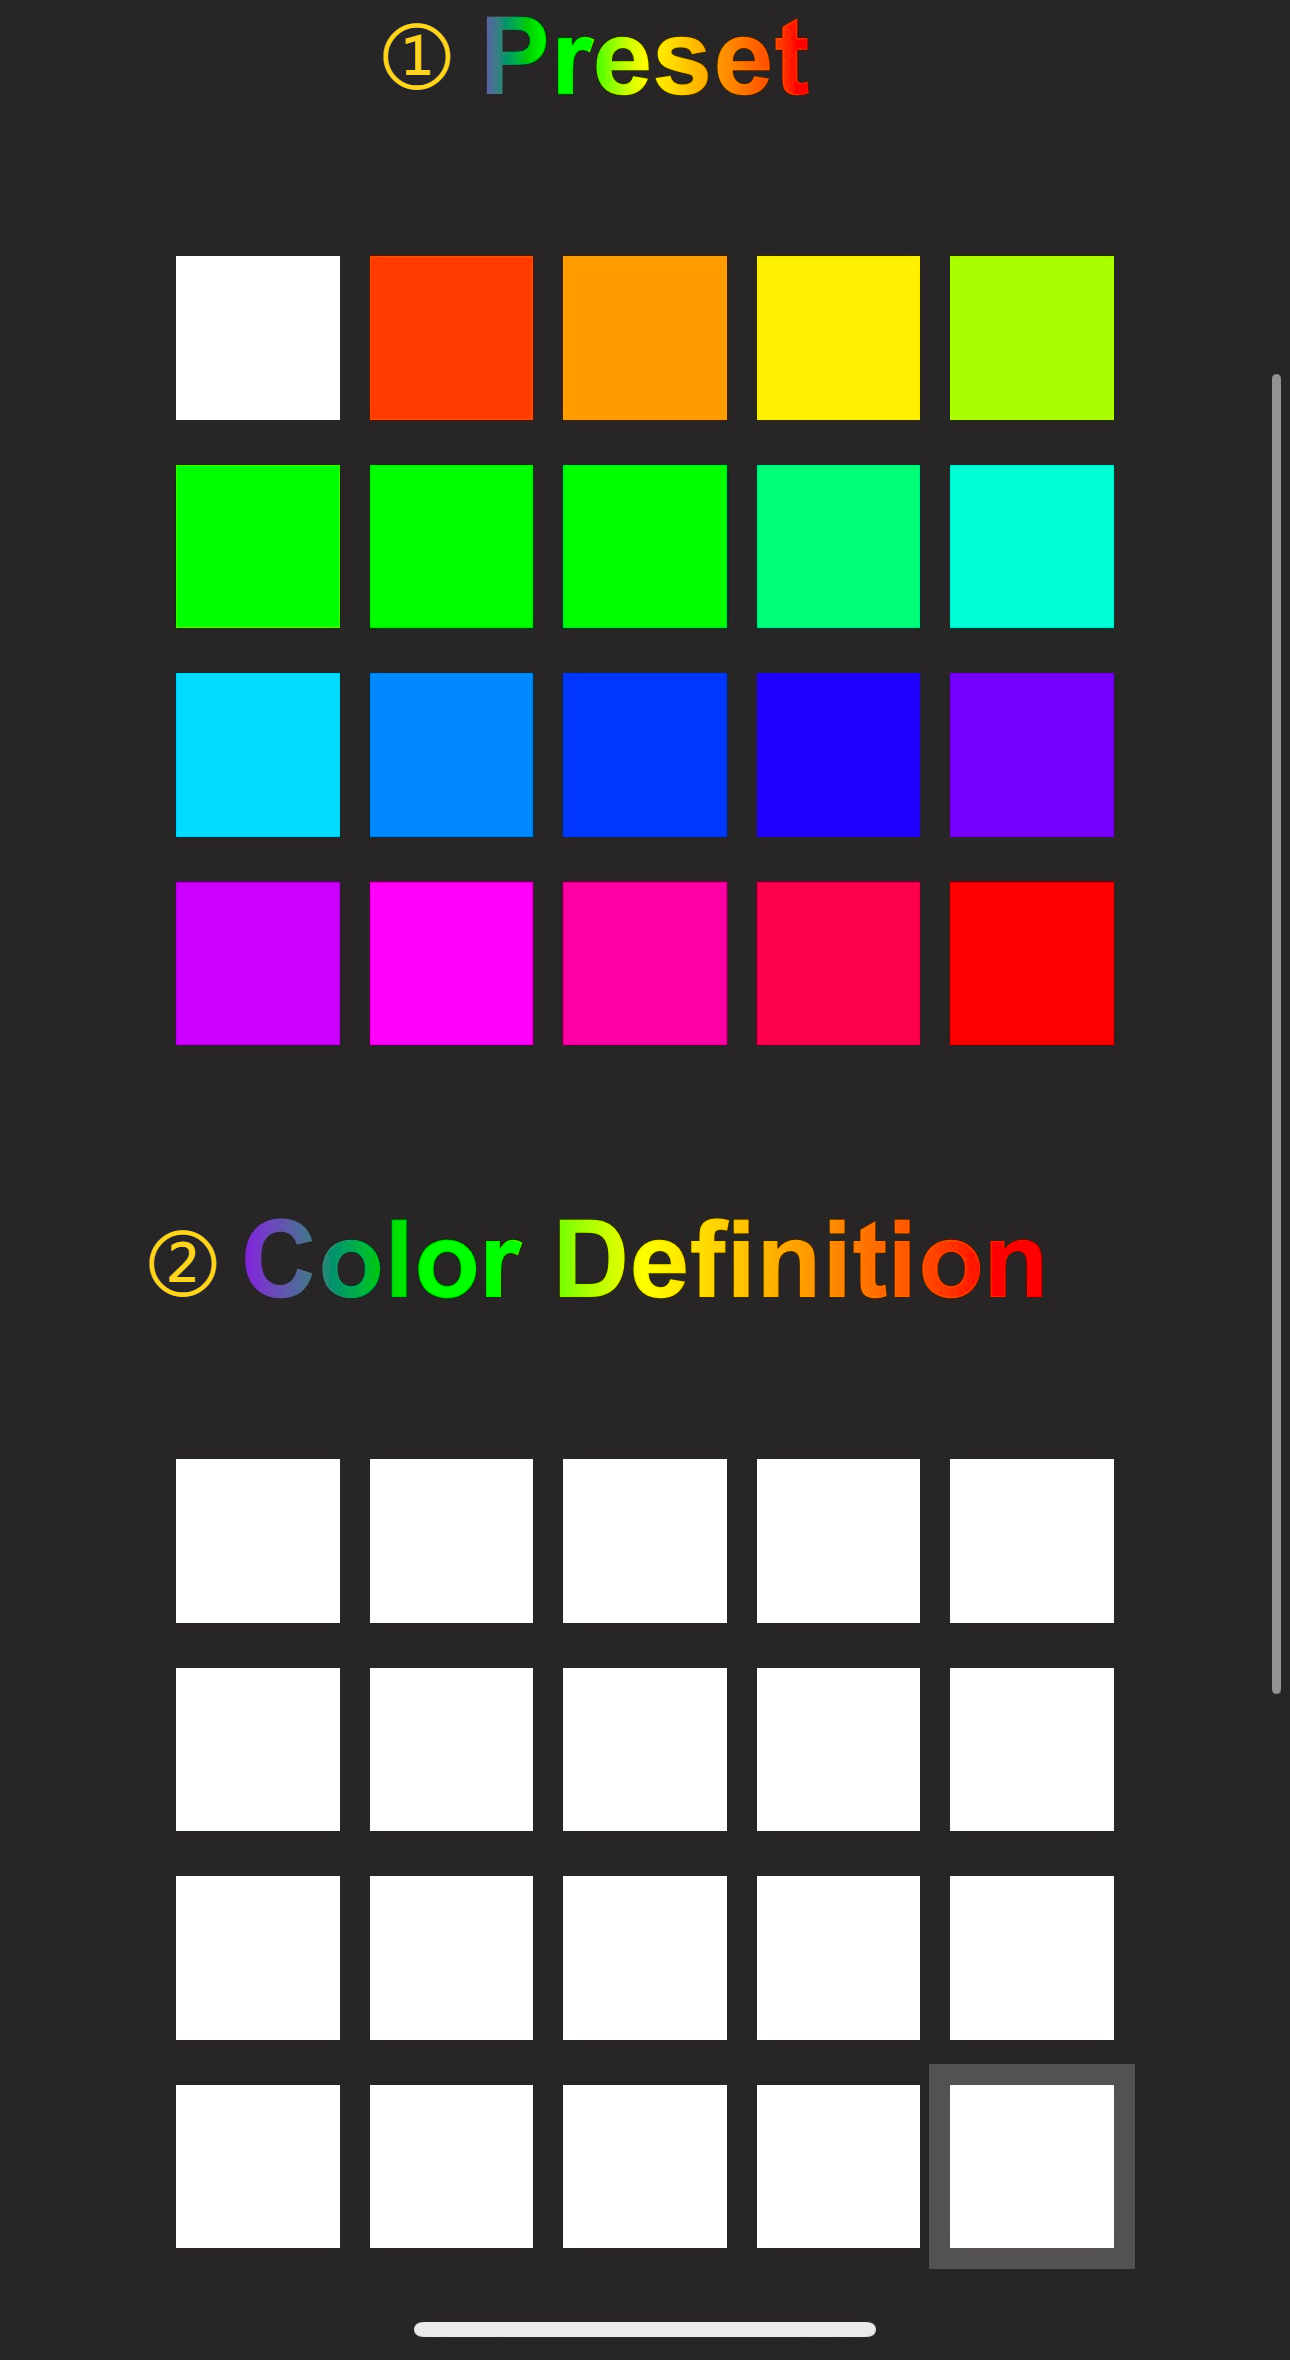
Choose the desired color.
-
① Factory default preset color.
-
② Custom color. After clicking, a color picker will appear where you can set the color value for this custom color.

-
-
After selecting a
PresetorColor Definition(custom color) color block. ClickConfirm, you can set the RGB lights to your selected color.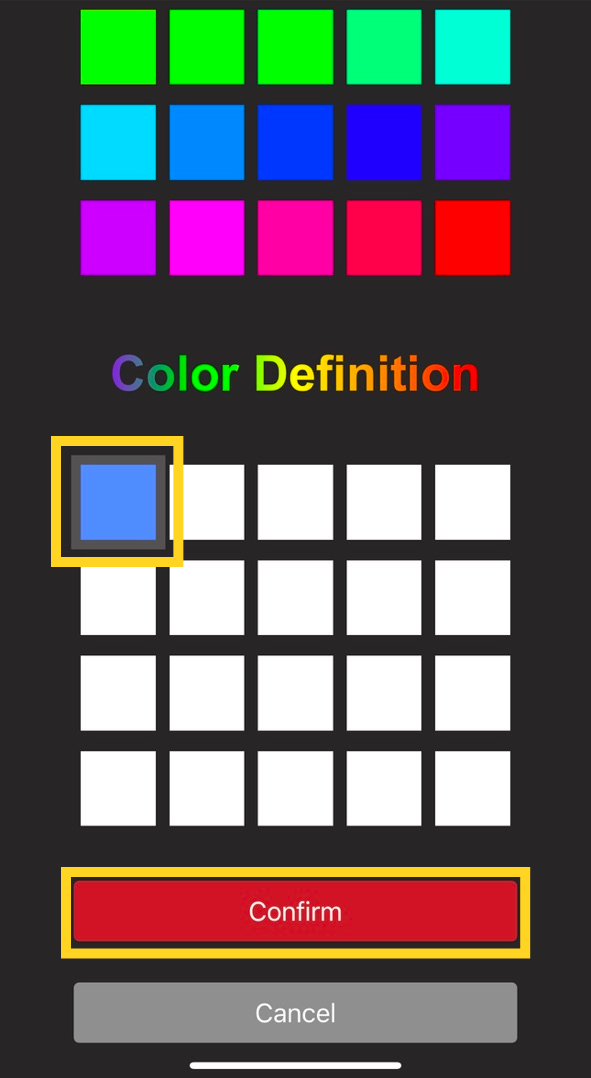

-
Firmware History
V1.0.0
- First released factory firmware.
Feature Requests
If you'd like to see certain features in the upcoming firmware release, please submit a feature request on the official GitHub repository. Feature Requests
Related Navigation
Technical Support
Was this page helpful? For further assistance or if you encounter any issues, please contact our after-sales team at service001@biqu3d.com.