P1/X1
ProductLink: https://biqu.equipment/products/biqu-panda-claw-extruder-gear-set-gold-nano-coated-steel-aluminum-cnc-support-for-x1-p1-a1-mini?variant=41425356783714 Wiki: https://bttwiki.com/Panda%20P1%20X1.html
Introduction
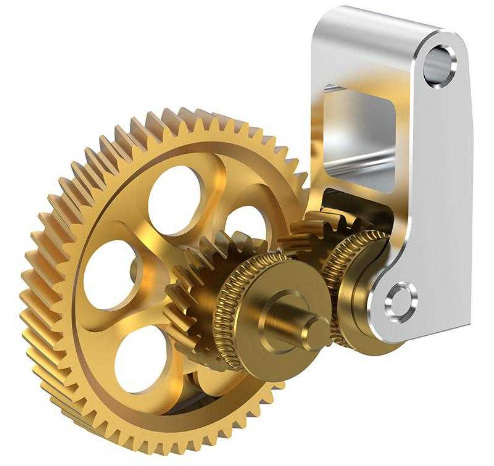
The BIQU Panda Claw is an extruder gear set, designed with golden RNC nano-coated hardened steel gears and aluminum CNC idler arm. It is tailored to improve the performance and durability of extrusion systems in the X1, P1, and A1 series printers, offering an upgrade that enhances filament flow and printing precision.
Feature Highlights
- Abrasive-Resistant: Made from hardened steel with RNC nano-coating, the Panda Claw is highly resistant to wear-and-tear from abrasive filament.
- Enhanced Stability and Durability: The lightweight, high-strength, ultra-tight tolerance idler arm eliminates unwanted movement, ensuring stable feeding, while the brass spur gear provides self-lubricating properties for a longer lifespan.
- Precision: The five-spoke lightweight design minimizes moving mass, ensuring exceptional accuracy for perfect prints.
- Compatibility: The Panda Claw is compatible with Bambu Lab X1/P1/A1 series printers.
Packaging List
| Item | Qty |
|---|---|
| Panda Claw | 1 |
| Bearings | 2 |
| MoS2 Grease | 1 |
Replacement Guide
In this guide, you will learn how to replace the stock extruder gear with Panda Claw on the P1.
Step 1: Remove the Extruder from the Print Head
Begin by gently detaching the wires of the extruder and hotend as illustrated in the following image.
It's important to carefully handle the filament sensor ribbon cable (marked with ‘1’).
This cable is delicate and prone to damage.

Next, proceed to disengage the filament cutter. Keep the lever pressed down while you unscrew the fastener which secures it.
Once the screw is loosened, carefully release the filament cutter.
Caution: Ensure that the screwdriver is positioned perpendicular to the surface of the screw head before insertion. Verify that the driver is fully engaged with the screw head before gently turning it to remove the screw. This prevents improper use of the tool and avoids stripping the screw head.

Once the lever is released, start by removing the first three screws that secure the extruder. Next, lightly loosen screws numbered ‘4’ and ‘5’ to free the filament guide.
Push the filament guide toward the extruder to allow the PTFE tube to be removed.
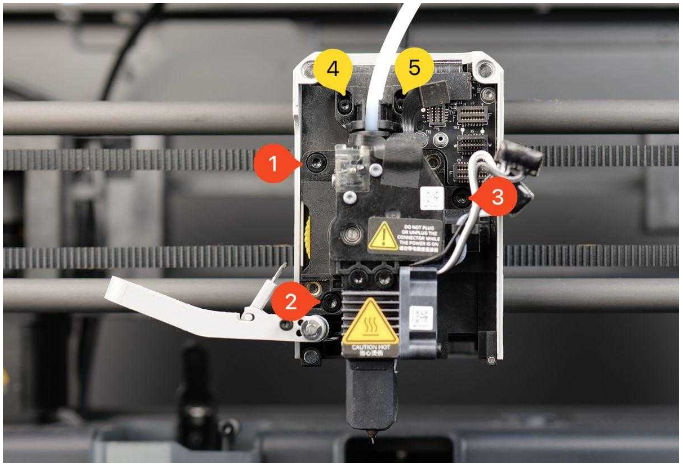
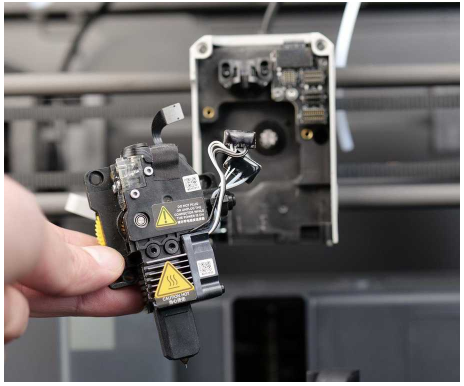
The entire extruder assembly can now be detached from the printer.
Step 2: Disassemble the Extruder
Once the extruder is removed from the printer, begin disassembling it.
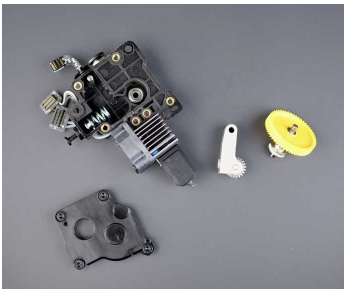
Start by unscrewing the screws numbered ‘1’ to ‘4’, as indicated in the image below.

Screw number ‘5’, which secures the idler gear, should be loosened halfway at this stage to relieve the spring tension.
You can then pull the yellow gear towards you to remove it. The idler can be removed in the same manner.
Step 3: Cleaning the Extruder Body and Components
Before replacing with Panda Claw and re-assembling the extruder, it is crucial to clean any debris from the body and components. As shown in the image below, this extruder has accumulated a significant amount of dust. Ensure all dust is removed prior to reassembly. You can use a small brush and compressed air to thoroughly clean the extruder.
Step 4: Lubricating the Extruder
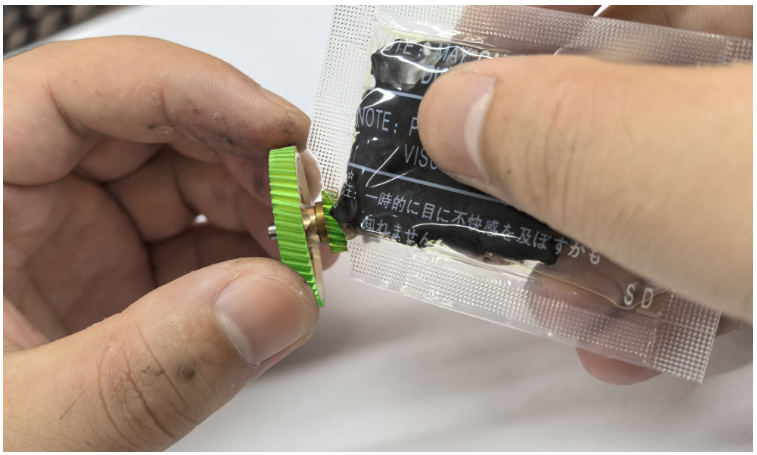
Before assembling the Panda Claw to the extruder, it is recommended to apply lubrication to the gears.
Add a small amount of lubricant on the idler extruder gear, and the sides as shown in the image below.
Notes: Make sure you don’t get any grease on the filament gear teeth (highlighted in blue in the image below). If you do, just wiping it off won’t help. You’ll need to wash the gear with soap to remove the grease and then apply new grease after that.

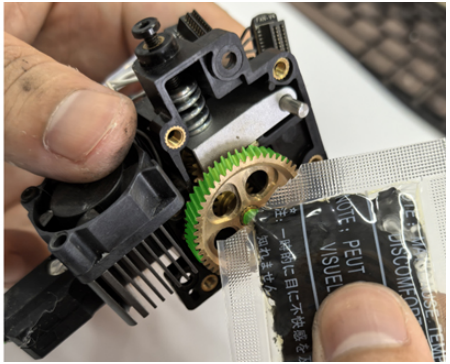
Next, you can also apply a bit of lubricant on the extruder gear (highlighted in green in the image below).
Finally, install the Panda Claw gear onto the extruder body and apply a small amount of lubricant around the designated area, highlighted in green in the image below.
After applying the lubricant, reinstall the back cover of the extruder and manually rotate the hollow extruder gear a few times to evenly distribute the lubricant and verify that everything is functioning smoothly.
Be sure to securely tighten the four extruder screws along with the idler tensioner screw to prepare it for installing it onto the printer.

Step 5: Re-installing the Extruder onto the Printer
Now you can re-install the extruder onto the printer. Begin by securing the extruder in place with screws numbered ‘1’, ‘2’, and ‘3’. Next, insert the PTFE tube into the top of the extruder, raise the filament guide, and tighten screws ‘4’ and ‘5’.

Push down the filament lever as shown in the image and tighten the lever screw.

Lastly, reconnect all the extruder and hotend wires to the board. Take extra care during this step to ensure proper alignment of the connectors. Pressing down connectors when misaligned or in the incorrect port can lead to device errors.

Step 6: Post-Operation Calibration
We recommend performing a full calibration of the printer after this operation, to ensure smooth functioning.
Product Purchase Link
https://biqu.equipment/products/biqu-panda-claw-extruder-gear-set-gold-nano-coated-steel-aluminum-cnc-support-for-x1-p1-a1-mini?variant=41425356783714
If you have any issues with the product, please submit a support ticket.
https://biqu3d.com/pages/submit-a-ticket
Navigation:
BIQU Official Website: http://biqu3d.com
BIGTREETECH Official Website: http://bigtree-tech.com
Online Store: https://biqu.equipment
Community: https://community.biqu3d.com