Panda Branch Plus
- Product Link: Click to buy
Revision Log
| Version | Date | Update Notes |
|---|---|---|
| v1.00 | Sept 10, 2025 | Initial Release |
Product Overview
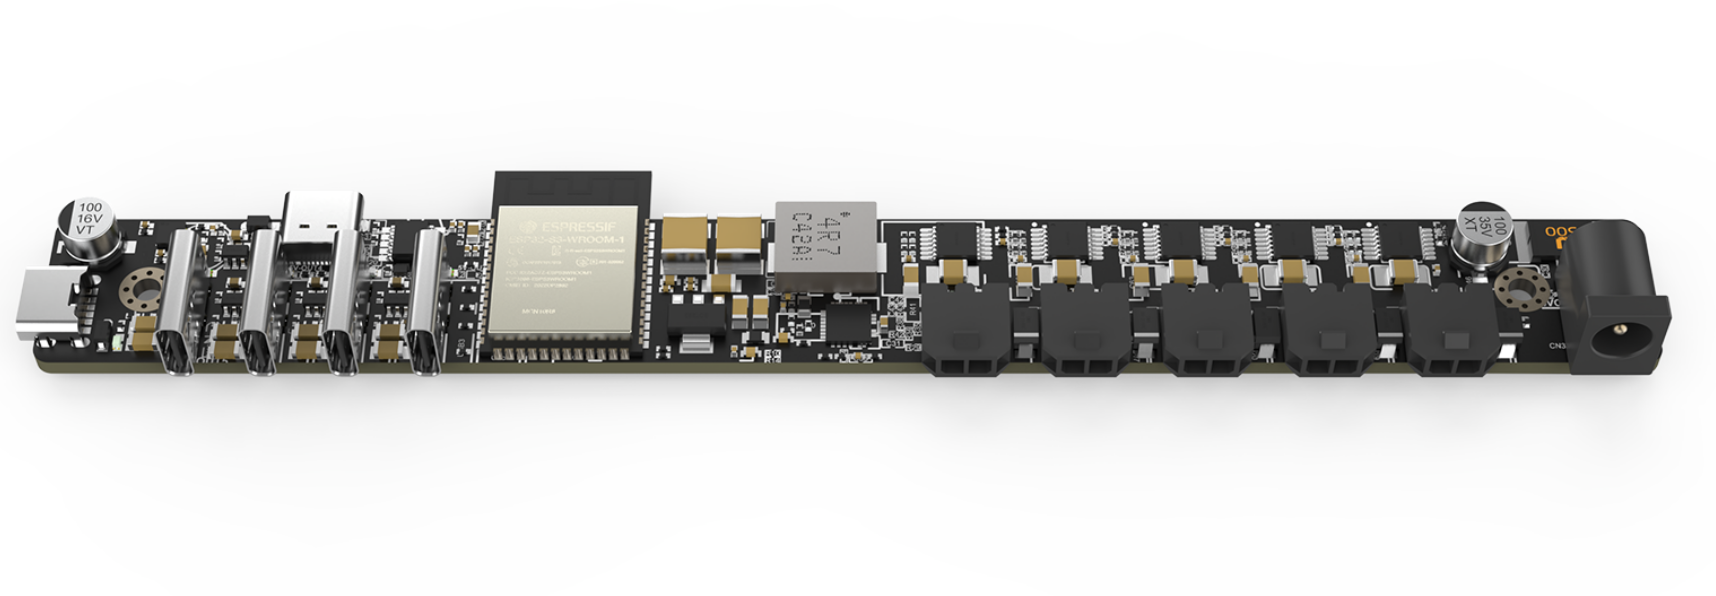
The Panda Branch Plus is an advanced, all-in-one power management hub designed for sophisticated 3D printing ecosystems. It centralizes control with ten independent, switchable channels (five MX3.0 and five Type-C ports - powered by a robust 24V/2.8A adapter). Each channel can be individually controlled via the intuitive WebUI, allowing for precise management of every connected device. Driven by a built-in ESP32 processor and enhanced MQTT gateway technology, the Panda Branch Plus ensures seamless and reliable connectivity, eliminating the limitations of traditional power solutions.
A dedicated 5V/5A Type-C output seamlessly powers a Panda Hub Plus, and the tool-free, snap-in housing design enables quick and effortless installation. Together with its intelligent power distribution and robust network reliability, the Panda Branch Plus guarantees stable, worry-free performance for your entire connected ecosystem.
Product Features
-
Centralized power management hub with up to 10 independently controlled outputs
-
Built-in MQTT gateway supporting multiple sub-devices for reliable networking
-
High-power adapter included: 24V/2.8A for stable and consistent output
-
5 × Type-C outputs and 5 × MX3.0 outputs for versatile connections
-
Integrated ESP32-S3 module for smart Wi-Fi control
-
Built-in safety protection circuits, including ESD protection, over-current protection, and short-circuit protection
Specifications
-
Product Name: BIQU Panda Branch Plus
-
Compatibility: P1P/P1S/X1C/X1E/A1/A1 mini
-
Power Input: DC 5.5×2.1 (included adapter: 24V/2.8A)
-
Built-in Gateway: Integrated MQTT gateway, supports up to 20 sub-devices.
-
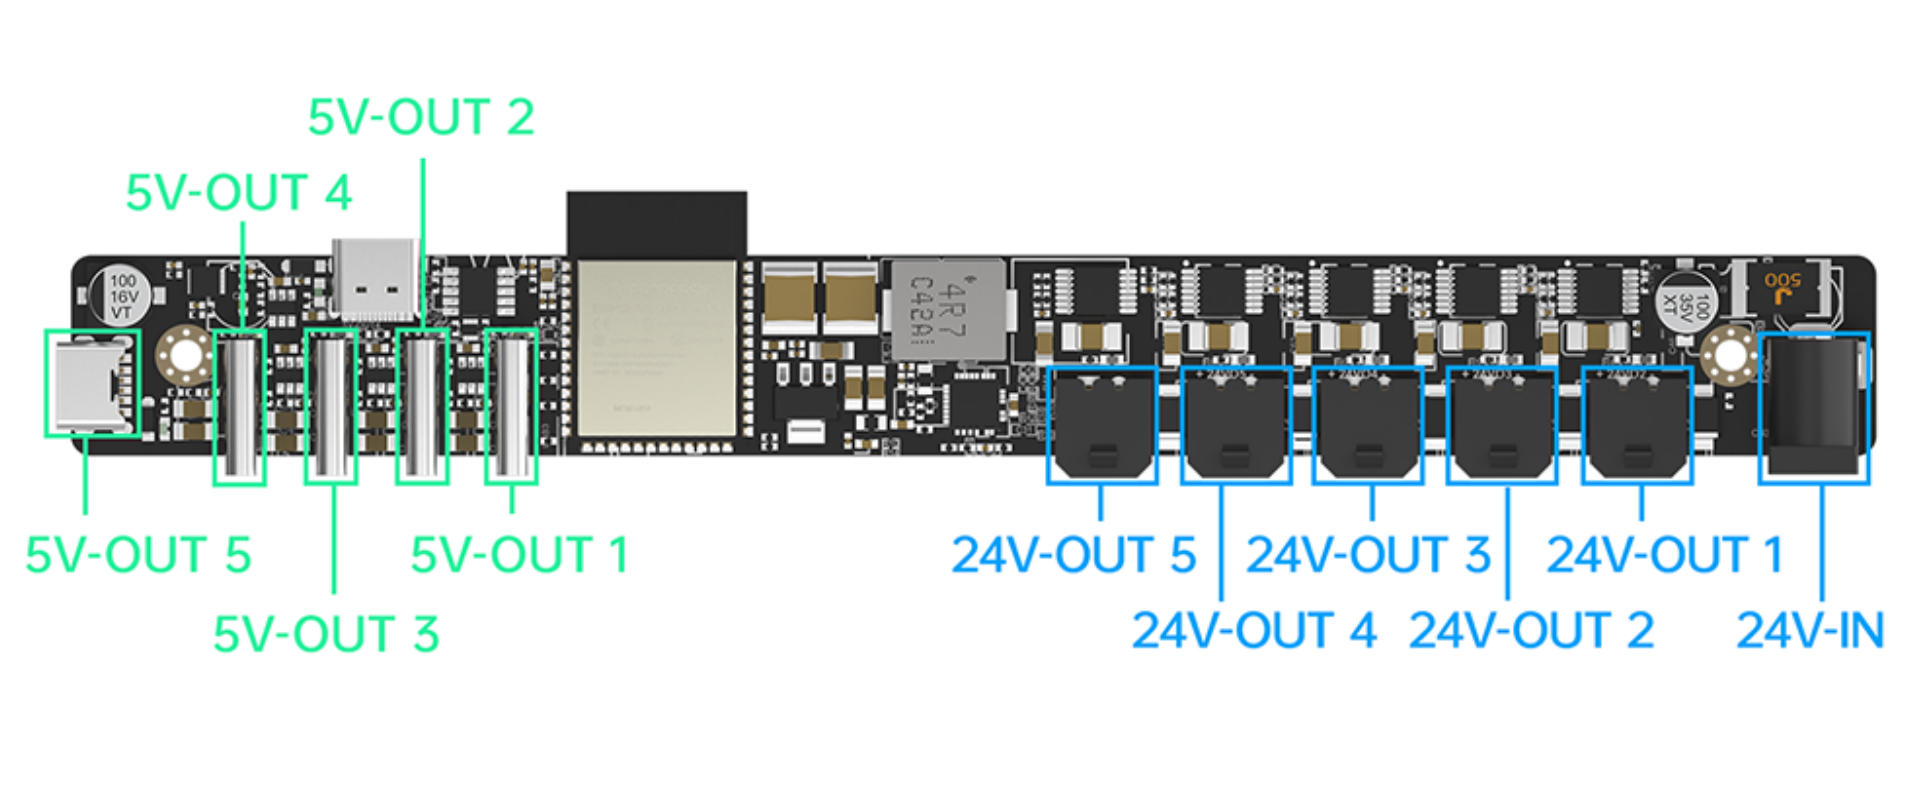
Output Ports:
-
1 × Type-C (5A)
-
4 × Type-C (1.5A)
-
5 × MX3.0 2-pin (2A)
-
Total: 10 independently switchable outputs
-
-
Web UI + BIQU APP Control: ✔
-
Protection Features: ESD Protection, Over-Current Protection, Short-Circuit Protection
-
Important Notes: Uses included 24V/2.8A adapter.
Interface
Installation Instructions
Download the required case files for your printer model from the GitHub repository, then print the case.
Installation Steps
For A1 mini Printer
-
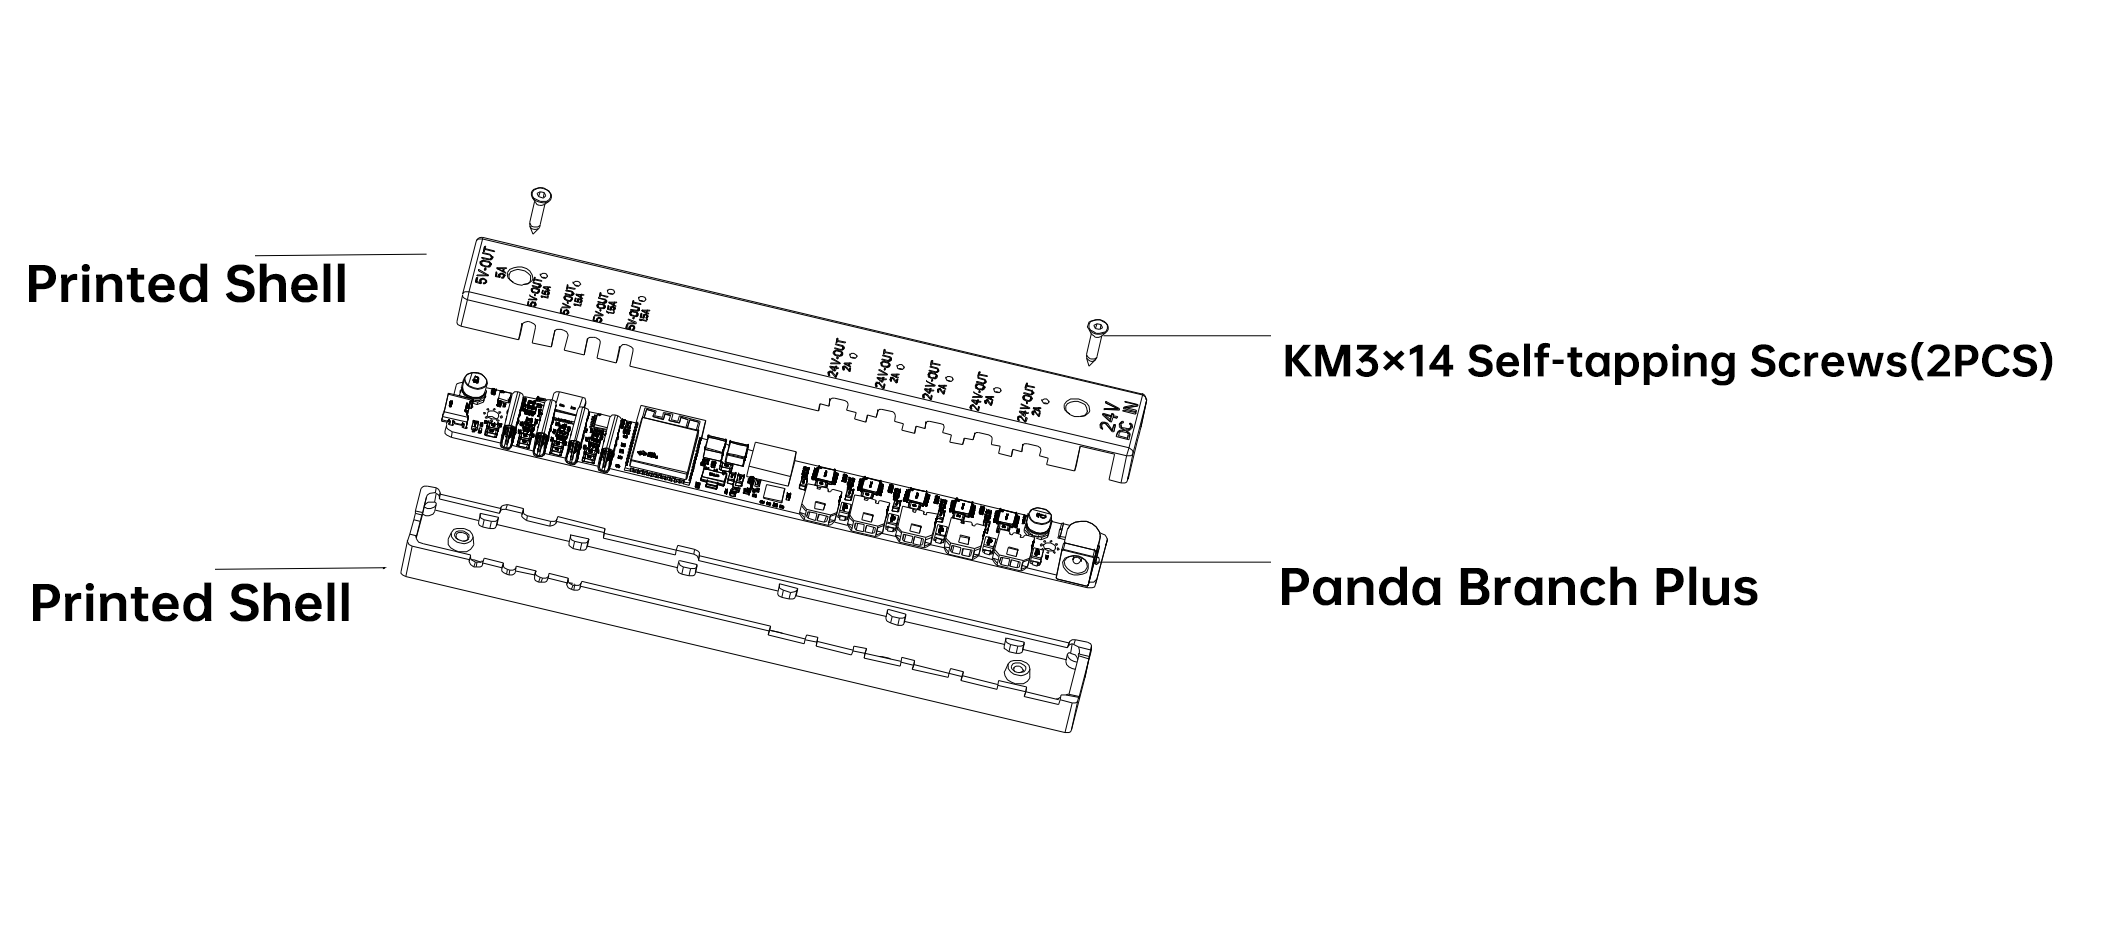
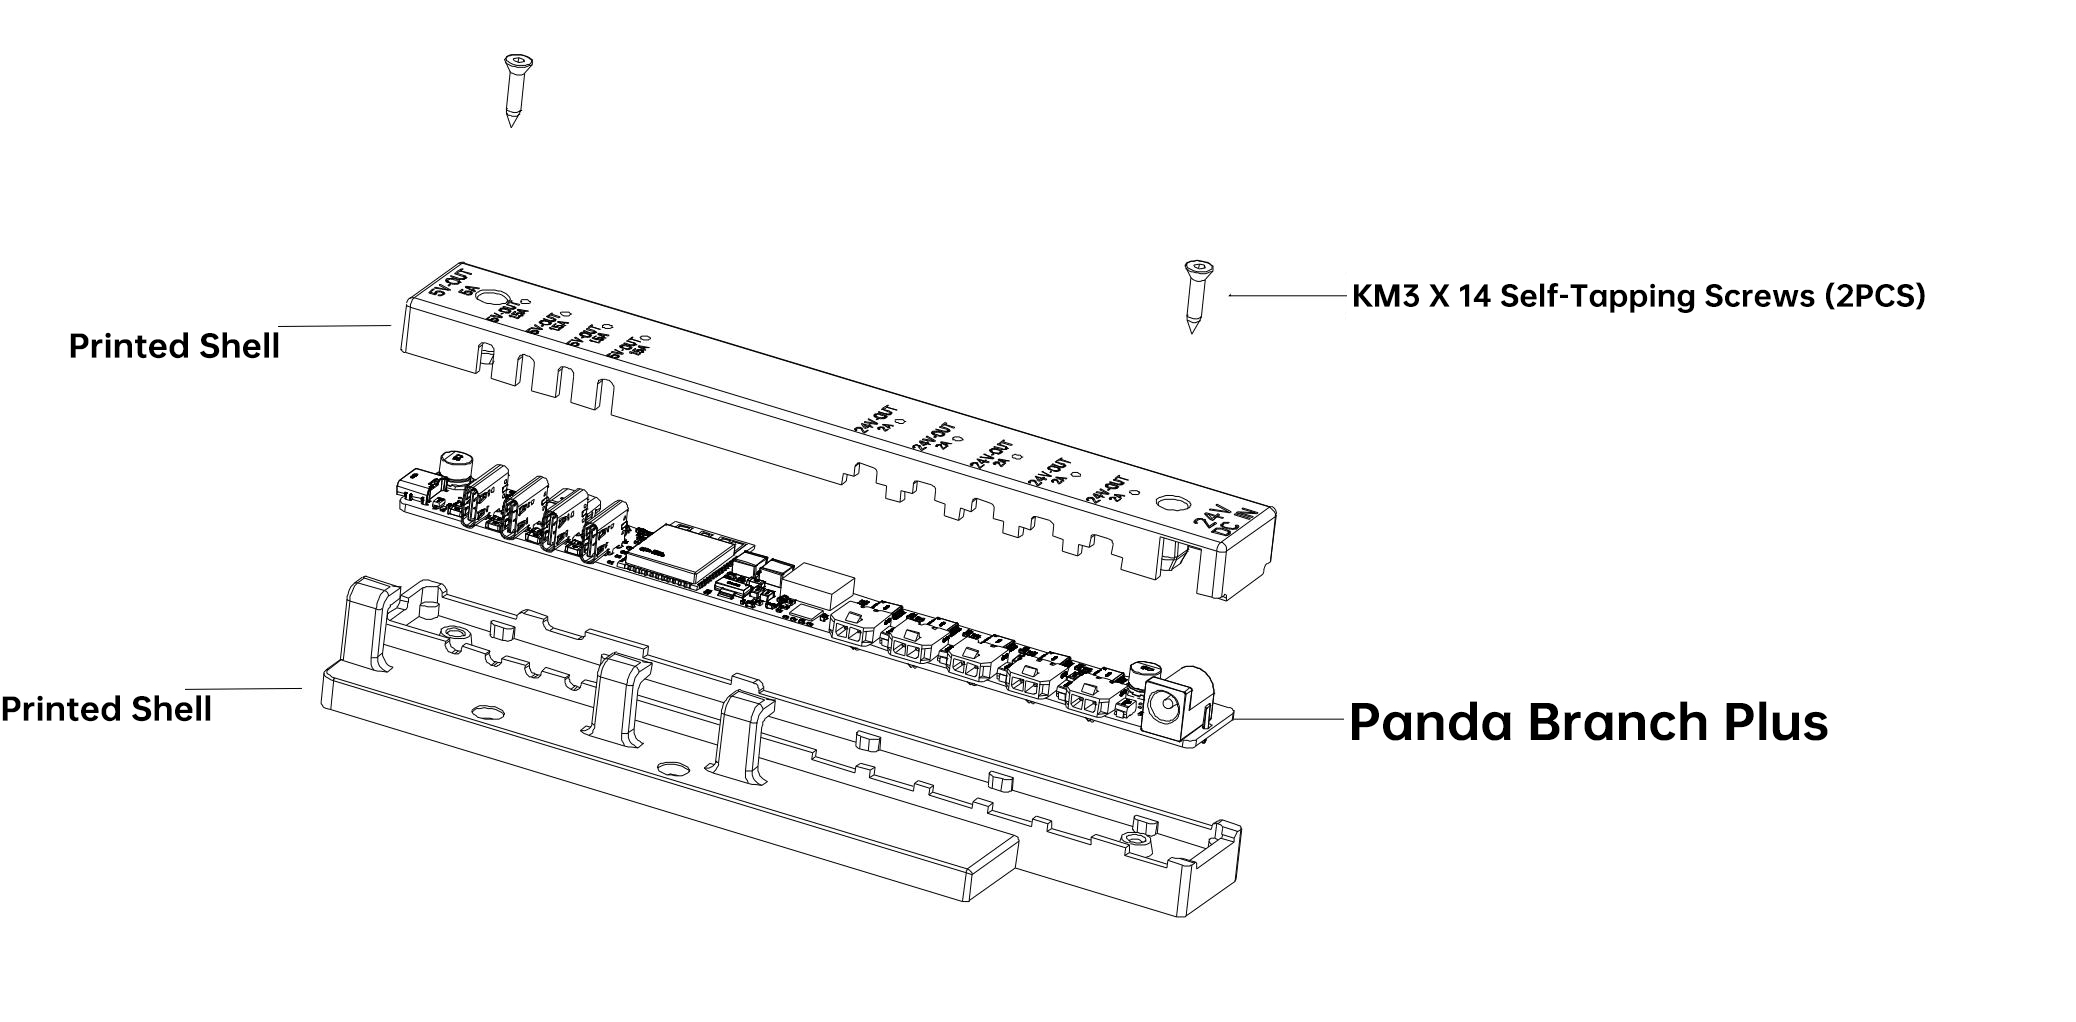
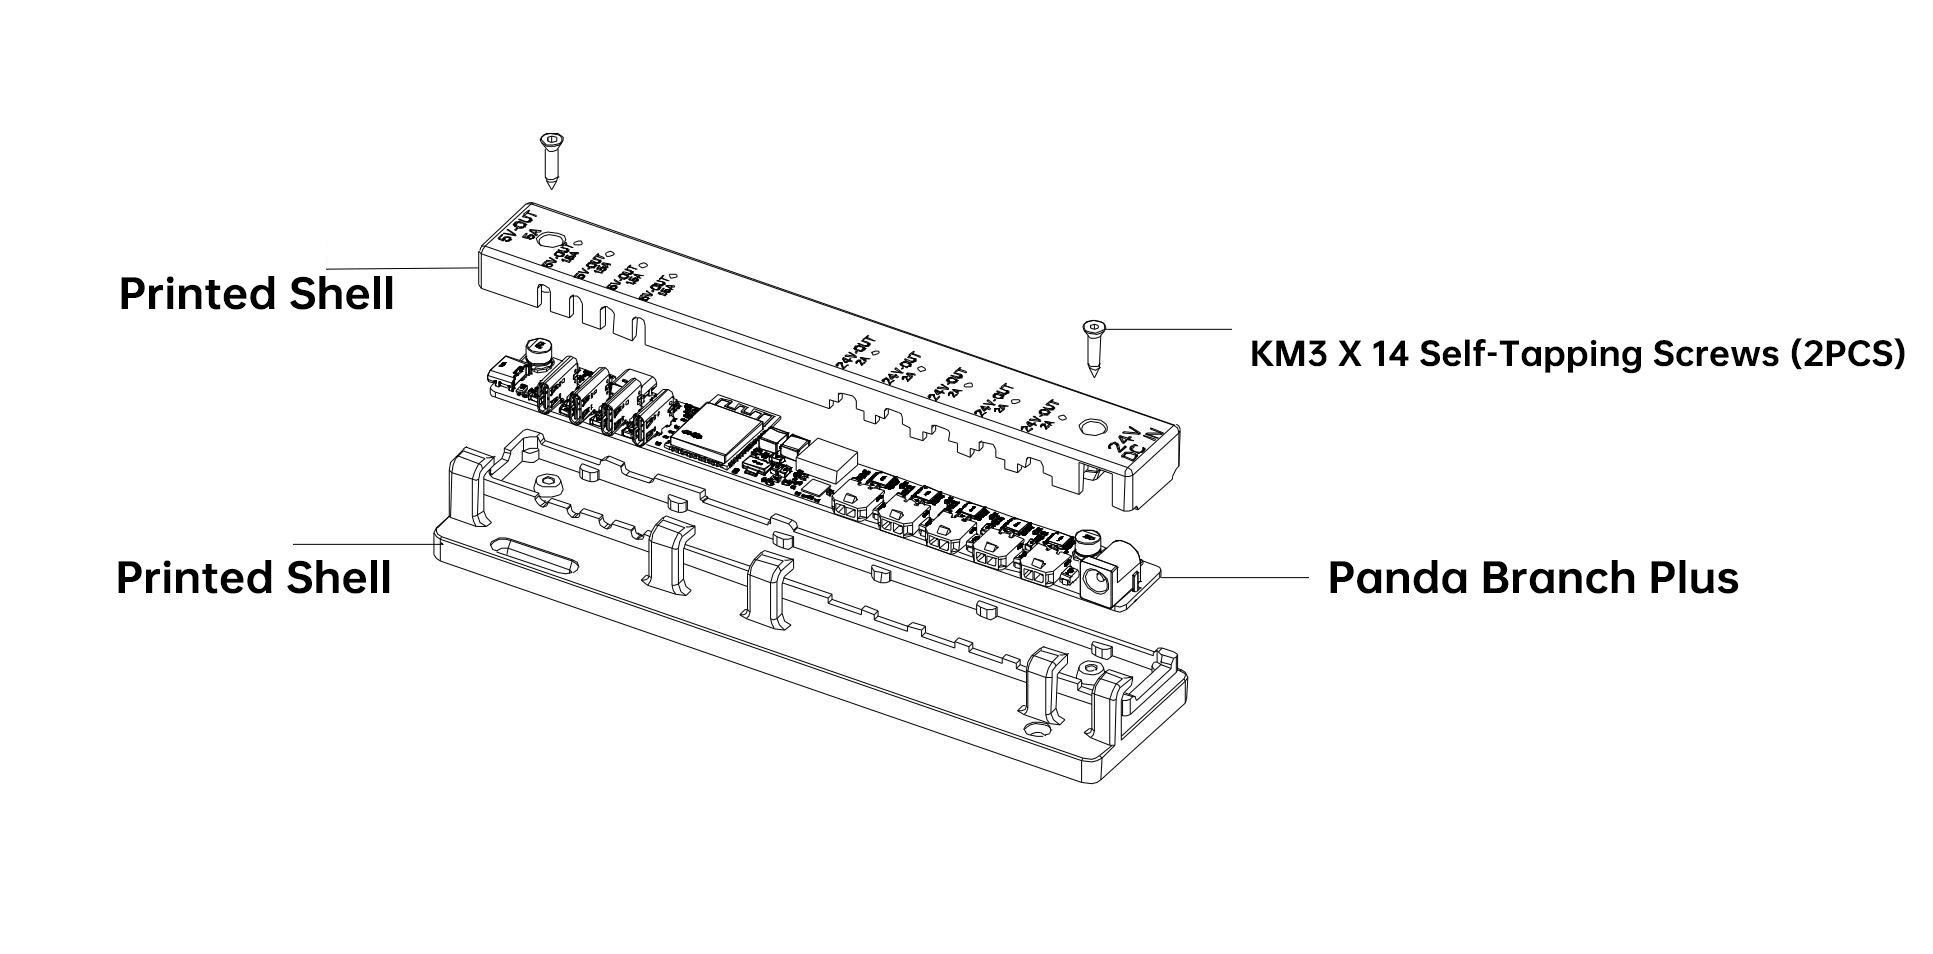
Place the Panda Branch Plus into the printed upper and lower shells and secure it with KM3×14 self-tapping screws.
-
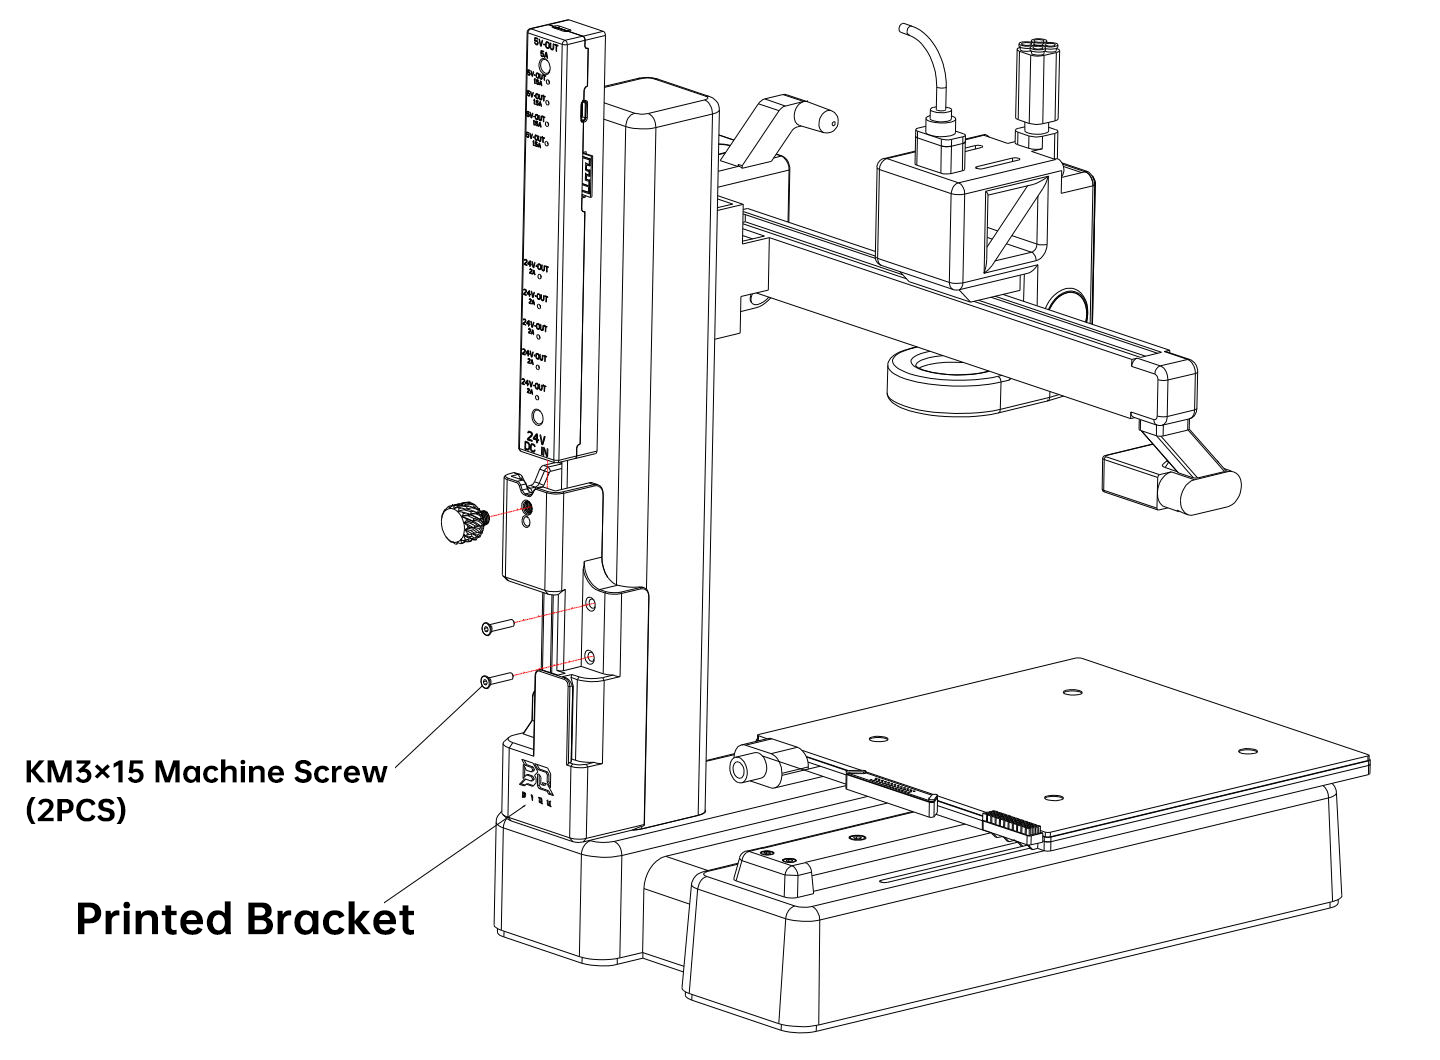
Insert the printed bracket into the position shown and secure it with KM3×15 machine screws. Place the assembled case from Step 1 into the slot at the top of the printed bracket, then fasten it with the printed thumb screw.
For A1 Printer
-
Place the Panda Branch Plus into the printed upper and lower shells and secure it with KM3×14 self-tapping screws.
-
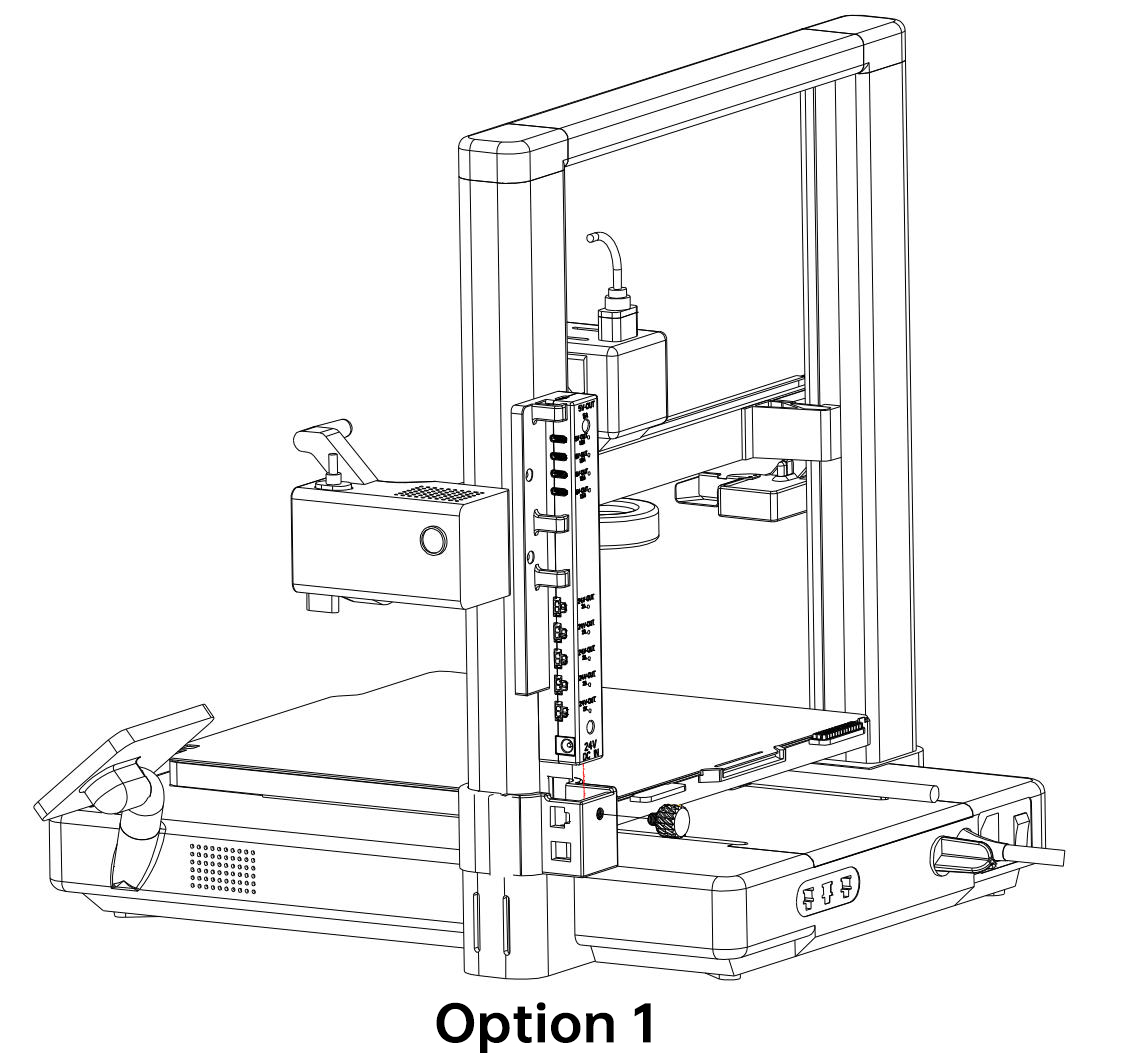
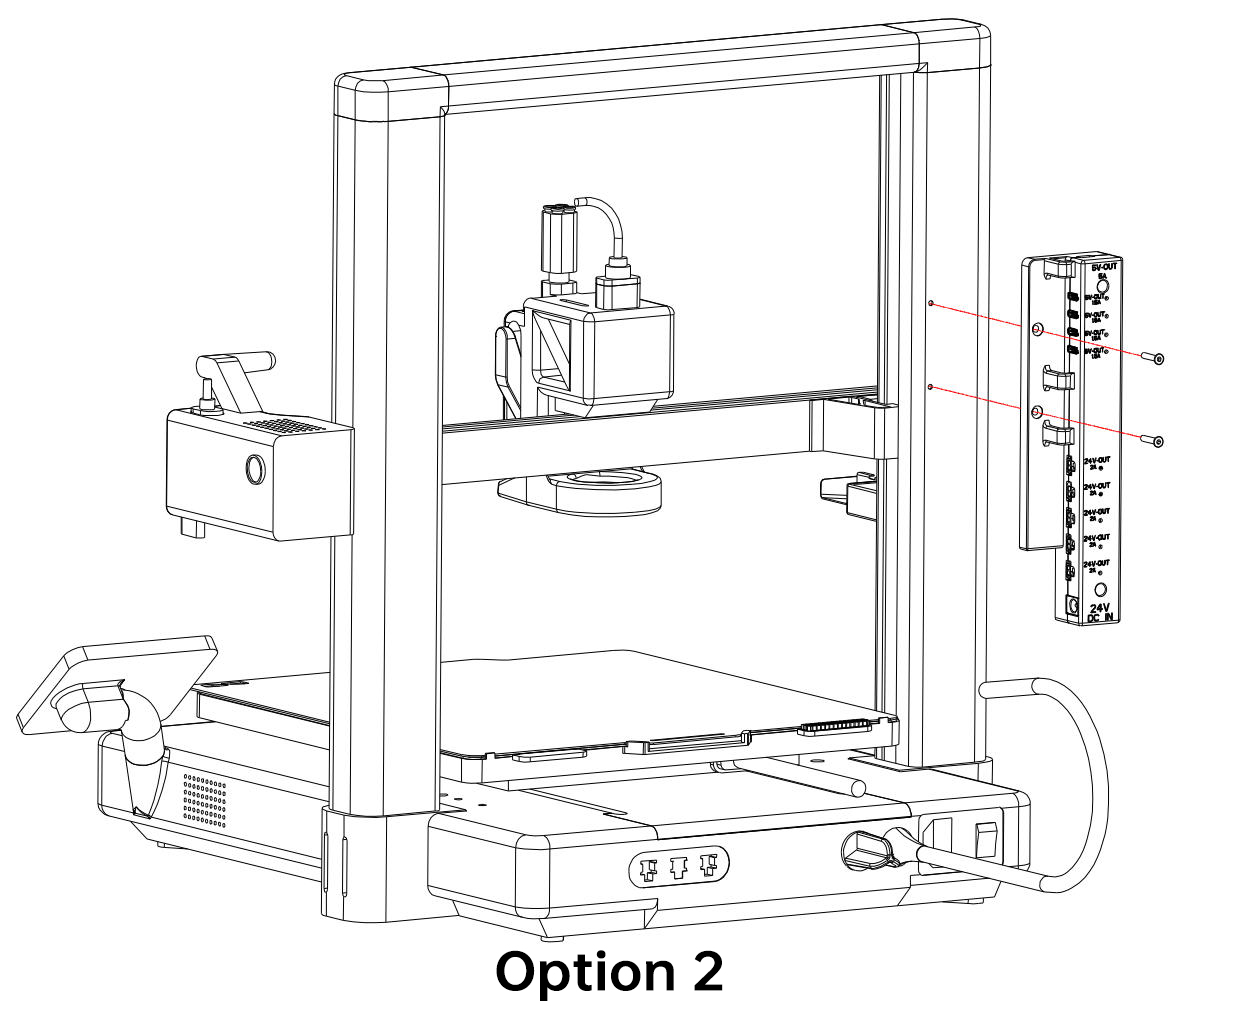
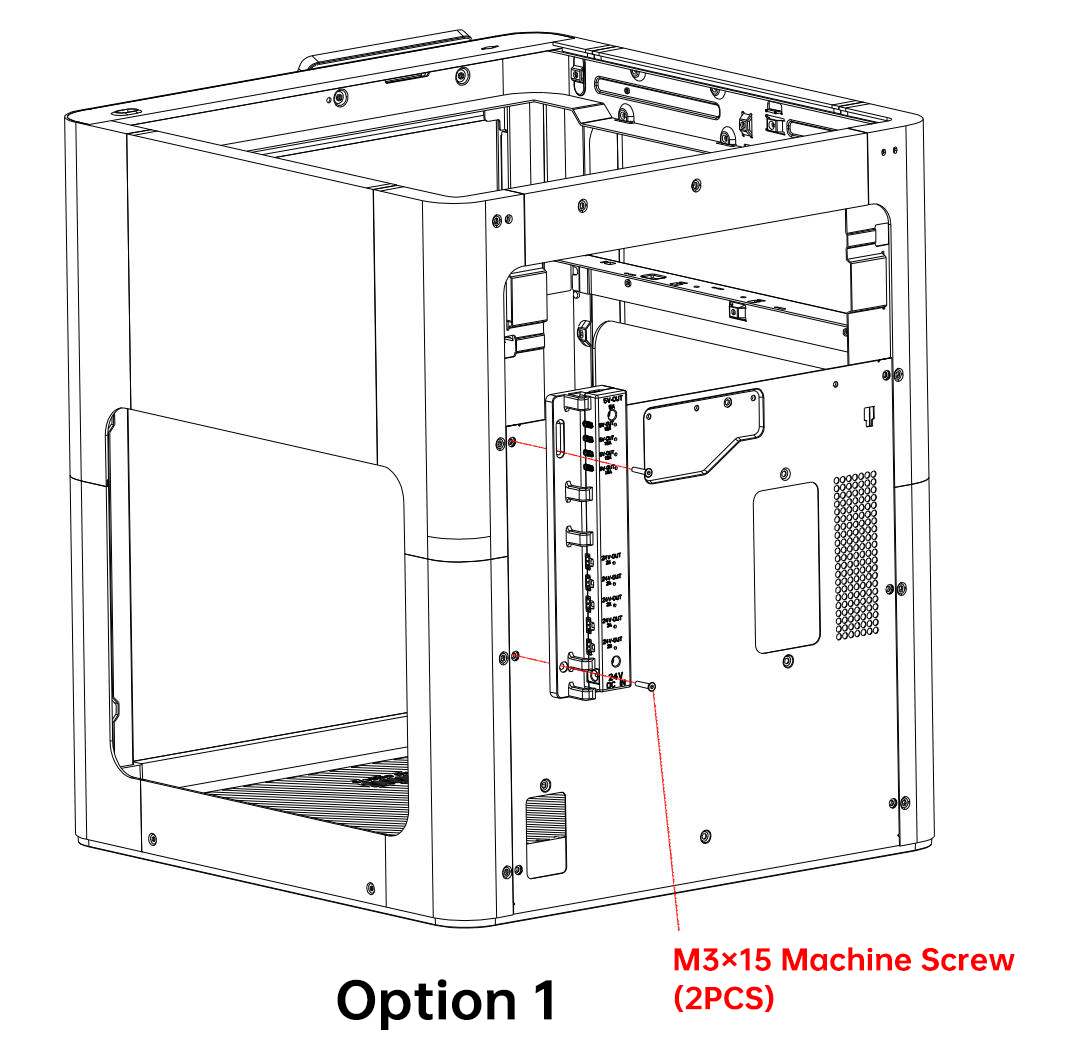
Insert the printed bracket into the position shown and secure it either with the printed thumb screw or with M3×15 machine screws.
Option 1: Attach directly to the A1 Z-axis using the printed thumb screw. Place the assembled case from Step 1 into the slot and secure it with the printed thumb screw.
Option 2: Use two M3×15 machine screws to secure it to the A1 Z-axis.
For P1/X1 Series Printers
-
Place the Panda Branch Plus into the printed upper and lower shells and secure it with KM3×14 self-tapping screws.
-
Insert the printed bracket into the position shown and secure it with M3×15 machine screws.

Note: This method requires two M3×15 machine screws to secure the bracket to either the rear-right side or the upper-rear side of the printer.
First-Time Setup
Network Configuration
-
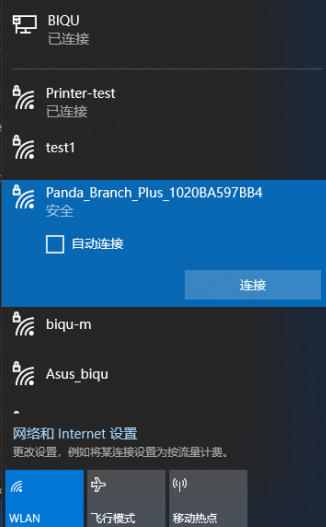
The device will create a hotspot named "Panda_Branch_Plus_XXXXXXXXXXXX", with the default password "987654321".
-
Connect to this hotspot using your mobile phone or computer.
-
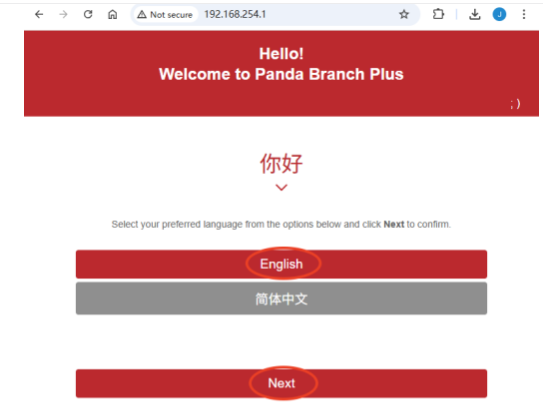
Open a browser and enter: http://192.168.254.1/
-
Select your preferred language.
-
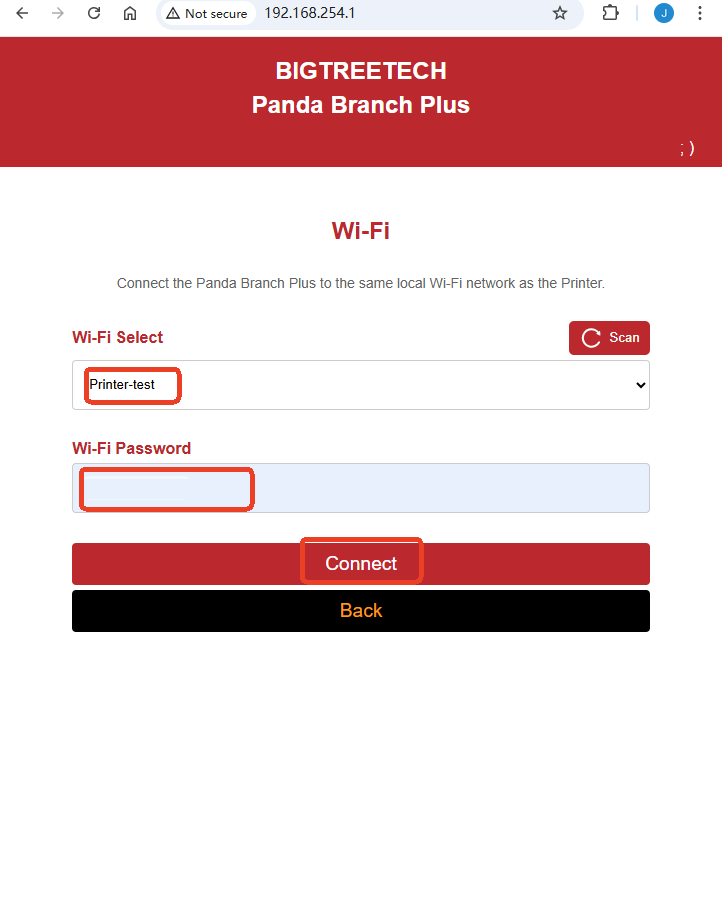
After scanning for Wi-Fi, select your target Wi-Fi network from the list, enter the password, and click Connect.
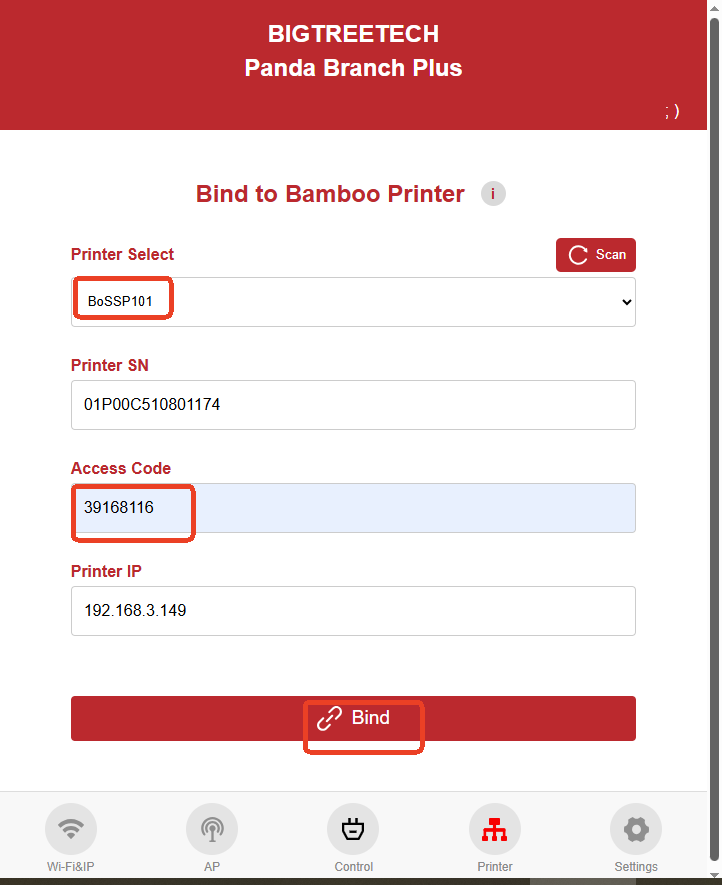
Binding the Printer
-
Click Scan Printer.
-
Enter the access code, then click Connect.
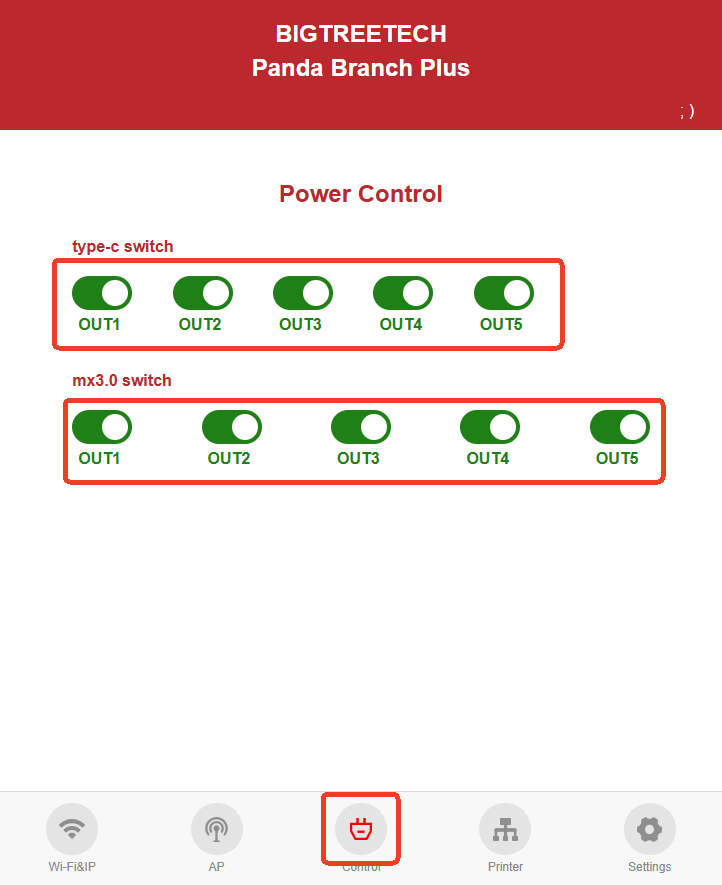
Power Control
The USB port and 24V port can be switched on or off through the Web UI.
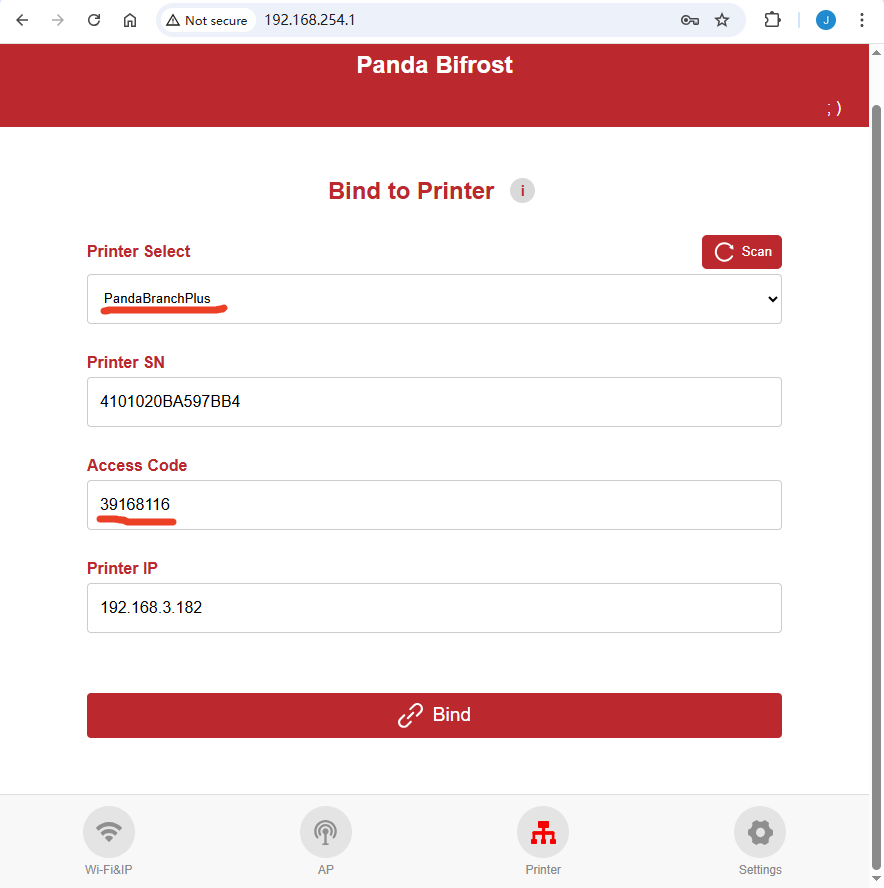
Binding Other Panda Devices
Step 1: Bind a Printer to This Device
Once a printer is bound, the device will broadcast its information over the local network, simulating a printer named "PandaBranchPlus".
Location: xxx.xxx.xxx.xxx
USN: 41098A316C65xxx
DevConnect.bambu.com: lan
DevModel.bambu.com: C12
DevName.bambu.com: PandaBranchPlus
DevVersion.bambu.com: 01.00.00.00
Step 2: On Another Panda Device
-
Open the Web UI, click Scan Printer, and select "PandaBranchPlus".
-
Enter the access code shown on the printer, The access code is same as the one on the printer.
-
Click Bind.
Usage Limitations
When Connecting with PandaTouch
-
Cloud mode is not supported.
-
Viewing SD card files from the printer is not supported.
-
Starting print tasks from a USB drive is not supported.
Maximum Number of Clients
- Supports up to 20 devices.
Firmware
Firmware History
01.00.00.00
- Initial release.
Feature Requests
We are committed to evolving the Panda Branch Plus firmware based on user feedback. To suggest new features, please submit them as tickets on our official GitHub repository.
Technical Support
Was this page helpful? If you have any questions about product usage or encounter issues, please contact our after-sales team at service001@biqu3d.com.