Panda Under Armor PX
Product Link: https://bit.ly/4kY2Ulr
Wiki: https://bttwiki.com/Panda-Under-Armor-PX.html
Makerworld: https://makerworld.com/en/models/1646712-panda-castor-wheel-adjustment-tool#profileId-1740562
Introduction
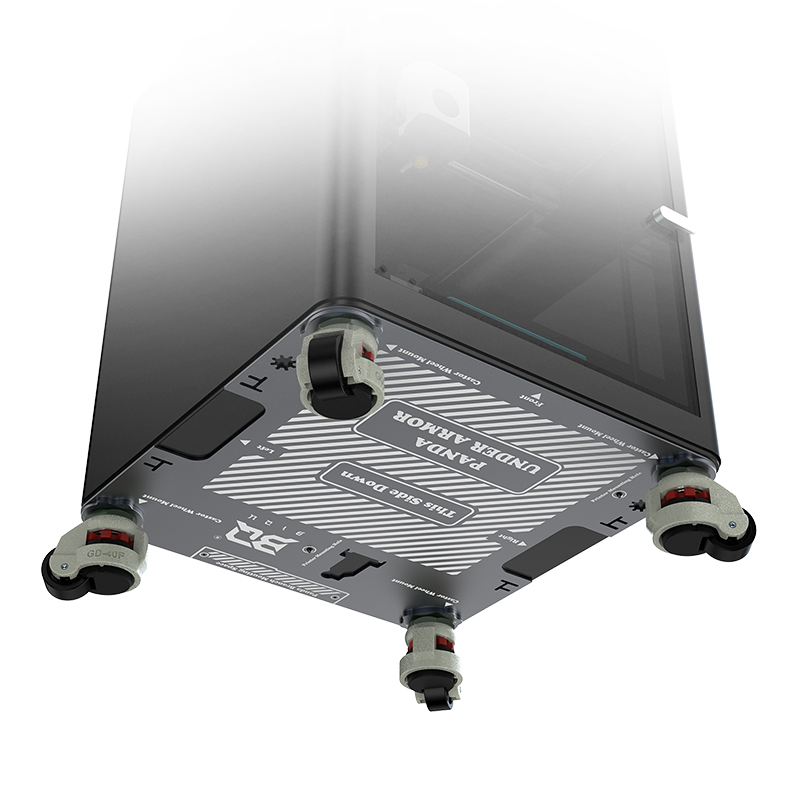
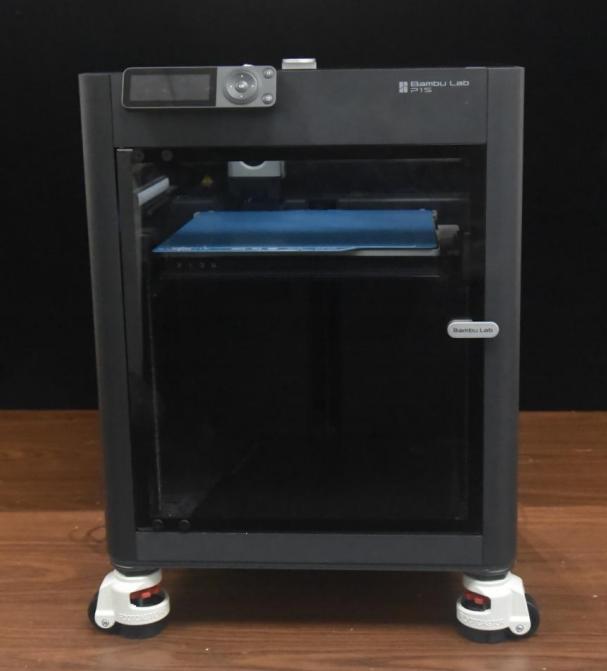
The BIQU Panda Under Armor PX is designed for the P1/X1 series 3D printers, offering full bottom protection and safer mobility. Made from durable AL6061-T6 aluminum alloy, it's lightweight yet sturdy. Optional castor wheels provide easy movement and stable parking, adapting to various usage scenarios for enhanced protection and convenience.
Feature Highlights
Full Protection: Offers complete protection for the bottom components of the printer, preventing damage from accidental bumps during movement.
Exclusive Design: Custom fit for the P1/X1 series printers, effectively blocking dust and hair.
AL6061-T6 Aluminum Alloy: Lightweight yet strong, ensuring structural stability and resistance to deformation.
Optional Liftable Castor Wheels: Makes it easy to move and park the device, catering to your various needs.
Specifications
| Product Name | BIQU Panda Under Armor PX |
|---|---|
| Material | AL6061 T6 Aluminum Alloy |
| Compatible Models | For Bambu Lab P1P, P1S, X1C, X1E 3D printers |
| Optional Add-ons | BIGTREETECH Panda Branch (sold separately) Castor Wheel Kit for Panda Under Armor PX (sold separately) |
Installation Guide
Follow these steps to install the Panda Under Armor PX on your P1 printer.
Preparation:
1、Ensure the printer is powered off.
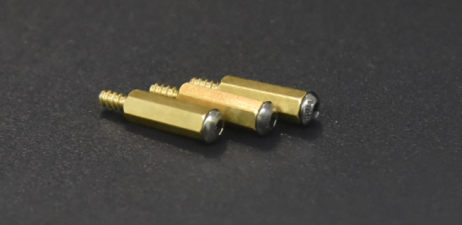
2、Screw in the three PM3x6 screws (included in the Panda Under Armor PX kit) into the M3 Hex Standoffs.
Note: Do not screw in too tightly, as these screws will need to be removed later.
3、Place the printer on its side on a desktop, such as with the back facing left and the door facing right.

Installation Steps:
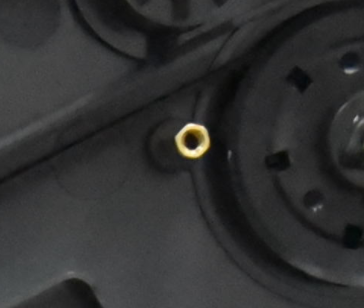
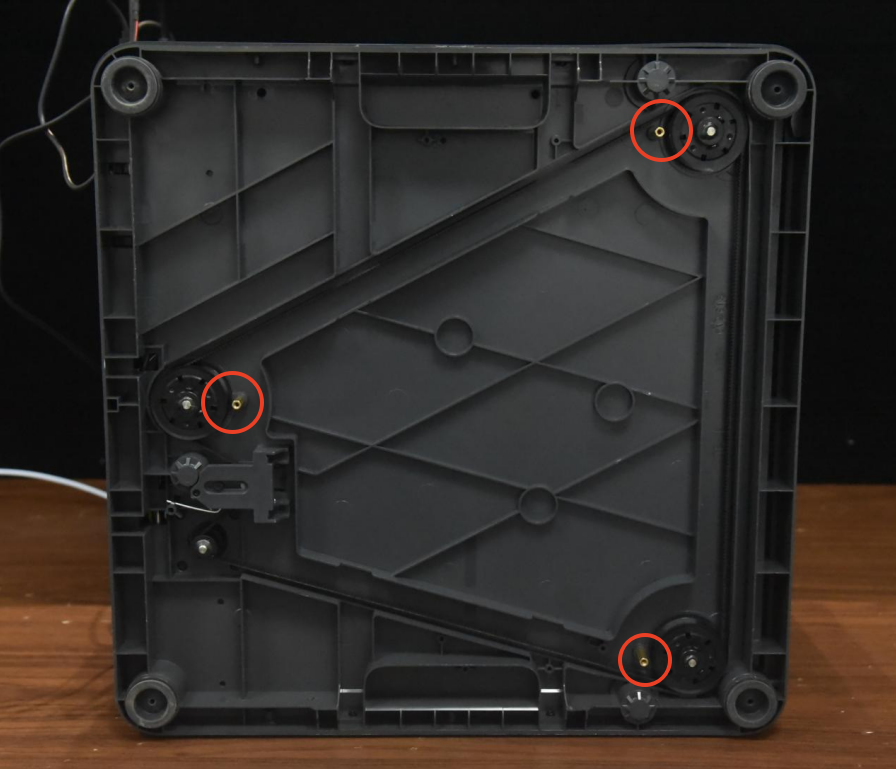
1、Use an H2.0 screwdriver to screw the three M3 hex standoffs, with screws already attached, into the three threaded holes at the bottom of the printer (as shown in the image).

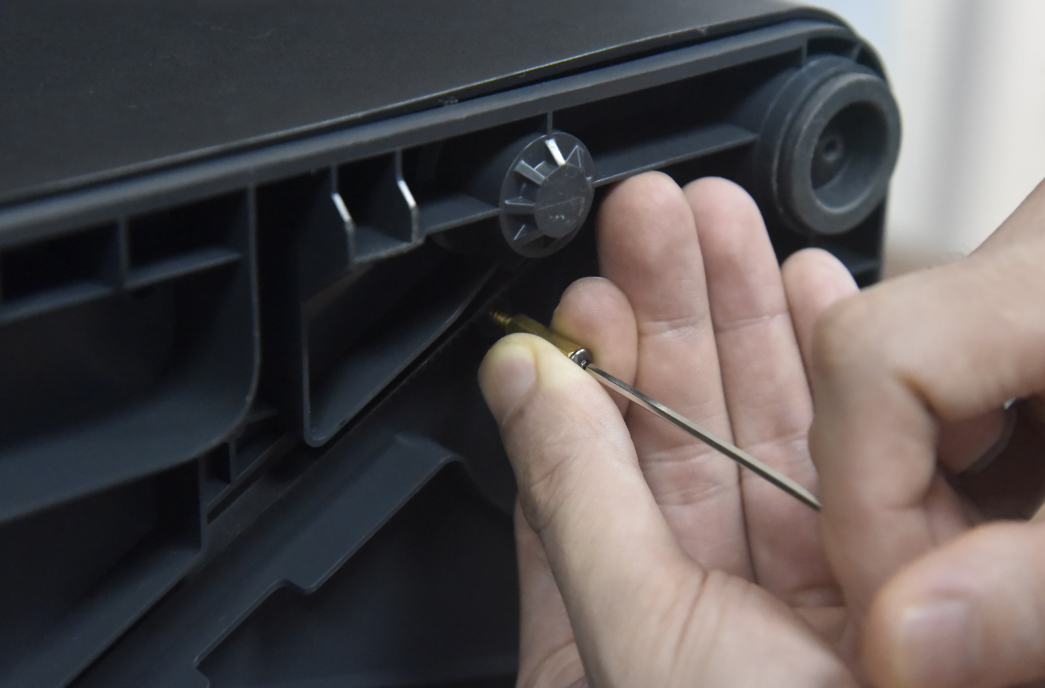
2、Remove the screws from the M3 hex standoffs, leaving the standoffs in place. These screws will be used later to secure the Panda Under Armor PX.
Now, you can choose between two installation methods:
- a. Install only the Panda Under Armor PX
- b. Install both the Panda Under Armor PX and the Castor Wheel Kit
a.Install only the Panda Under Armor PX:
1、Align the Panda Under Armor PX with the bottom of the printer, ensuring it fits snugly. Gently press it down.

2、Reinsert the screws you removed earlier into the M3 hex standoffs to securely fasten the Panda Under Armor PX.

3、The Panda Under Armor PX installation is now complete.
b.Install the Panda Under Armor PX and the Castor Wheel Kit:
1、Use the 16 screws from the castor wheel kit to attach the four castor wheels to the Panda Under Armor PX.
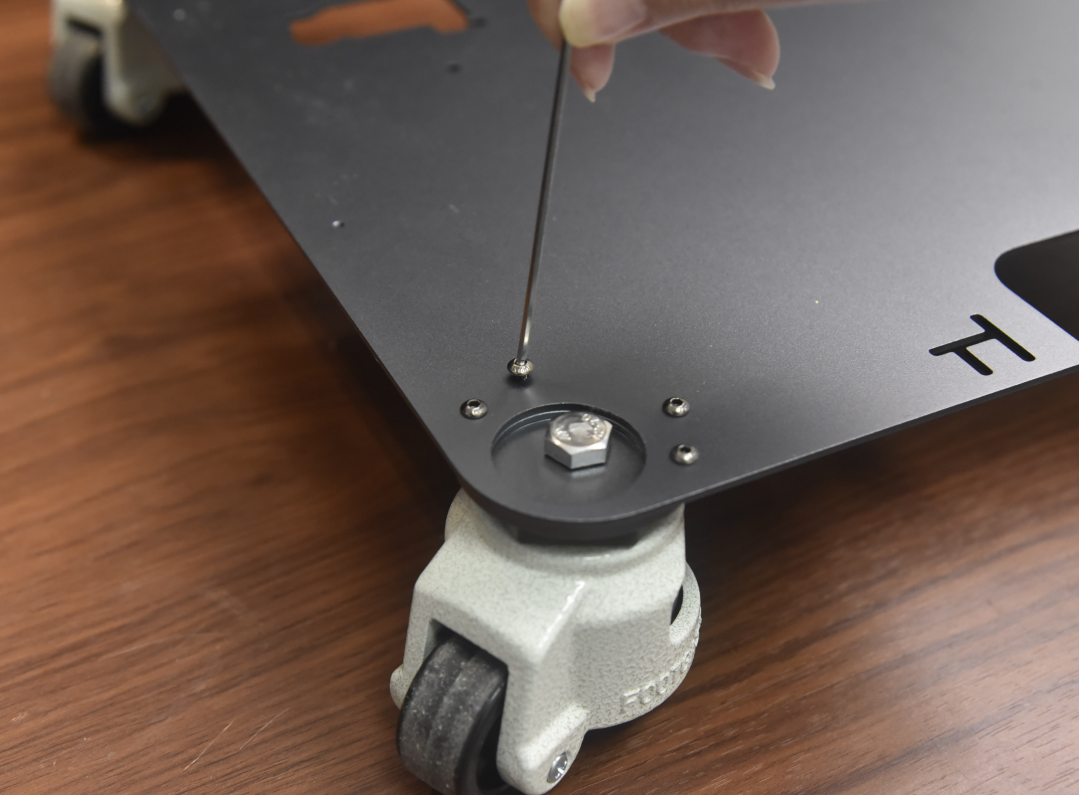

2、Remove the stock foot pads from the printer.

3、Align the Panda Under Armor PX, with the caster wheels installed, with the bottom of the printer, ensuring a snug fit. Gently press it down.

4、Reinsert the screws you removed earlier into the M3 hex standoffs to securely fasten the Panda Under Armor PX.


5、The installation of the Panda Under Armor PX with the wheel kit is now complete.
How to Lower the Shock-Absorbing Foot Pads for Stable Placement
1、If you need the printer to stay stable and immovable, you can lower the shock-absorbing foot pads within the castor wheels.
2、Visit https://github.com/bigtreetech/Panda-Under-Armor-PX to download and print the Panda Castor Wheel Adjustment Tool.
To Lock: Use the tool to pull the red adjustment wheel toward the triangle icon on the tool, lowering the foot pads and securing the printer to the floor.
To Unlock: Pull the wheel toward the circle icon to raise the foot pads, allowing smooth movement.

Product Purchase Link
https://bit.ly/4kY2Ulr
If you have any issues with the product, please submit a support ticket.
https://biqu3d.com/pages/submit-a-ticket
Navigation:
BIQU Official Website: http://biqu3d.com
BIGTREETECH Official Website: http://bigtree-tech.com
Online Store: https://biqu.equipment
Community: https://community.biqu3d.com