Panda PWR
Product Link: BIGTREETECH Official Website
Important Usage Information
- In Panda Touch connection mode, should the IP address of the Panda PWR change, you must bring the Panda Touch close to the Panda PWR to acquire the updated IP address.
- Keep the product in a dry area. Do not use in moist environments.
- This product can be operated either as a standalone unit or together with the Panda Touch.
- When connecting to a 220VAC input, first connect the input wires on the Panda PWR before connecting the wires to the socket.
- The TYPE-C port can only be used for input.
- The USB-A port can only be used for output.
FCC WARNING:
This device complies with Part 15 of the FCC Rules. Operation is subject to the following two conditions: (1) this device may not cause harmful interference, and (2) this device must accept any interference received, including interference that may cause undesired operation. Any changes or modifications not expressly approved by the party responsible for compliance could void the user's authority to operate the equipment. NOTE: This equipment has been tested and found to comply with the limits for a Class B digital device, pursuant to Part 15 of the FCC Rules. These limits are designed to provide reasonable protection against harmful interference in a residential installation. This equipment generates, uses, and can radiate radio frequency energy and, if not installed and used in accordance with the instructions, may cause harmful interference to radio communications. However, there is no guarantee that interference will not occur in a particular installation. If this equipment does cause harmful interference to radio or television reception, which can be determined by turning the equipment off and on, the user is encouraged to try to correct the interference by one or more of the following measures: Reorient or relocate the receiving antenna. - Increase the separation between the equipment and receiver. - Connect the equipment into an outlet on a circuit different from that to which the receiver is connected. - Consult the dealer or an experienced radio/TV technician for help.
To maintain compliance with FCC’s RF exposure guidelines, this equipment should be installed and operated with a minimum distance of 20 cm between the radiator and your body. Use only the supplied antenna.
Basic Specifications
| Wi-Fi Module | ESP8684-MINI-1-H4 |
|---|---|
| Memory | RAM - 272KB, Flash - 4MB |
| Connection | 2.4G Wi-Fi (IEEE 802.11 b/g/n) |
| Operating Temperature | -10°C to 60°C |
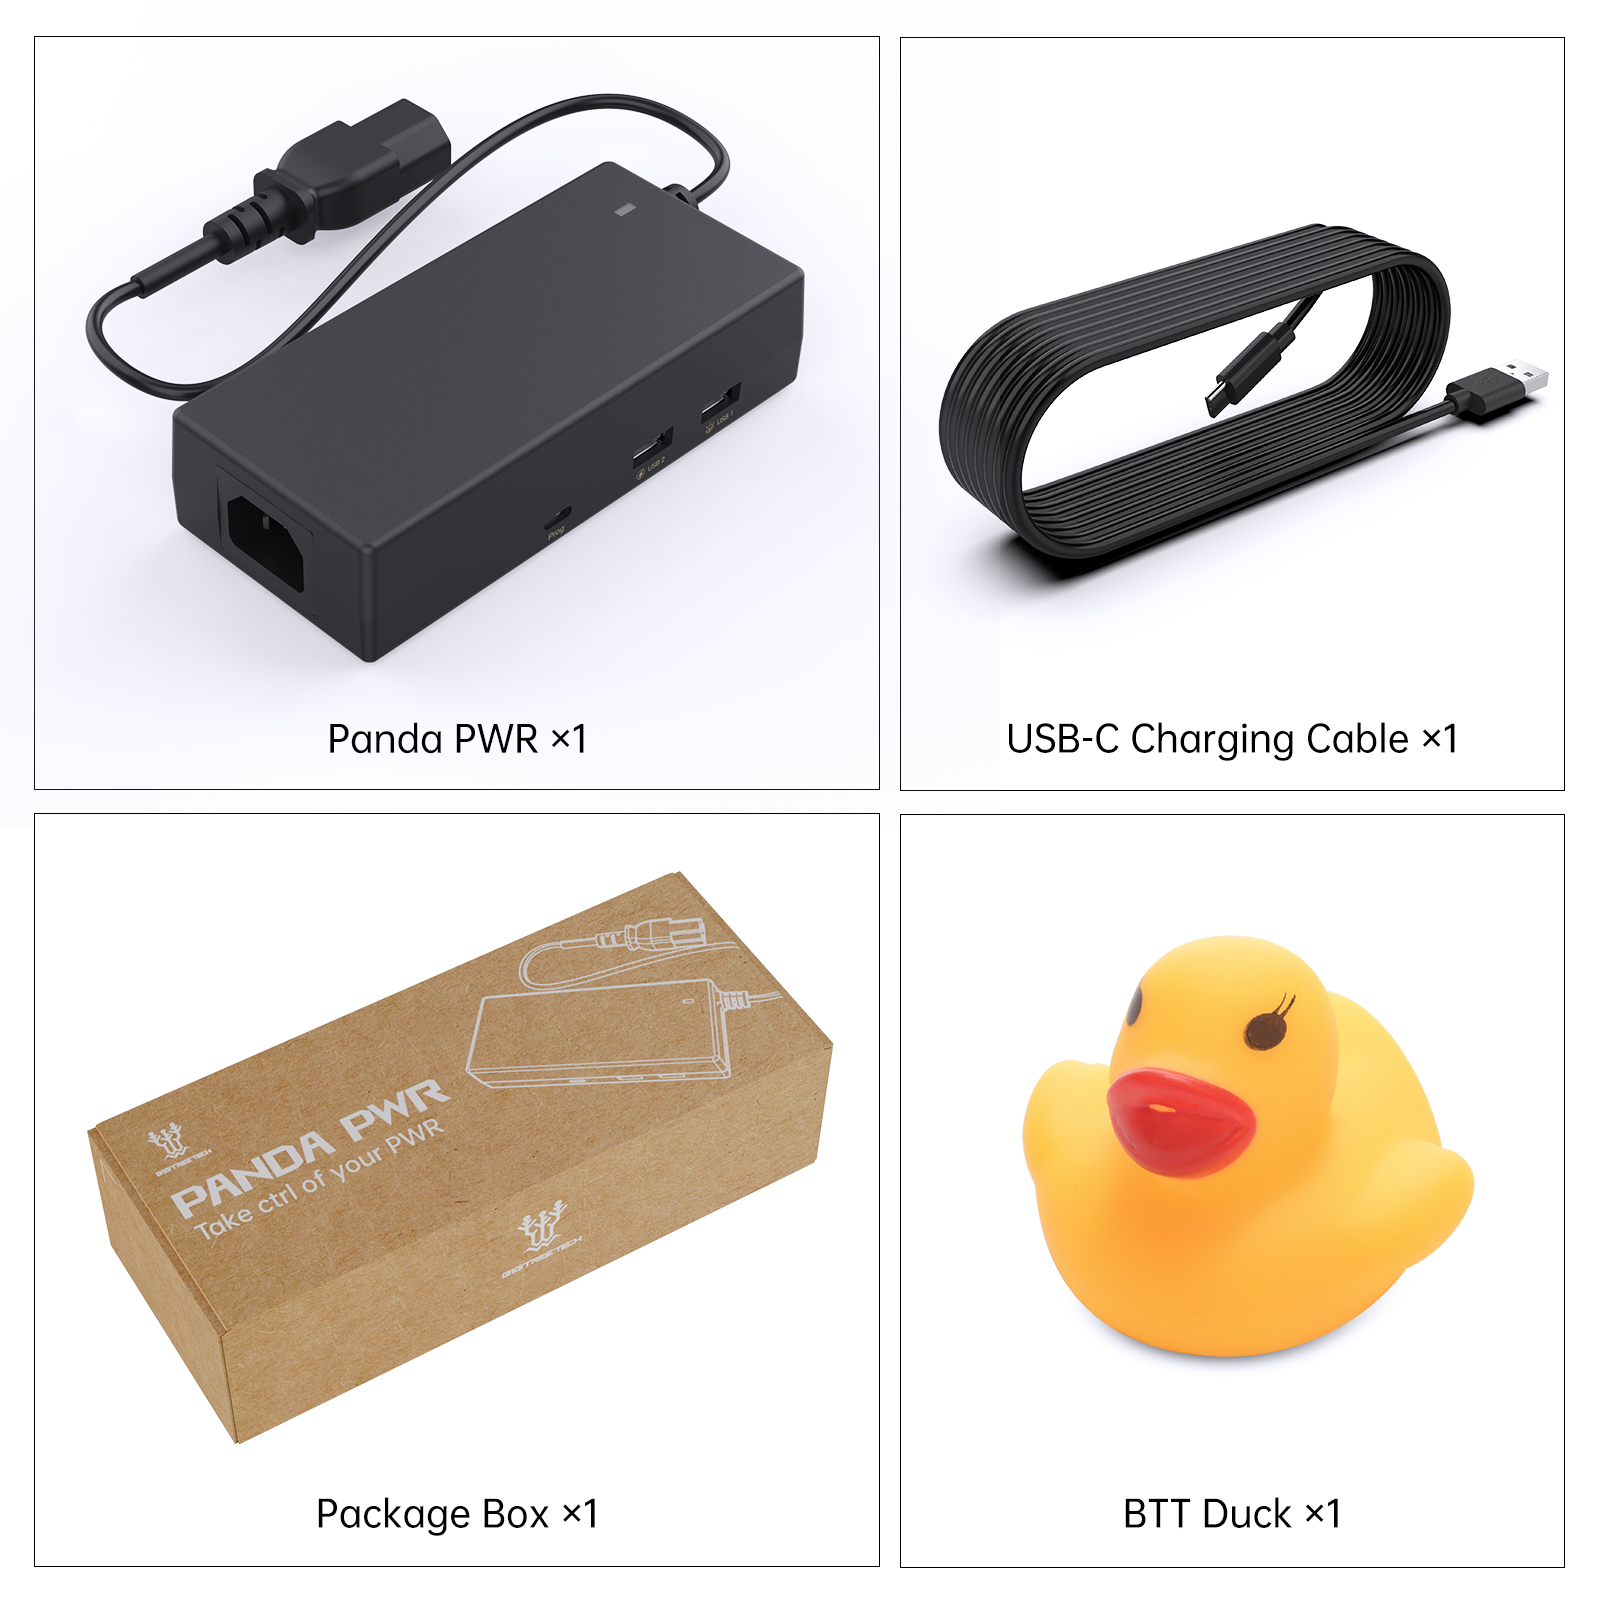
Packaging List
Operation Guide
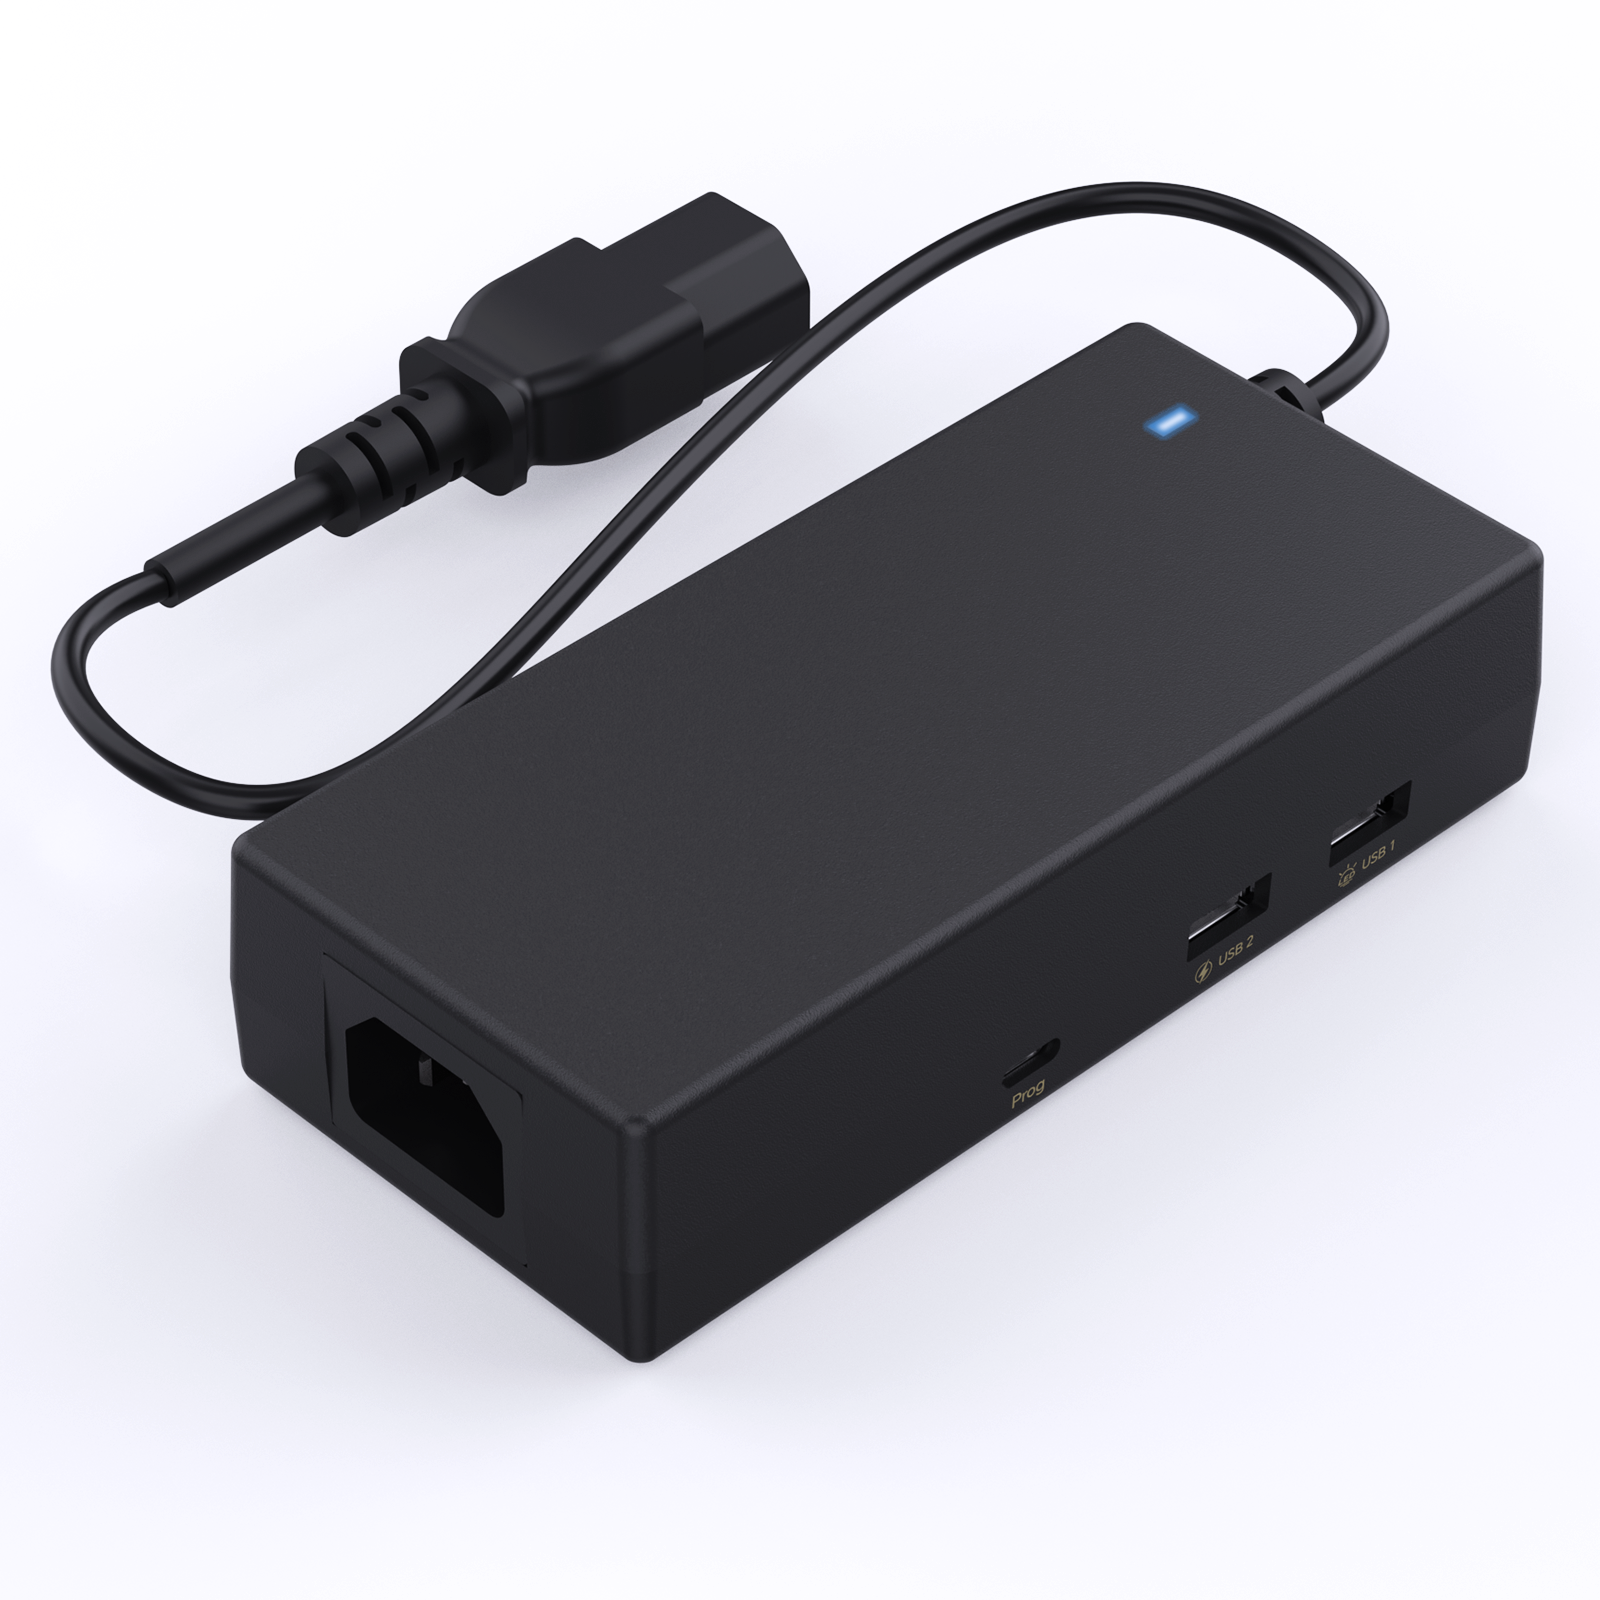
Interface Description
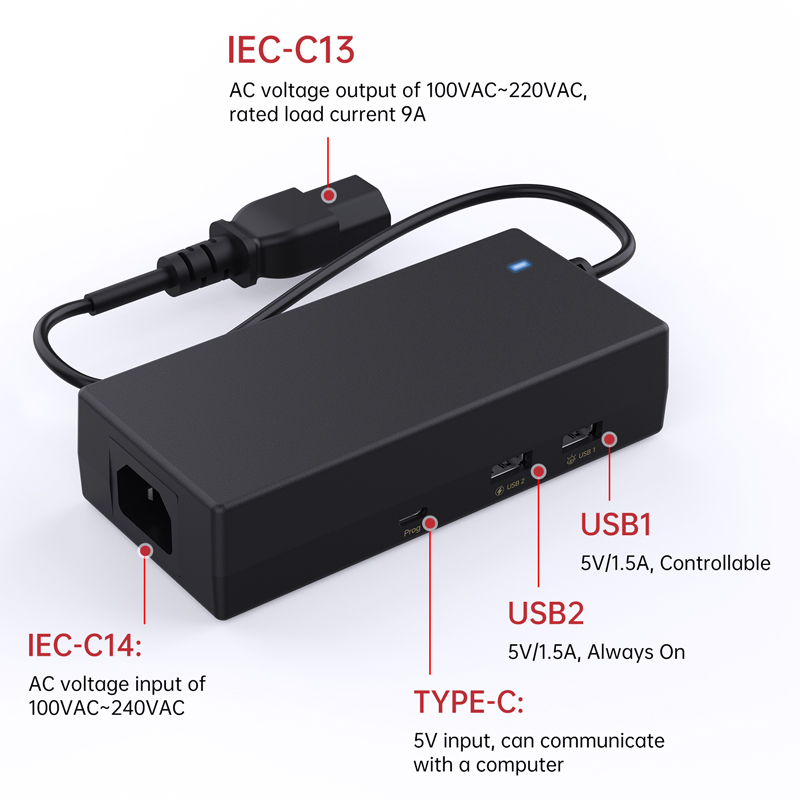
USB Interface
- USB1
Used for modules that require control switches, such as a USB light strip. - USB2
Can provide power to some modules, such as Panda Touch. - TYPE-C
Can be used to burn firmware and restore factory settings.
Button Description
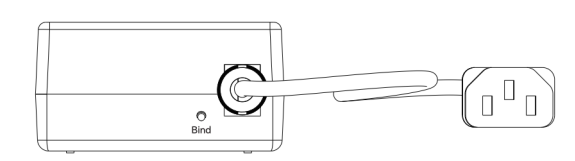
-
Bind a Panda Touch
Press and hold for about 3 seconds to enter binding mode. Place the Panda Touch on the shell of Panda PWR. -
Activate the 220V Output
Double-click the Bind key. -
Restore factory settings
Press and hold the button for approximately 8 seconds until the indicator light flashes red, indicating that the PWR is resetting.
Indicator Light Description
- Blue: Operating in LAN standalone mode.
- Blue Pulse: Searching for a Panda IoT Device to bind with.
- Green: Normal communication with a Panda IoT Device.
- Green Flashing: A communication error with a Panda IoT Device.
- Red Pulse: The device is performing a factory reset.
First Connection
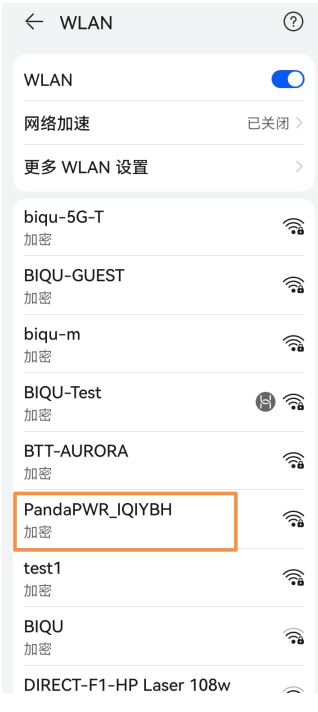
Upon initial setup, the Panda PWR will generate an access point with the default name 'PandaPWR_XXXXXX', where 'XXXXXX' represents a random sequence of six uppercase letters. The default password is a nine-digit number: '987654321.
Configure The Network Setting
1 Using your mobile phone or PC, connect to the AP named 'PandaPWR_XXXXXX'.
2 Enter the IP address '192.168.4.1' into the browser of your connected device (phone or PC). Typically, after entering the AP password, you should be automatically redirected to the web user interface (UI).
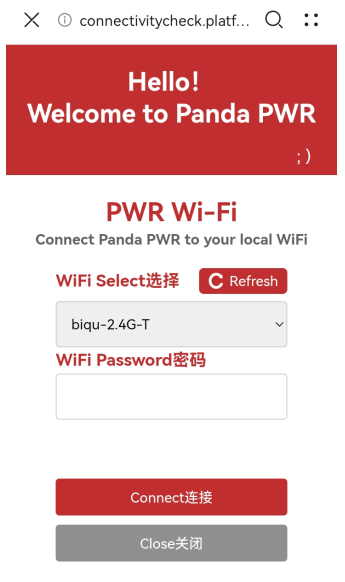
3 Choose the Wi-Fi network you wish to connect to and enter its password.

4 Press the 'Connect' button. Following this, you will be automatically redirected to the control (ctl) page where you can find the updated IP address on the 'Wi-Fi & IP' page.
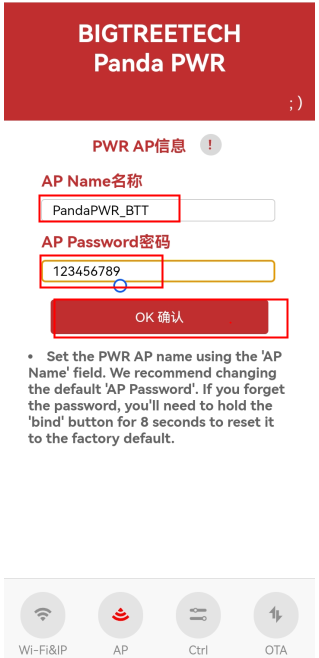
Configure The AP Name And Password
For easier identification, especially when multiple units are in use, we recommend renaming the AP.
- Navigate to the AP page by clicking the "AP" button, where you can modify the AP name and password. Confirm changes by clicking the "OK" button.
Work Modes
LAN Standalone Mode
In this mode, you can use mobile phones or computers to remotely control the Panda PWR via the WEB-UI. How to control it via the web?
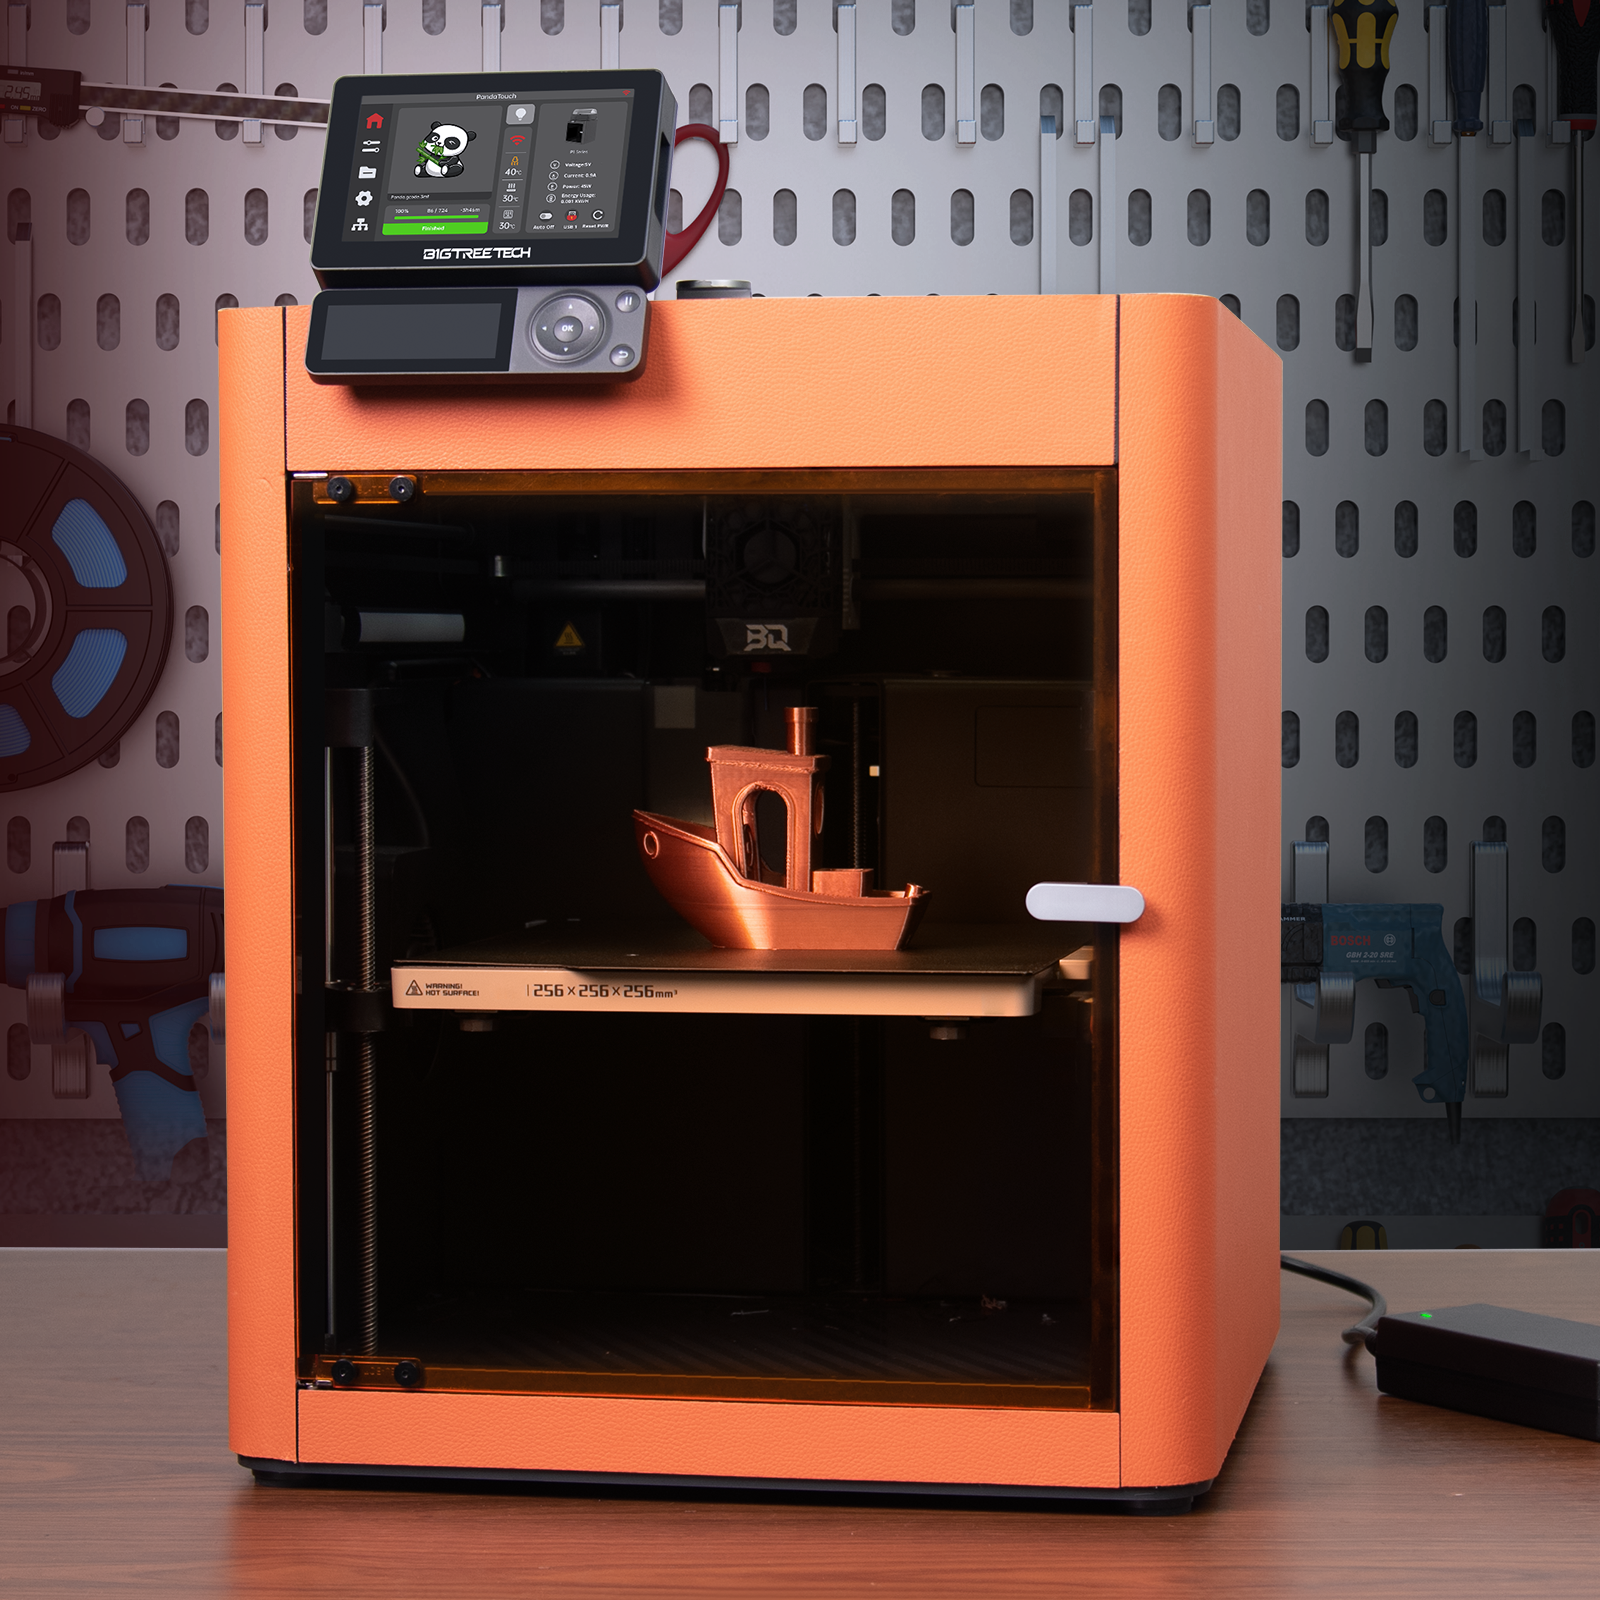
Panda Touch Connection Mode
In this mode, control is managed through the Panda Touch. How to control it via the Panda Touch?
How to Switch Work Modes
To switch from LAN standalone mode to Panda Touch connection mode, press and hold the Bind button for approximately 3 seconds. If the binding is successful, the device will remain in Panda Touch connection mode. If not, it will revert to LAN standalone mode.
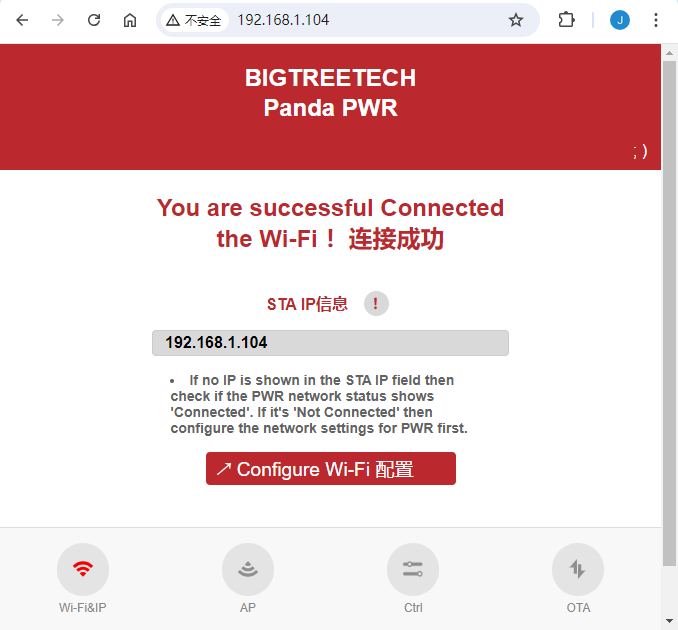
WEB UI Operation Guide 
Configure network
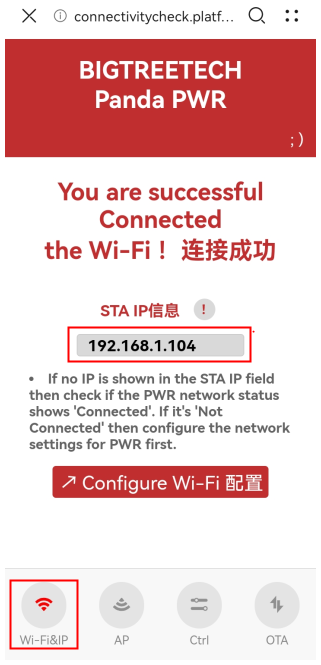
- Click the "Wi-Fi&IP" button to navigate to the Wi-Fi page, where the IP address is displayed.
- To modify the IP address, click the "Configure Wi-Fi" button.
Restore factory settings
Restoring the factory settings will reset the Wi-Fi name of the Panda PWR to 'Panda PWR_XXXXX', where 'XXXXX' is a randomly generated sequence of five uppercase letters.
This measure is designed to prevent the presence of multiple Panda PWR Wi-Fi names in the same vicinity, reducing the potential for user confusion. Furthermore, the Wi-Fi login password will be reset to '9876543210.
Method 1:
Click the "OTA" button to switch to the OTA page.
Click the "Factory Reset" button to restore the factory settings.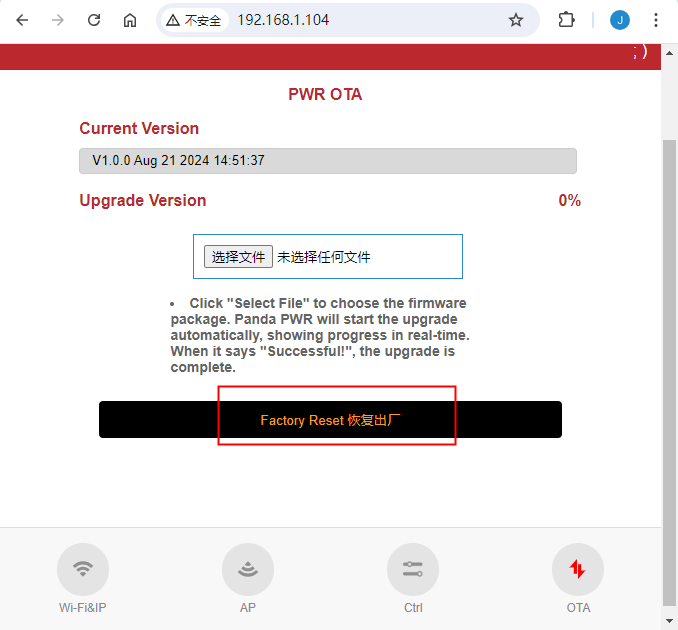 Method 2:
Press and hold the "Bind" button for approximately 8 seconds until the indicator light flashes red, indicating that the PWR is resetting.
Method 2:
Press and hold the "Bind" button for approximately 8 seconds until the indicator light flashes red, indicating that the PWR is resetting.
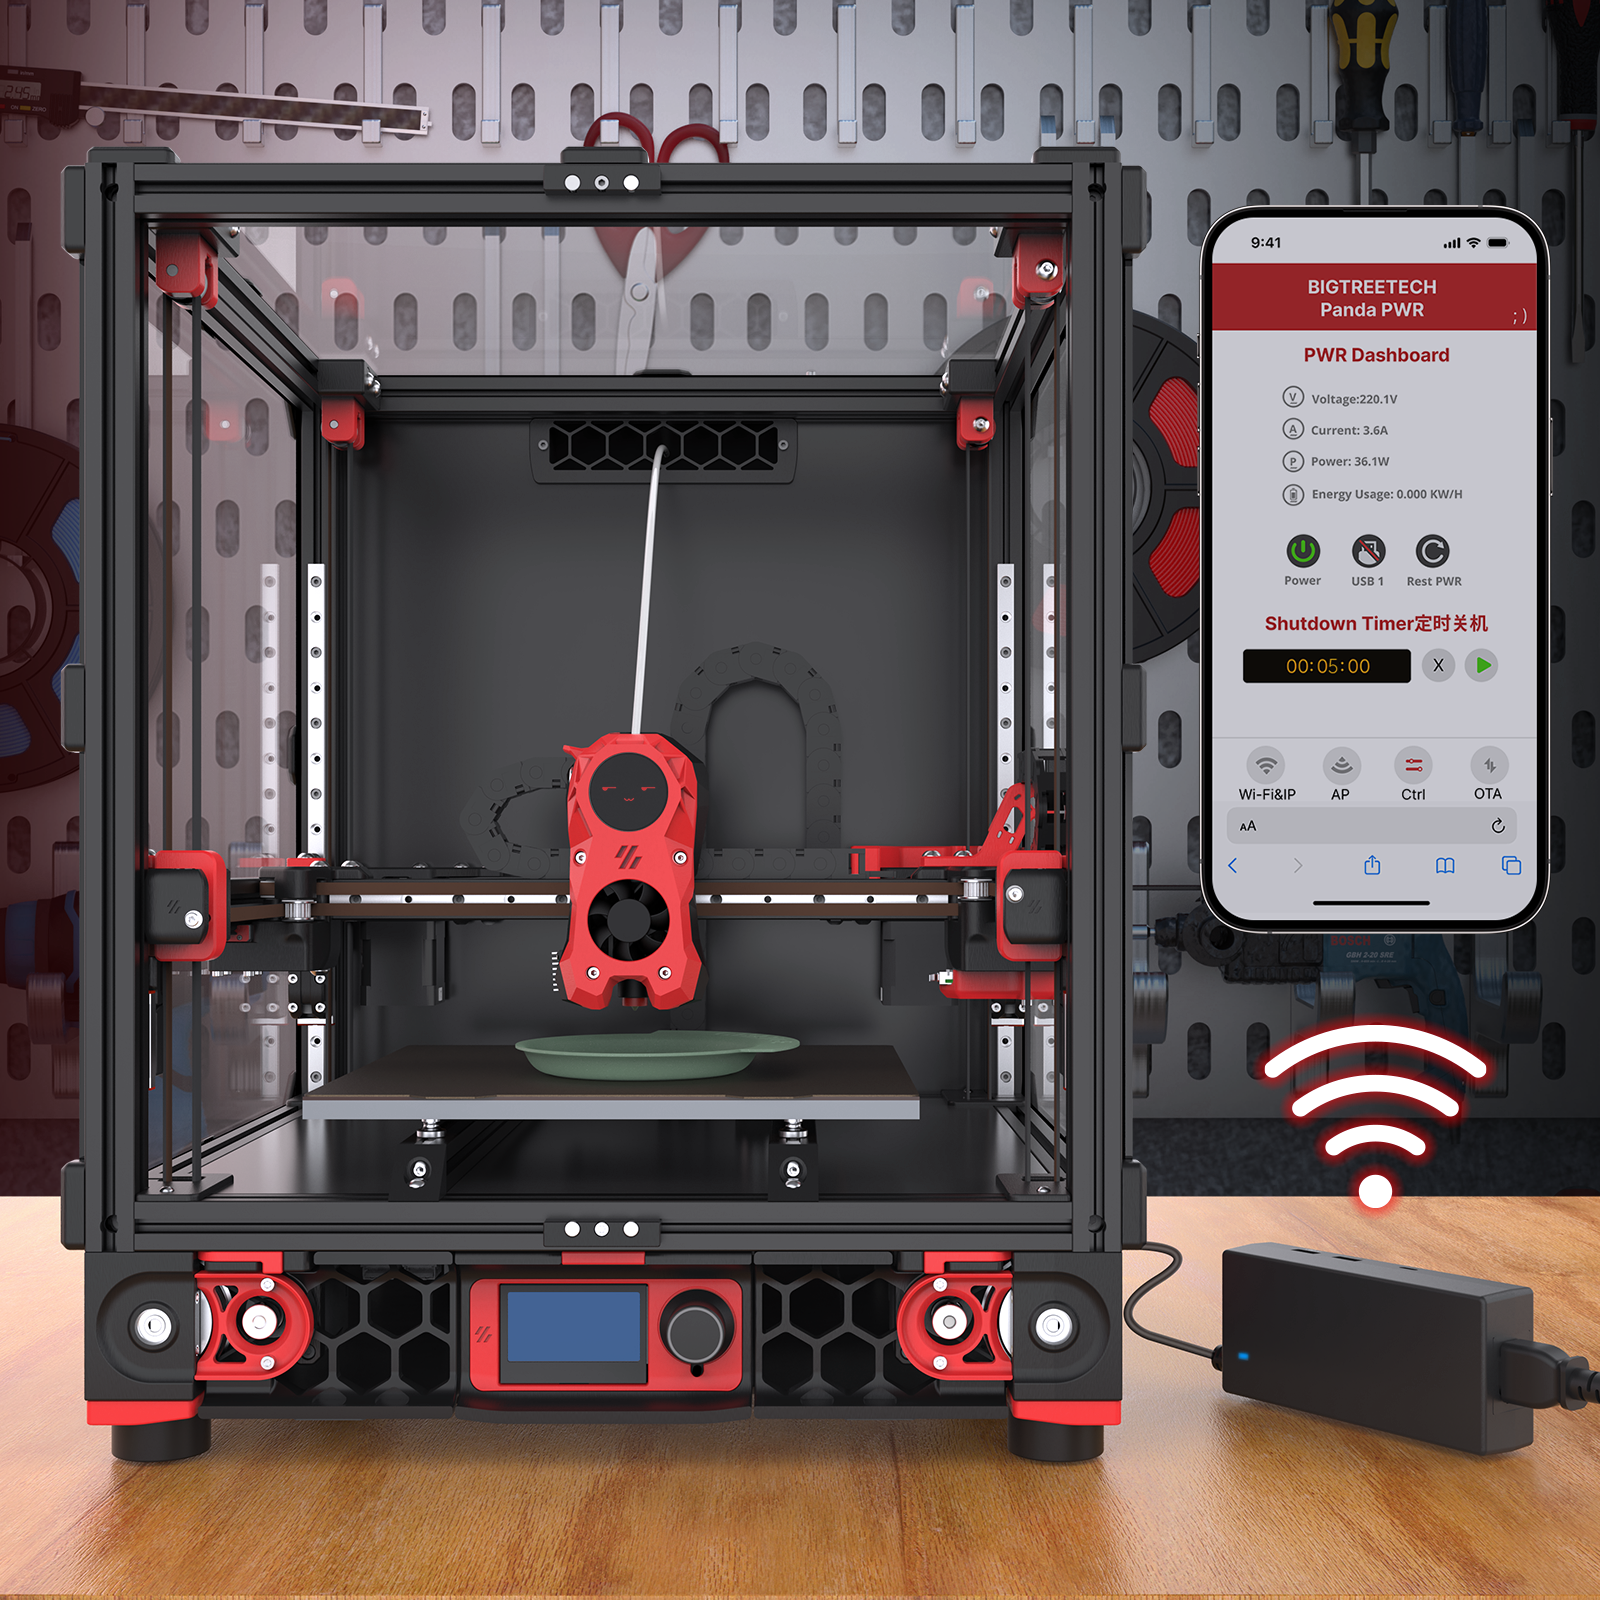
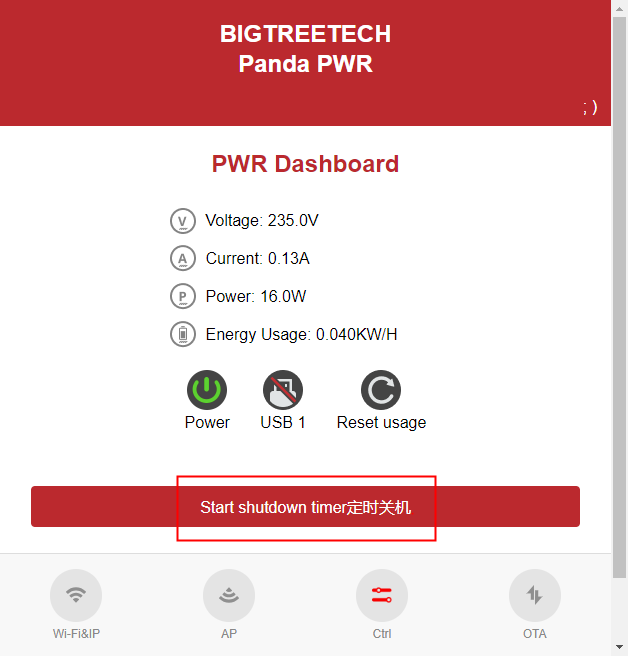
Control Panda PWR By WEB-UI
Basic control
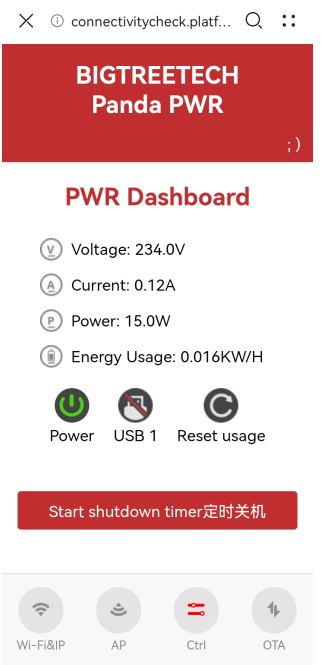
- Click the "Power" button to toggle the external power supply on and off.
- Click the "USB 1" button to toggle the USB1 port on and off.
- Click the "Reset Usage" button to clear the power consumption data.

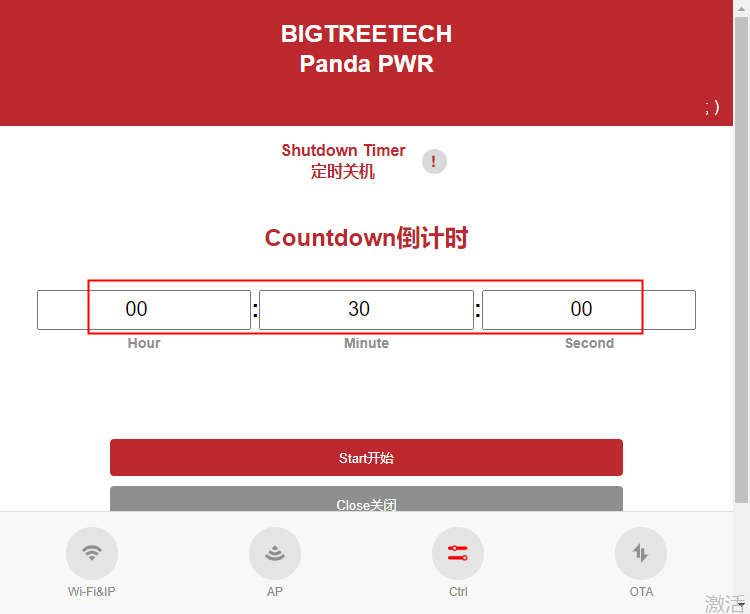
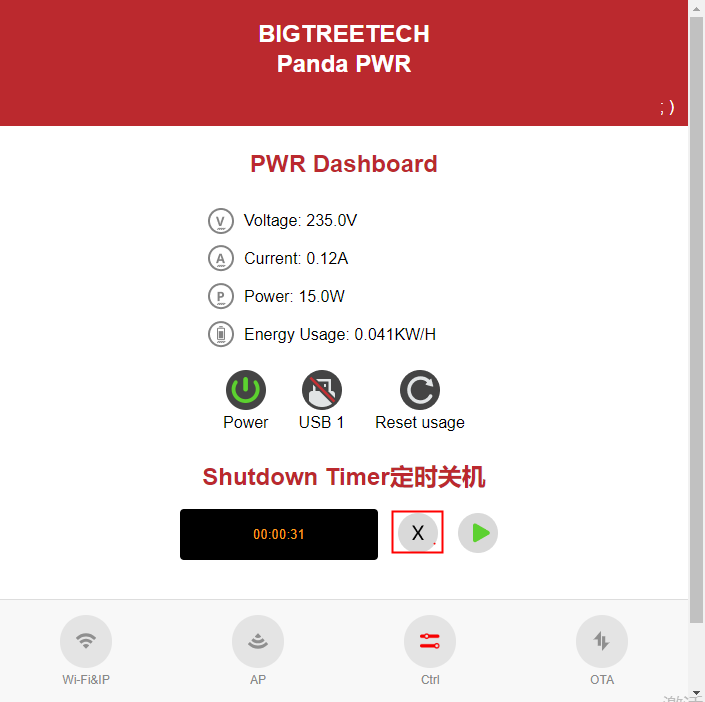
Countdown control
-
Click the "Start shutdown" button and enter the target time.
-
Pause/Continue Countdown
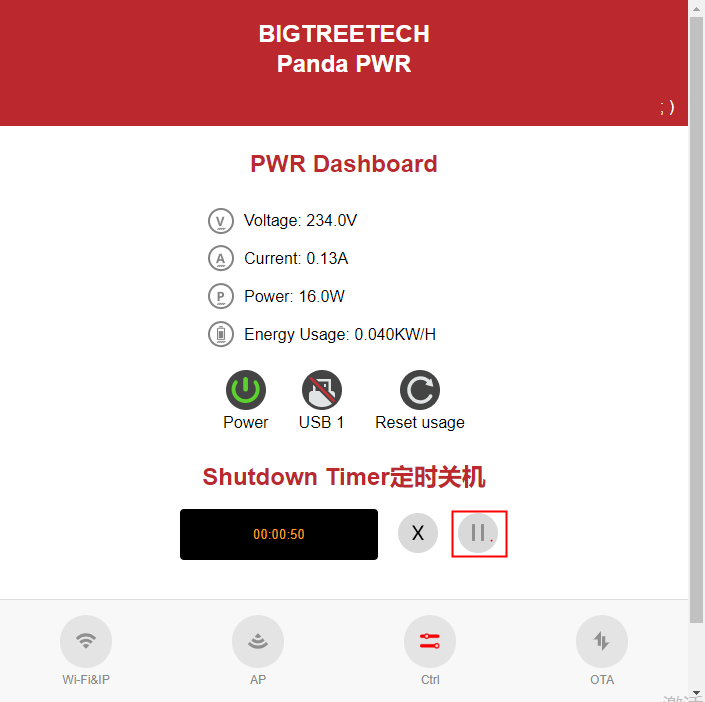
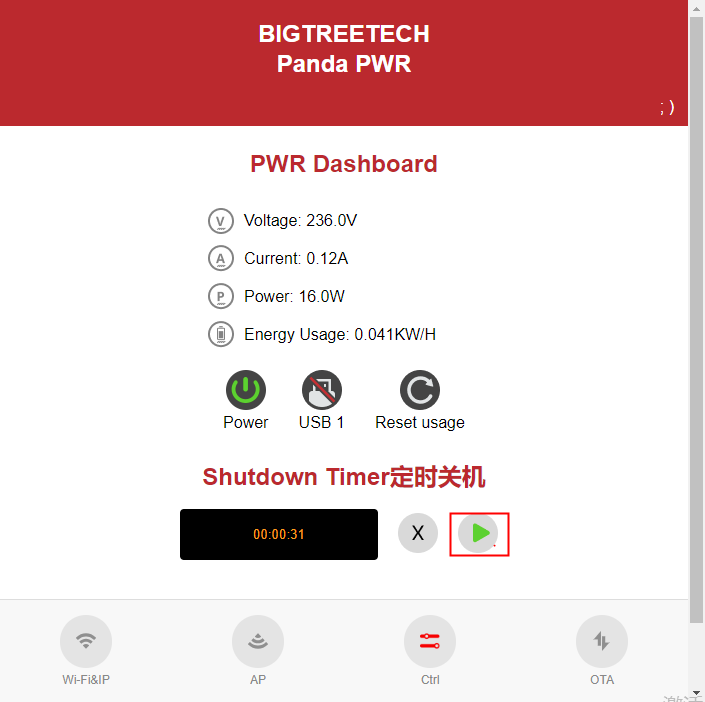
- Stop Countdown
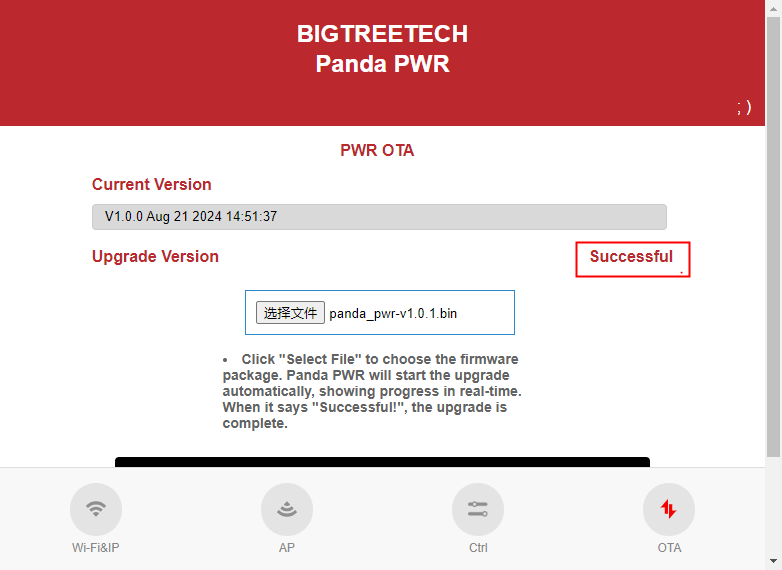
Over The Air Updates
- Click the "OTA" button to access the OTA page.
- Click the "Select File" button to choose the .bin file you wish to update.

- Once the update is complete, "Successful" will appear on the right side of the screen.
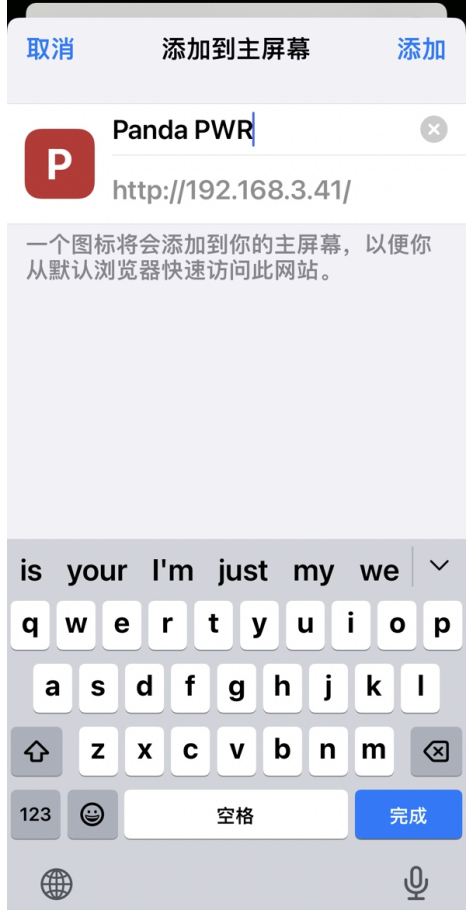
Quick access
Save the IP browsing page to your phone's home screen for quick and easy access in the future.
Control by Panda Touch 
Bind to Panda Touch
- Open the Panda PWR page.
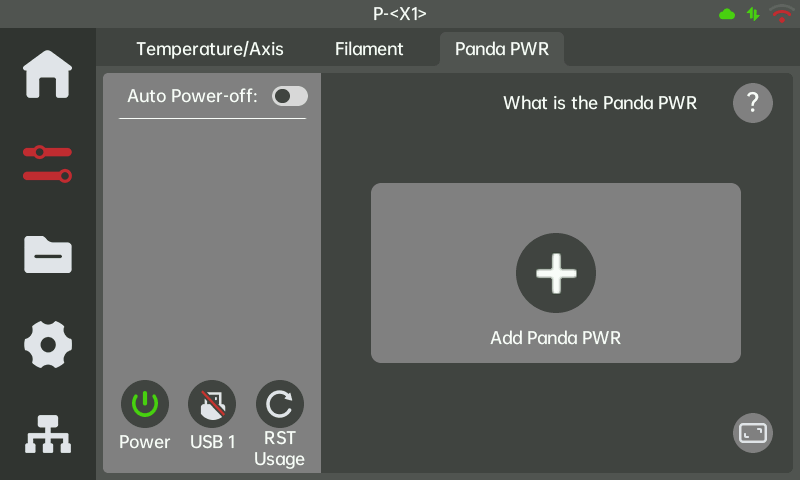
- Press and hold the "Bind" button until the blue light starts flashing (approximately 3 seconds).
-
Place the Panda Touch on the Panda PWR casing to establish a connection.
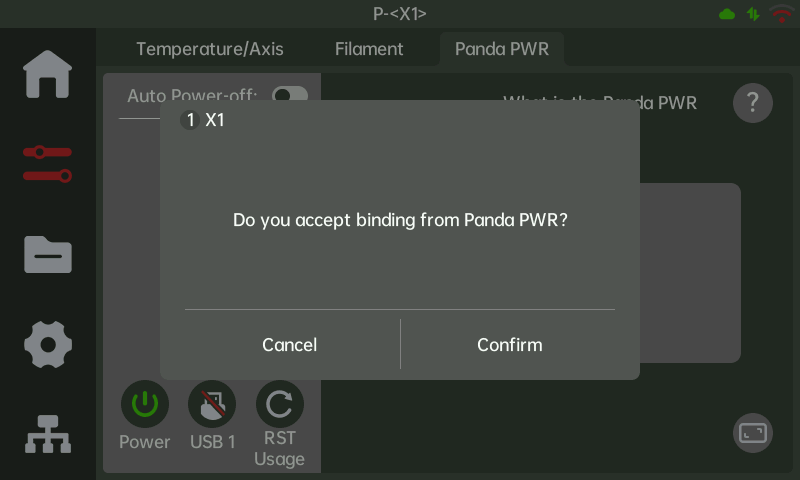
-
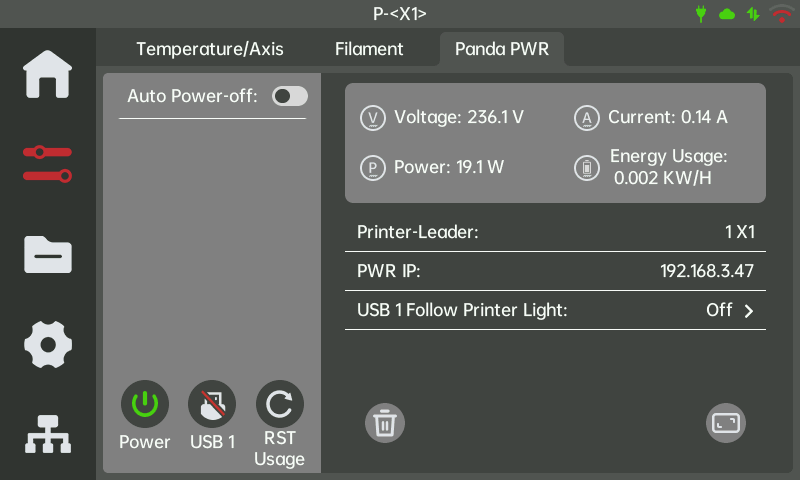
The Panda PWR data will be displayed on this page once the binding is successful.
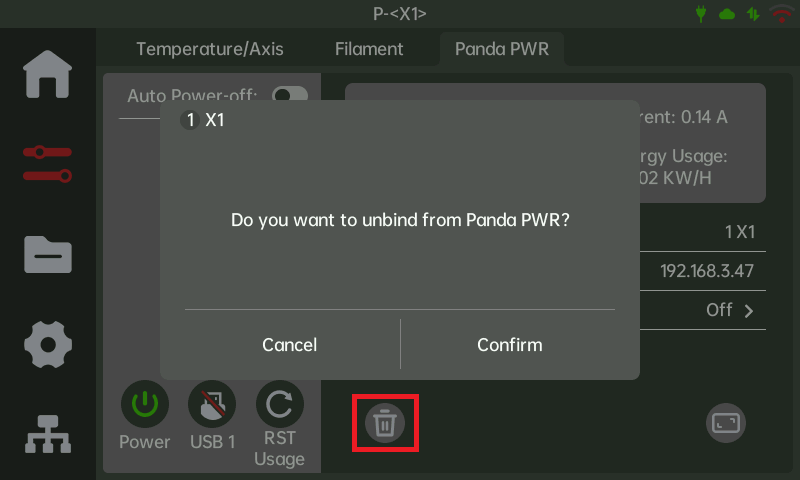
Unbind With Panda Touch
- To bind the Panda PWR to another device, unbind the current connection first.
Shut Down After Printing Is Complete
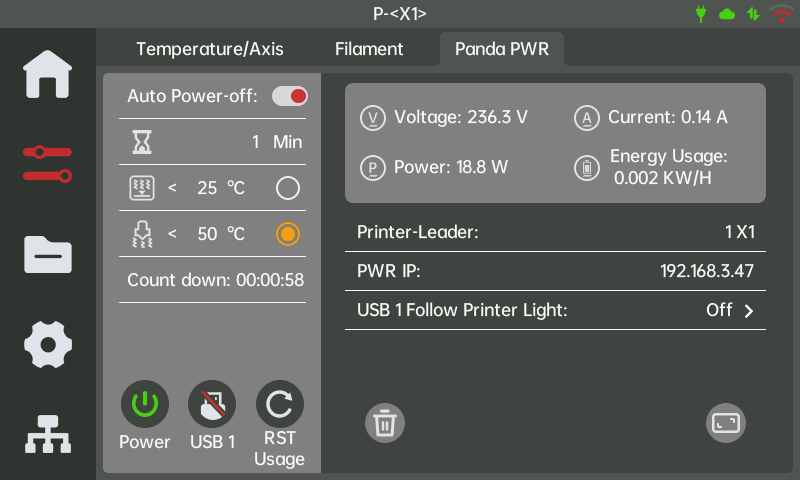
When you need the printer to shut down after printing, activate the auto power-off switch, set the countdown time and temperature limit values, and start the countdown when the conditions are met. After the countdown completes, Panda PWR will automatically cut off the power supply to the printer.
- Activate Auto Power-Off
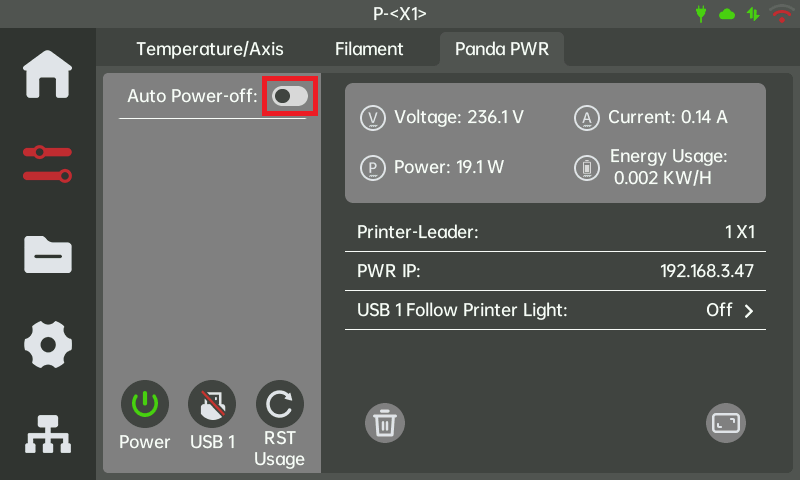
- The countdown will start automatically when the printer is online and the temperature reaches the set limit. If conditions are not met, the countdown will pause and resume once conditions are met again.
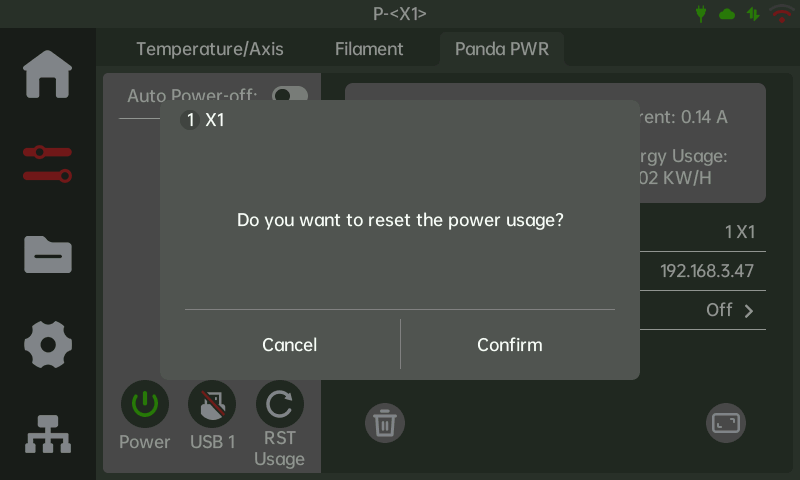
Clear The Power Consumption
The Panda PWR records the power consumption of the load. To reset the data, click the "RST Usage" button.
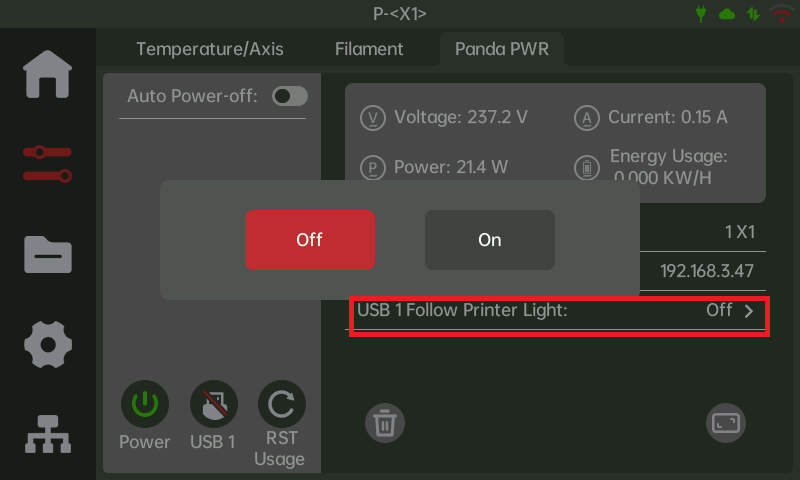
USB1 Follows the Printer Light
- Setting to ON: USB1 will mimic the printer's LED changes. If the LED is on, USB1 outputs 5V; if off, the output is disabled.
- Setting to OFF: USB1 operates under manual control only, disregarding the printer's LED status.
Firmware
Firmware History
V1.0.0.1
Bug Fixes
- Can not bind to Panda Touch.
- Can not scan wifi.
Functional Optimizations
- Add mdns server Panda Touch can get Panda PWR's ip from LAN.
- Optimized the layout of ssid list.
- Supports up to 63 characters for WiFi password.
V1.0.0
- Initial release of factory firmware.
Feature Requests
We welcome your suggestions for future firmware enhancements. Please submit your feature requests on the official Panda PWR GitHub repository.
Recovery Tool
If the Panda PWR fails to start and cannot perform an OTA update, use the recovery tool to restore functionality. Recovery Tool Download
Technical Support
Was this page helpful? If you have any questions about product usage or encounter issues, please contact our after-sales team at service001@biqu3d.com.