Panda Extruder

Product Link: https://biqu.equipment/products/biqu-panda-extruder
Wiki: https://bttwiki.com/Panda%20extruder.html
Introduction
The BIQU Panda Extruder is an exceptional durability-focused upgrade for P1P, P1S, X1C, and X1E printers. Crafted from aerospace-grade CNC anodized aluminum, it reduces inertia during high-speed printing, which results in superior print quality. Additionally, its free-flowing ventilation design efficiently dissipates heat, preventing overheating and maintaining consistent and reliable performance.
Feature Highlights
Enhanced Print Quality: A lightweight CNC-machined structure consisting of aerospace-grade aluminum makes it light yet sturdy. Reduced inertia with high-speed printing results in superior print quality and finer prints.
Optimized Heat Dissipation: The free-flowing ventilation design for exceptional heat dissipation prevents overheating while maintaining smooth operation all round.
Durability with Style: Combining aesthetics with functionality, the Panda extruder's vibrant color scheme and corrosion-resistant material offer both visual appeal and lasting performance.
Drop-In Upgrade: Compatible with X1C, X1E, P1P, and P1S stock gears. Also works flawlessly with our Panda series accessories such as the Panda Claw, Panda Revo, and Panda Jetpack.
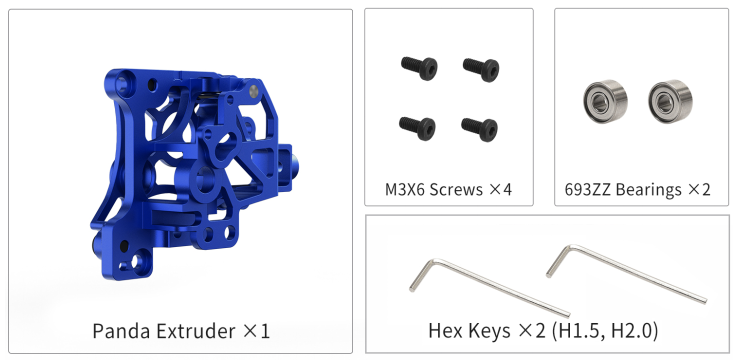
Packaging List
Replacement Guide
In this guide, you will learn how to replace the stock extruder with Panda Extruder on the P1 printer.
Step 1: Remove the Stock Extruder from the Toolhead
1.Begin by retracting the filament from the extruder and then switch the power off.
2.Remove the toolhead cover as shown.
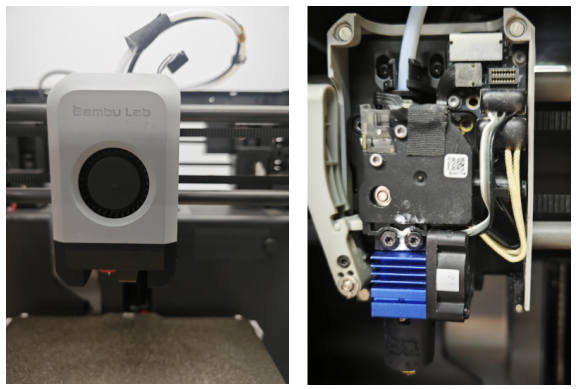
3.Disconnect the connector, as highlighted by the red circle.

4.Using the H1.5 hex key, loosen the screw as indicated by the arrow.
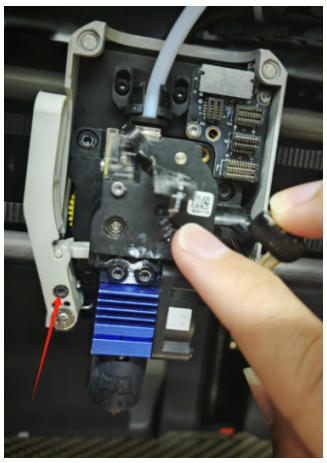
5.Use the H2.0 hex key to remove the three M3 screws as directed by the arrow, and then disassemble the PTFE tube by pressing the Bowden tube connector and pulling it out.

The stock extruder has been successfully removed.

Step 2: Disassemble the Stock Extruder
After the stock extruder has been removed from the printer, it's time to disassemble it.
1.Begin by disassembling the hotend. Using the H2.0 hex key, remove the two screws highlighted in red in the image below.
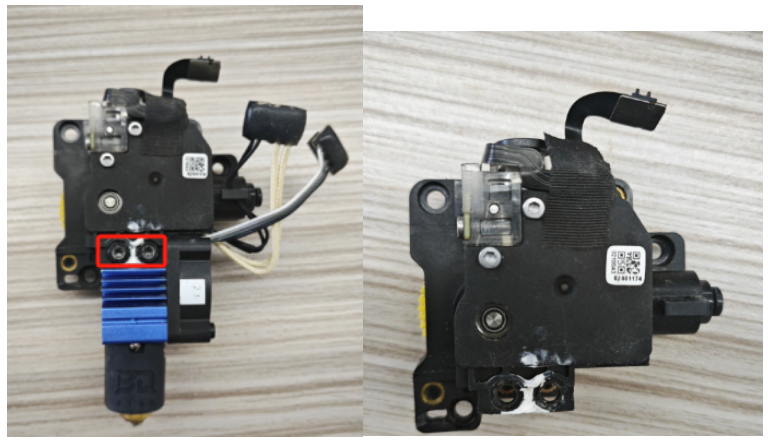
2.Next, use the H1.5 hex key to remove the filament sensor.
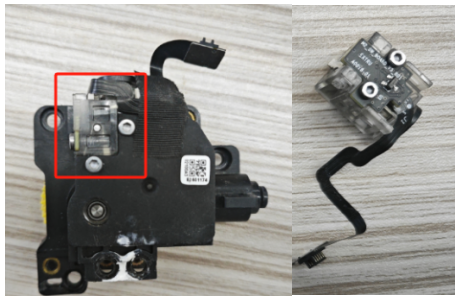
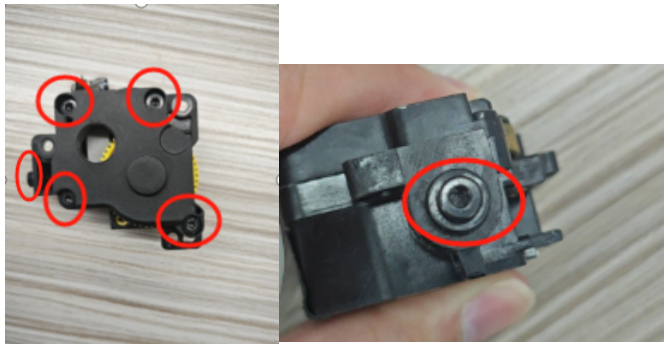
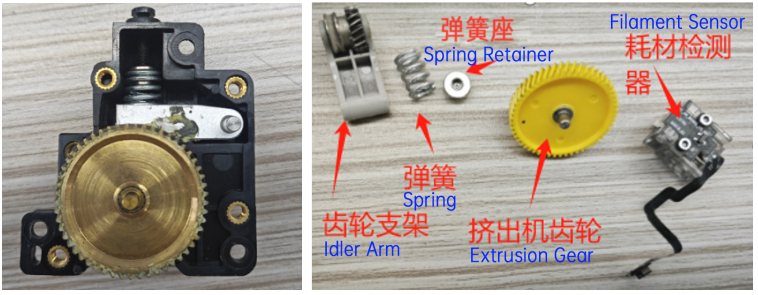
3.Flip the extruder over and use the H2.0 hex key to remove the five screws indicated in the image below. This will allow you to disassemble the internal components, revealing the idler arm, spring, spring retainer, and extrusion gear.
Step 3: Assemble the Panda Extruder
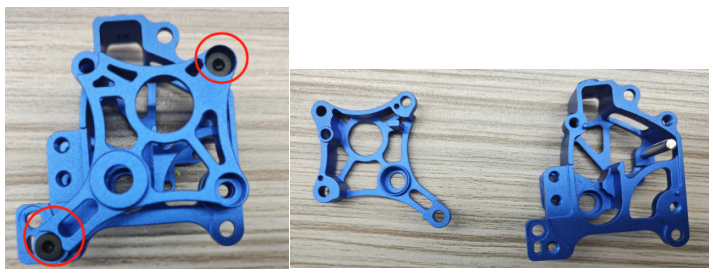
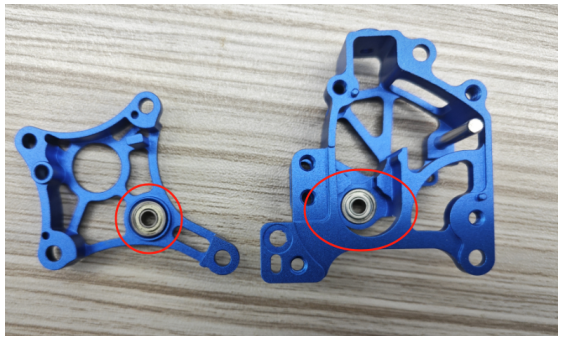
1.Unscrew the two screws circled in the image below to begin the Panda Extruder assembly.
2.Install the included two 693ZZ bearings into their designated slots.
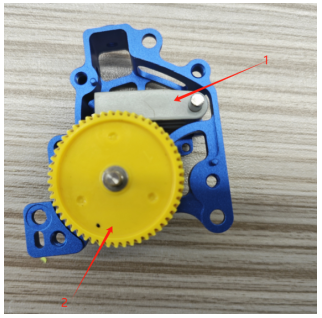
3.First, place the stock idler arm, followed by the stock extrusion gear.
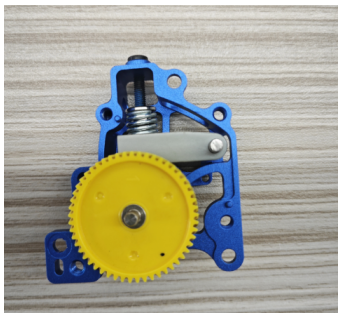
4.Insert the stock spring and spring retainer, securing them in place with screws.
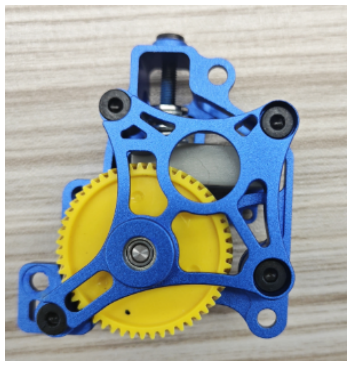
5.Assemble the Panda Extruder and secure it using the four included M3 screws.
- Properly align the filament sensor and secure it with screws.

- Reattach the hotend and tighten it with screws.
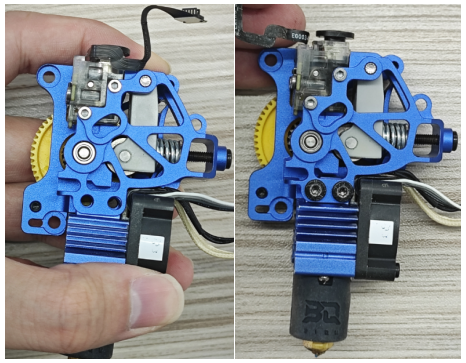
Step 4: Assemble the Panda Extruder onto the Toolhead
1.Install the Panda Extruder as indicated in the diagram, using the H2.0 hex key to fasten it with the screws.
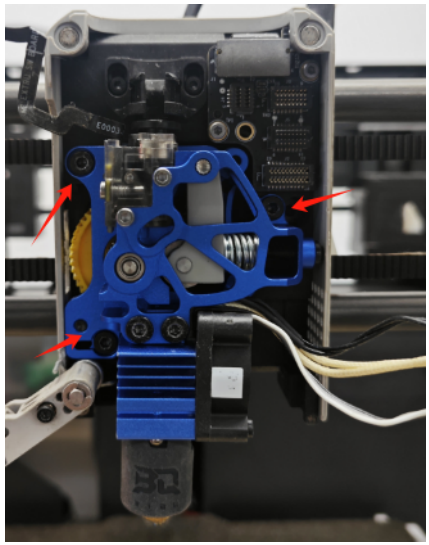
2.Position the cutter within its slot and secure it by tightening the screw indicated in the diagram with the H1.5 hex key.
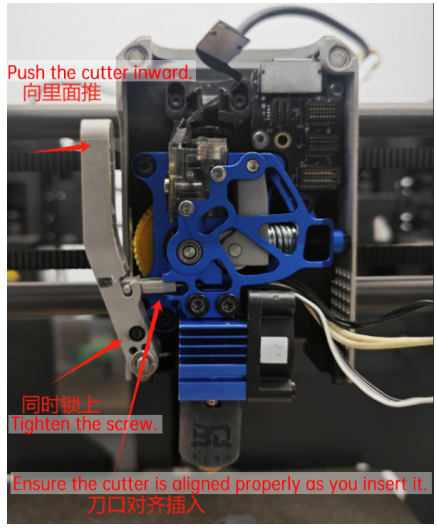
- Insert each of the three plugs into their respective sockets.

4.Insert the PTFE tube.
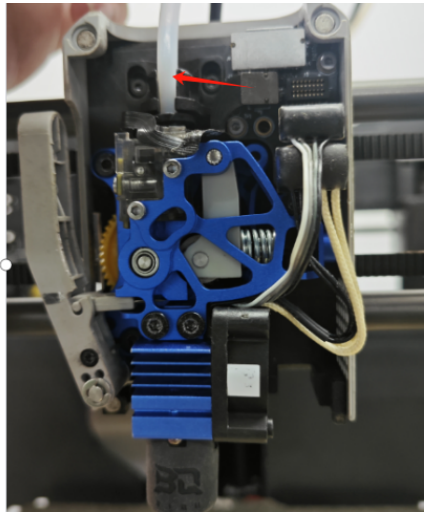
- Connect the fan plug and re-attach the cover.
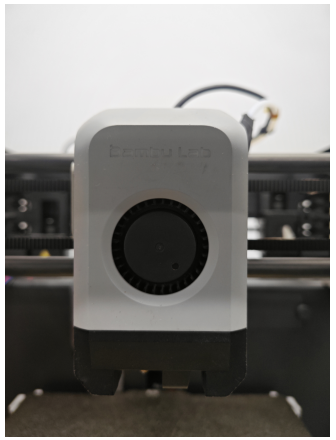
Congratulations! You've successfully upgraded to the Panda Extruder. Enjoy enhanced performance and precision in your printing.
Product Purchase Link
https://biqu.equipment/products/biqu-panda-extruder
If you have any issues with the product, please submit a support ticket.
https://biqu3d.com/pages/submit-a-ticket
Navigation:
BIQU Official Website: http://biqu3d.com
BIGTREETECH Official Website: http://bigtree-tech.com
Online Store: https://biqu.equipment
Community: https://community.biqu3d.com