Panda Hub Plus

- Product Link: Buy Here
Revision Log
| Version | Date | Update Notes |
|---|---|---|
| v1.00 | Sept 10, 2025 | Initial Release |
Product Overview
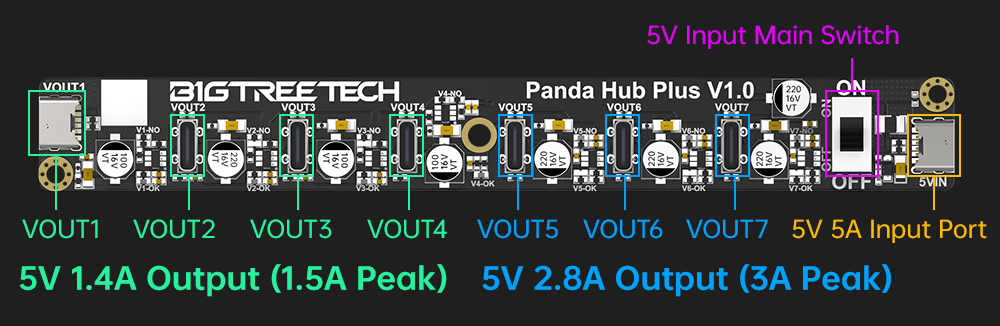
Panda Hub Plus is a compact power distribution unit for Bambu Lab P1, X1, and A1 series printers. It accepts a 5V/5A input from a standard adapter or the Panda Branch Plus Type-C port and distributes power through seven Type-C outputs, enabling the simultaneous operation of up to seven devices.
The Panda Hub Plus features a printable case for a clean, professional installation inside the P1 printer chamber. It ensures reliable performance for all connected devices while maintaining safe and organized cable management.
Features
-
Dedicated power hub for Bambu Lab printers
-
Supports 5V/5A input (adapter or Panda Branch Plus Type-C port)
-
Provides 7 × Type-C outputs (3 × 3A, 4 × 1.5A)
-
Printable case allows internal installation inside the P1 Series chamber
Specifications
-
Dimensions: 160 × 20 mm
-
Input Port: 1 × Type-C
-
Output Ports: 7 × Type-C (3 × 3A, 4 × 1.5A)
-
Input Voltage: DC 5V
-
Compatible Models: For Bambu Lab X1, P1, and A1 series
Interface Diagram
Installation Instructions
Download the required case files for your printer model from the GitHub repository, then print the case.
For A1 mini printer
-
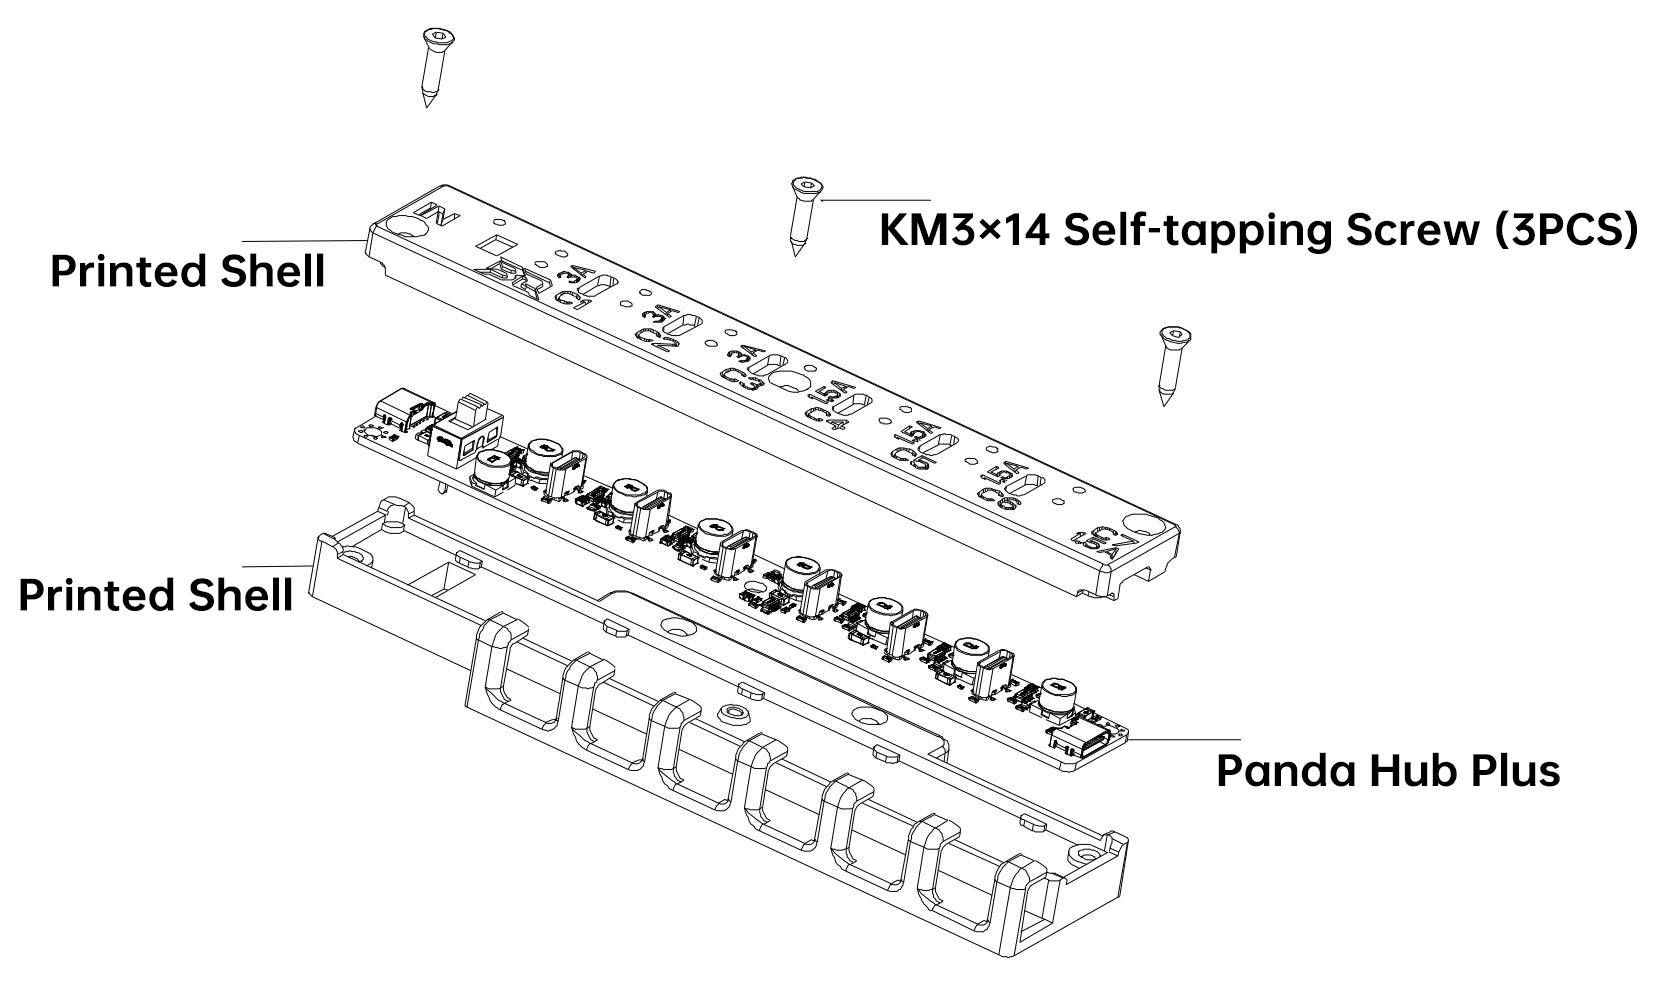
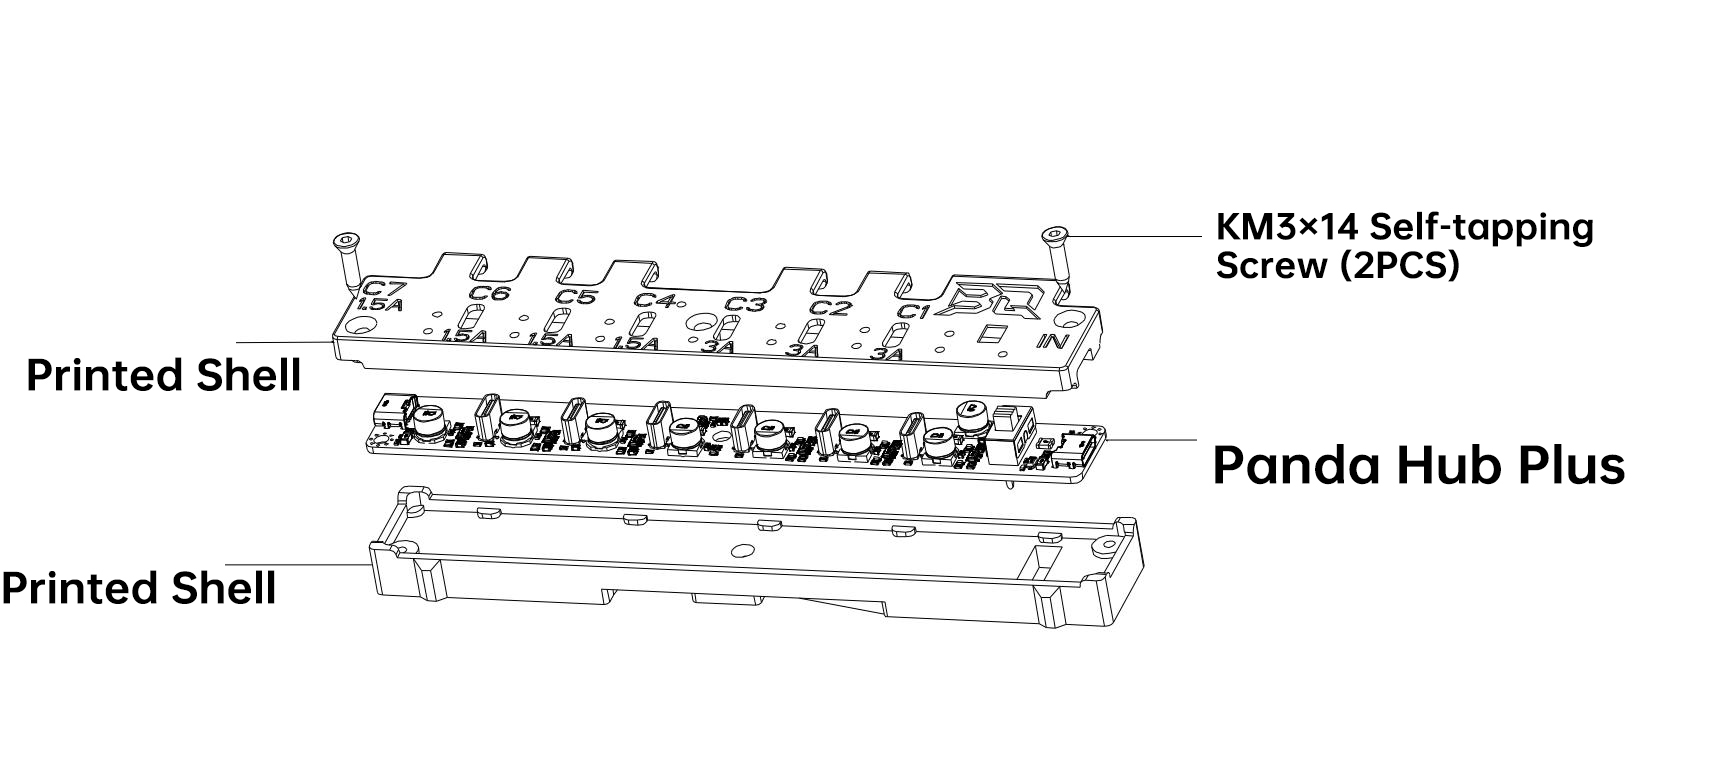
Place the Panda Hub Plus into the printed upper and lower shells, and secure it with KM3×14 self-tapping screws.

-
Insert the printed bracket into the position shown and secure it with KM3×20 machine screws.

For A1 Printer
-
Place the Panda Hub Plus into the printed upper and lower shells, and secure it with KM3×14 self-tapping screws.
-
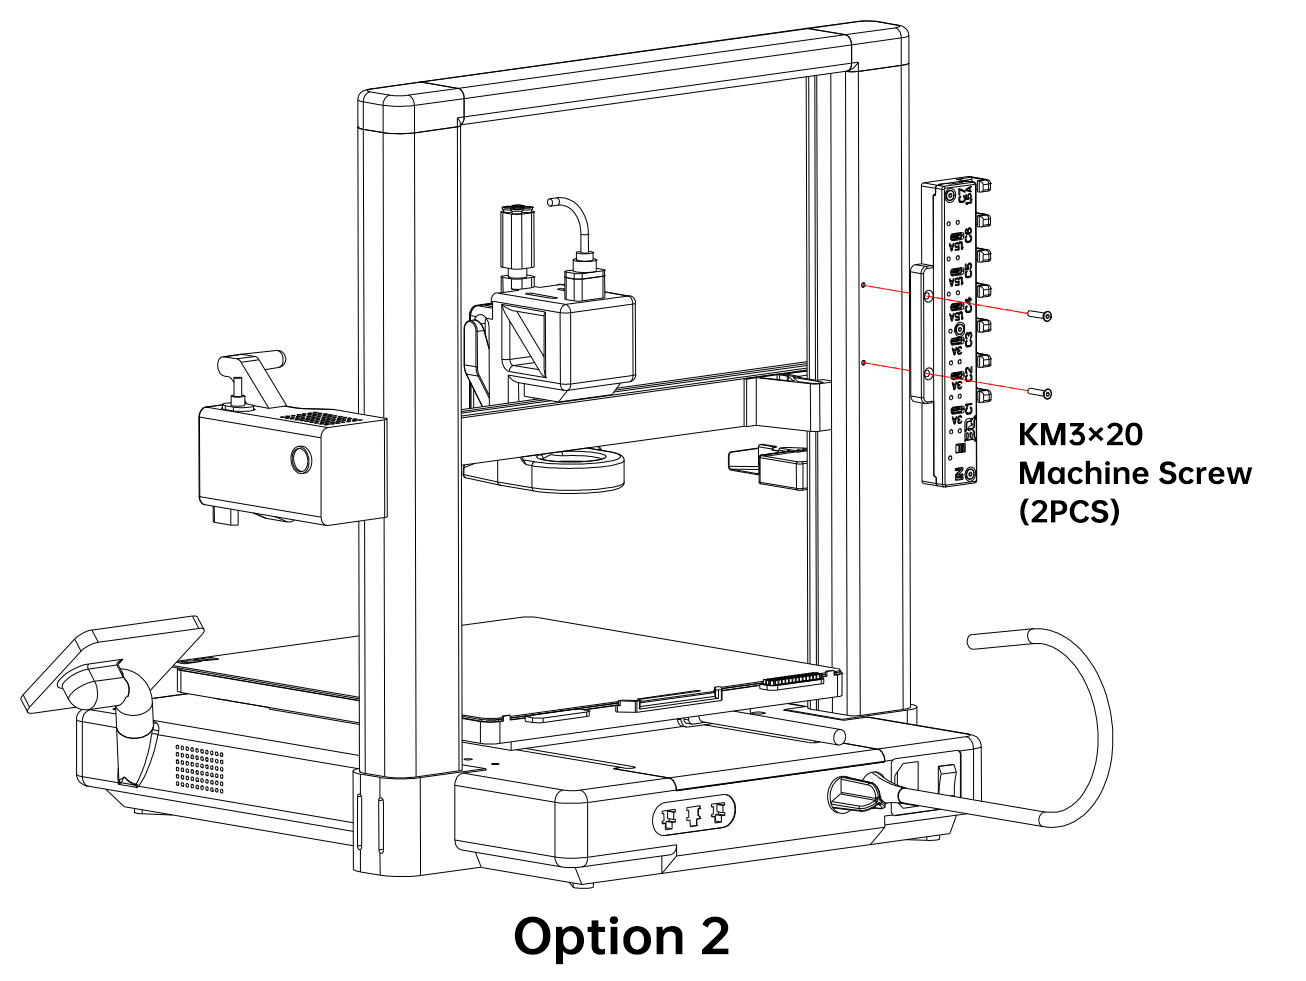
Insert the printed bracket into the position shown and secure it with either the printed thumb screw or M3×20 machine screws.
Option 1: Attach directly to the A1 Z-axis using the printed thumb screw.

Option 2: Use two KM3×20 machine screws to secure it to the A1 Z-axis.
For X1 Printer
-
Place the Panda Hub Plus into the printed upper and lower shells, and secure it with KM3×14 self-tapping screws.

-
Insert the printed bracket into the position shown and secure it with M3×20 machine screws.
Note: This method requires two M3×20 machine screws to secure the bracket to the rear-right side of the X1.
For P1 Printer
-
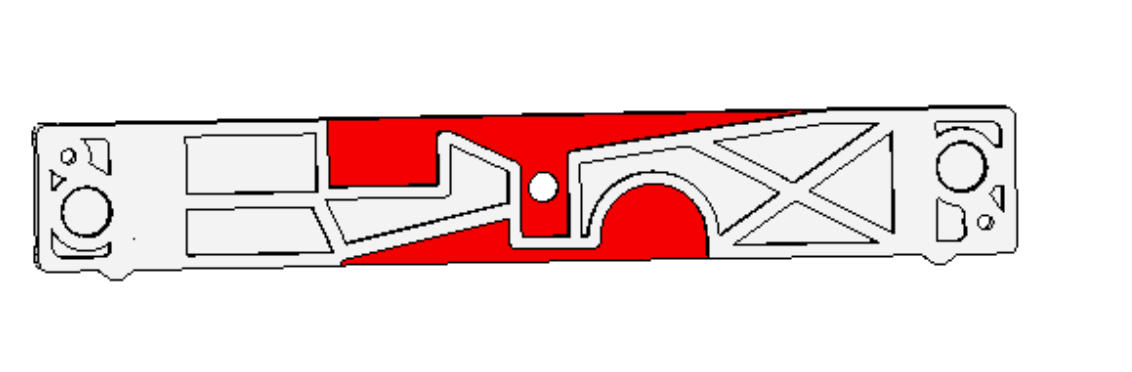
Place the Panda Hub Plus into the printed upper and lower shells, and secure it with two KM3×14 self-tapping screws.
Note: As shown in the red-marked area of the printed lower shell, the bottom support must be removed.
-
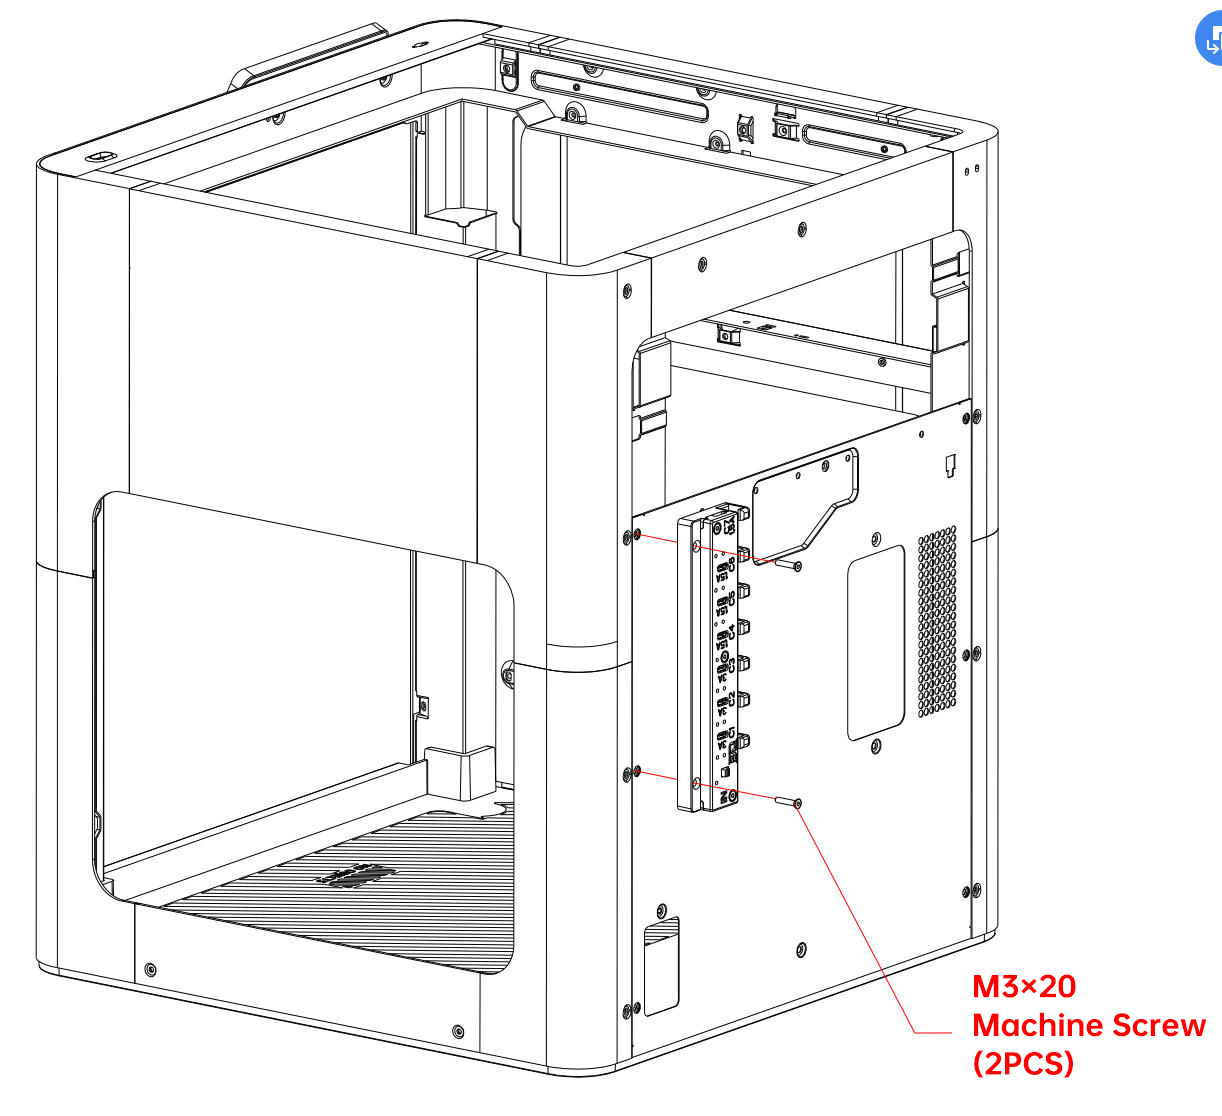
Insert the printed bracket into the position shown and secure it with M3×20 machine screw.

Note: This method requires one M3×20 machine screw at the position shown in the image.
Technical Support
Was this page helpful? If you have any questions about product usage or encounter issues, please contact our after-sales team at service001@biqu3d.com.