Panda Aura A1 & A1mini

- Product Link: Buy Here
Revision History
| Version | Date | Update Content |
|---|---|---|
| v1.00 | September 12, 2025 | Initial Version |
Important Notes
-
The Panda Aura product line consists of two dedicated models: the Panda Aura A1 for the A1 printer and the Panda Aura A1 mini for the A1 mini printer. Please be aware that the term "Panda_Aura" is often used as a collective name for both products.
-
As the Panda Aura A1 and A1 mini are designed solely to monitor printer status and do not issue commands, their functionality remains independent and will not be affected by Bambu Lab firmware updates. For more information on affected and unaffected features, please refer to the Bambu Lab Official Announcement.
-
Panda Aura A1 & A1 mini only support connection to 2.4G Wi-Fi.
-
After connecting Panda Aura A1 & A1mini's AP hotspot in the setup interface, the Web UI interface will directly open. Due to permission issues on some phones, firmware uploads may not be possible on this page. Please visit the Web UI in a browser to upload files.
-
If you encounter any issues not covered in this wiki, please contact customer support via:
support01@bigtree-tech.com.
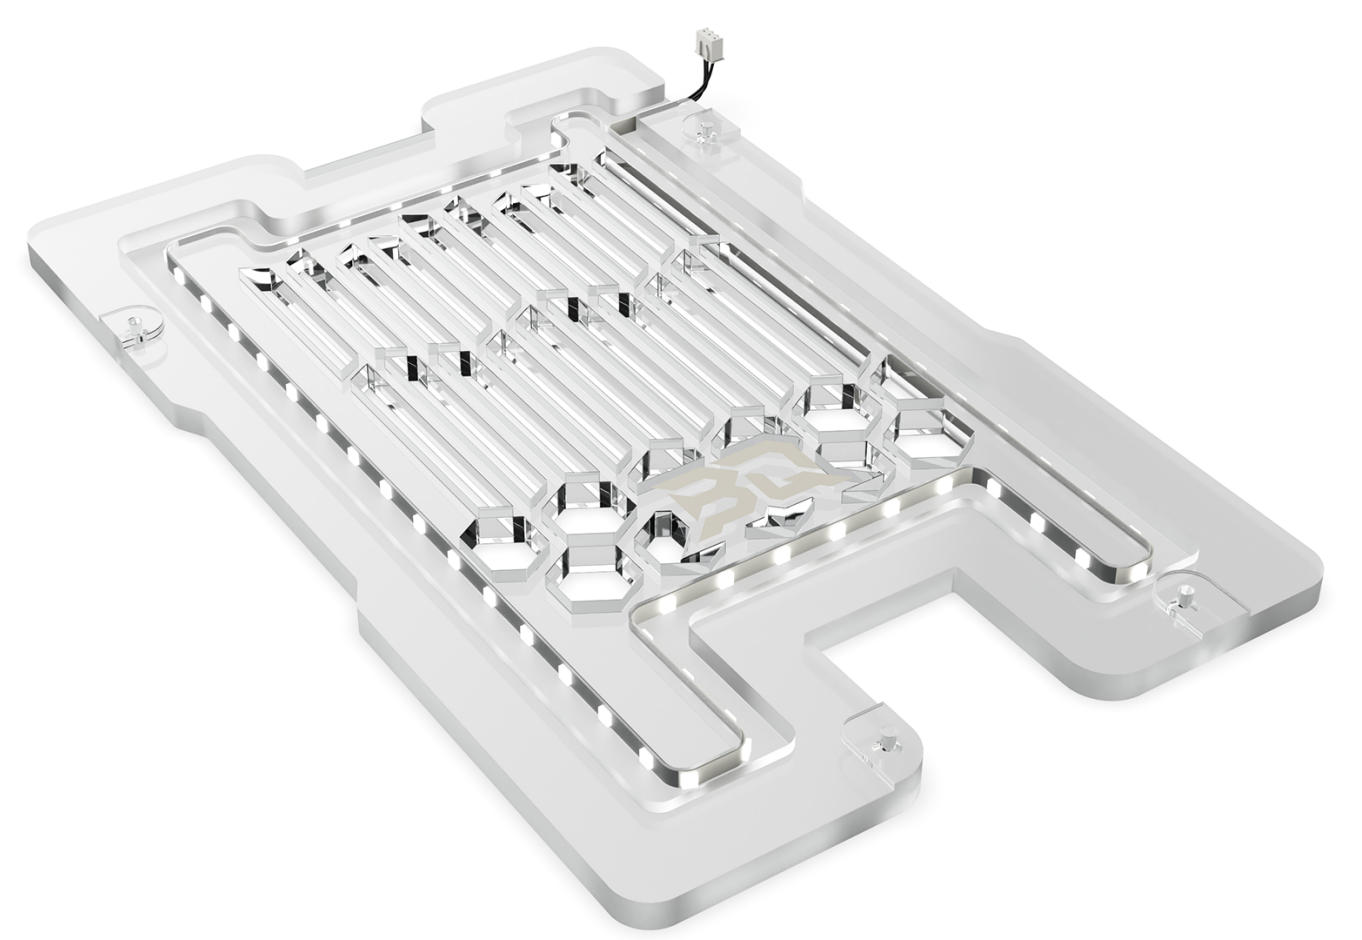
Product Overview
The Panda Aura A1 and A1 mini transform your Bambu Lab A1 printers into interactive desktop centerpieces. They provide real-time status updates through customizable RGB lighting and audio-visual alarms, which can be managed via a Web UI or an upcoming mobile app. Choose from preset scenes or create your own for a unique ambiance. By offering remote status visibility and dynamic light shows for events like print completion, these devices enhance both functionality and style.
Product Features
- Product Positioning: A1/A1 mini printer decorative light board and audio-visual alarm
- Customizable RGB light effects and sound effects (via Web UI and APP)
- Remote control of lighting effects via APP (coming soon), with scene interactions
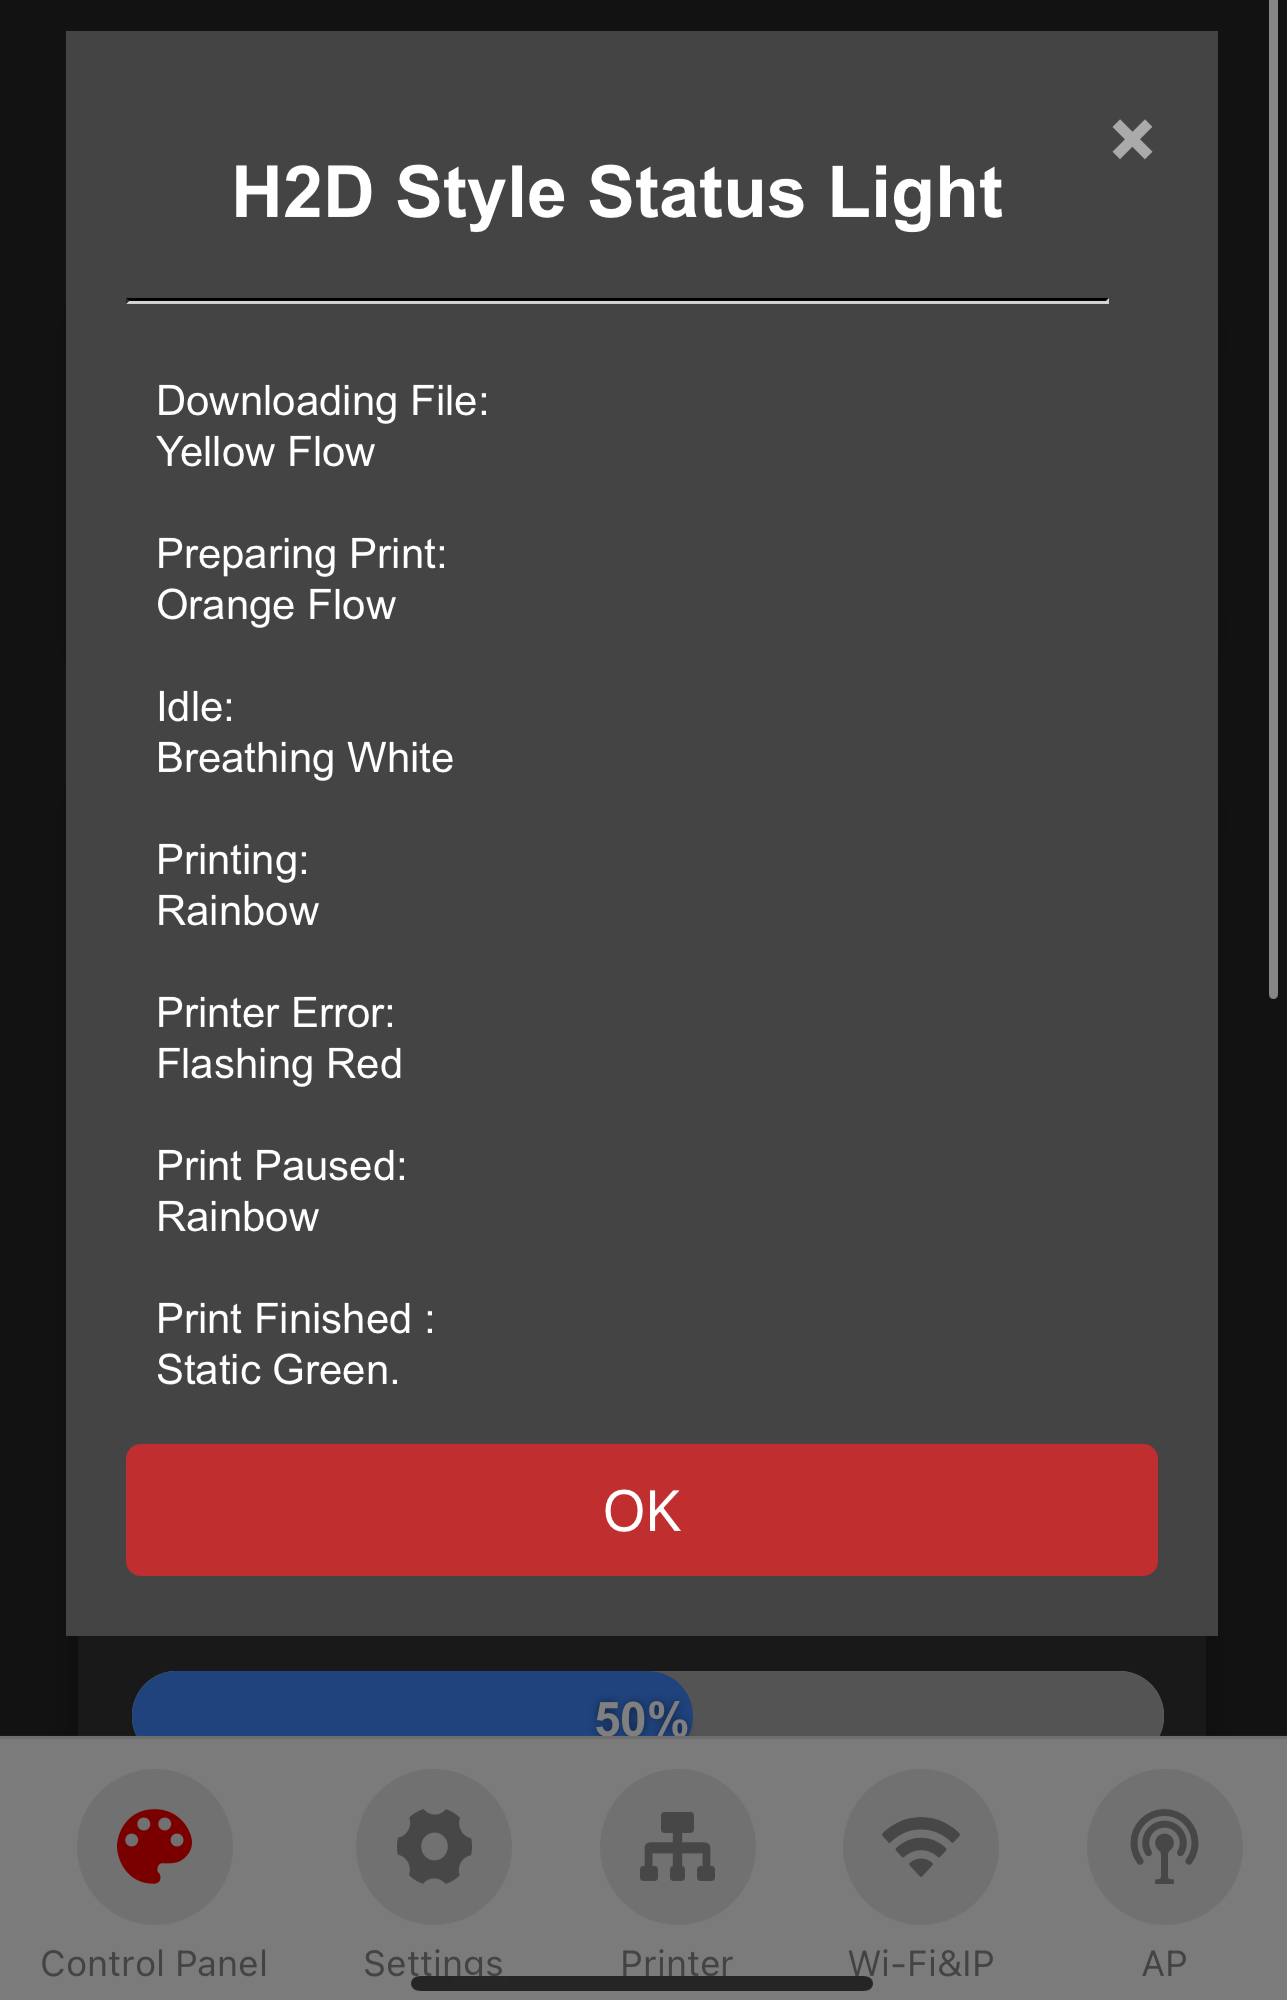
- Displays printing status (same logic as H2D printer status light)
- Audio-visual alarm for print completion and errors
Basic Parameters
| Microprocessor | Onboard ESP32-C3FH4 chip, RISC-V 32-bit single-core processor, up to 160 MHz |
|---|---|
| Storage | 384 KB ROM, 400 KB SRAM, 4 MB combined flash |
| Logic Voltage | 3.3V |
| Input Voltage | 24V |
| Current | Panda Aura A1: 0.53A; Panda Aura A1 mini: 0.46A |
| Power Input | Supports MX3.0 4pin & MX3.0 2pin |
| Light Board Material | Acrylic |
| RGB Light Beads | Panda Aura A1: 60 pieces; Panda Aura A1 mini: 55 pieces |
| Packaging Size | Panda Aura A1: 427x 406 x 37mm; Panda Aura A1 mini: 416x 230 x 37mm |
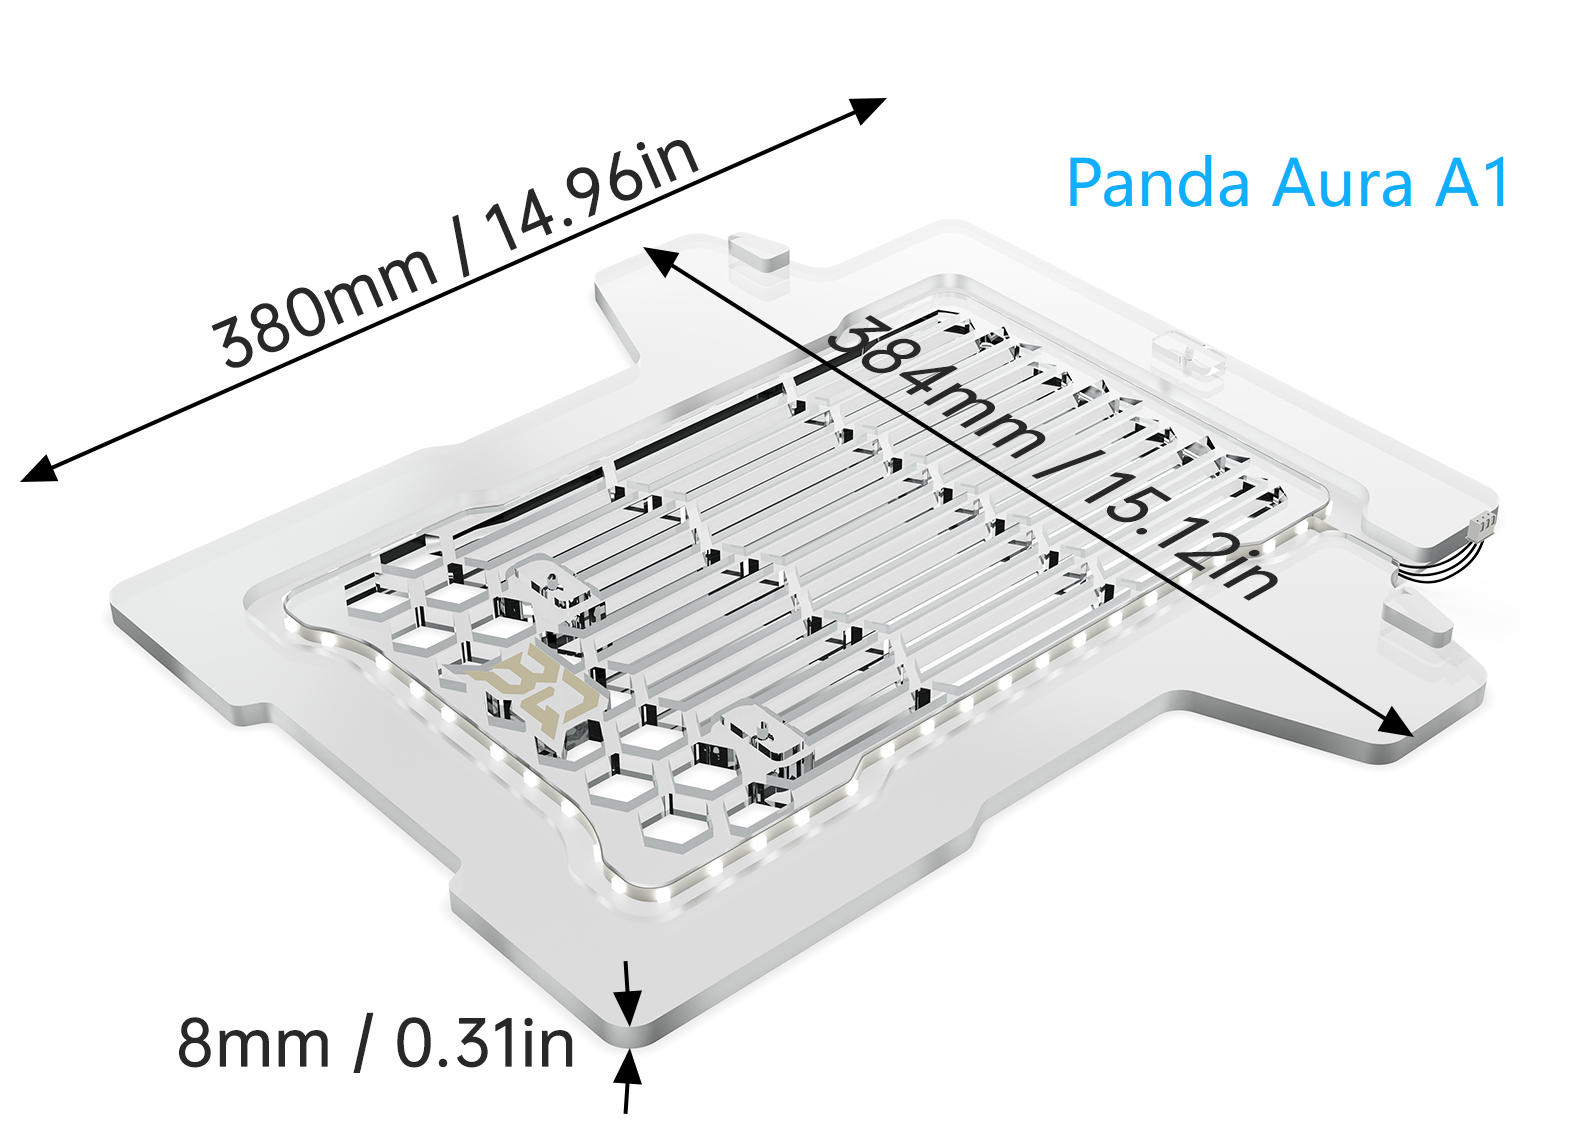
| Light Board Size | Panda Aura A1: 384x 380x 8mm; Panda Aura A1 mini: 314x 199 x 8mm |
| Speaker Power | 3W |
| Audio Format | Supports MP3 format |
| Communication | 2.4G Wi-Fi (IEEE 802.11 b/g/n) |
| Operating Temperature | 0℃ to +50℃ |
| Storage Temperature | -20℃ to +70℃ |
Product Size

Installation Guide
Installation on A1 Printer
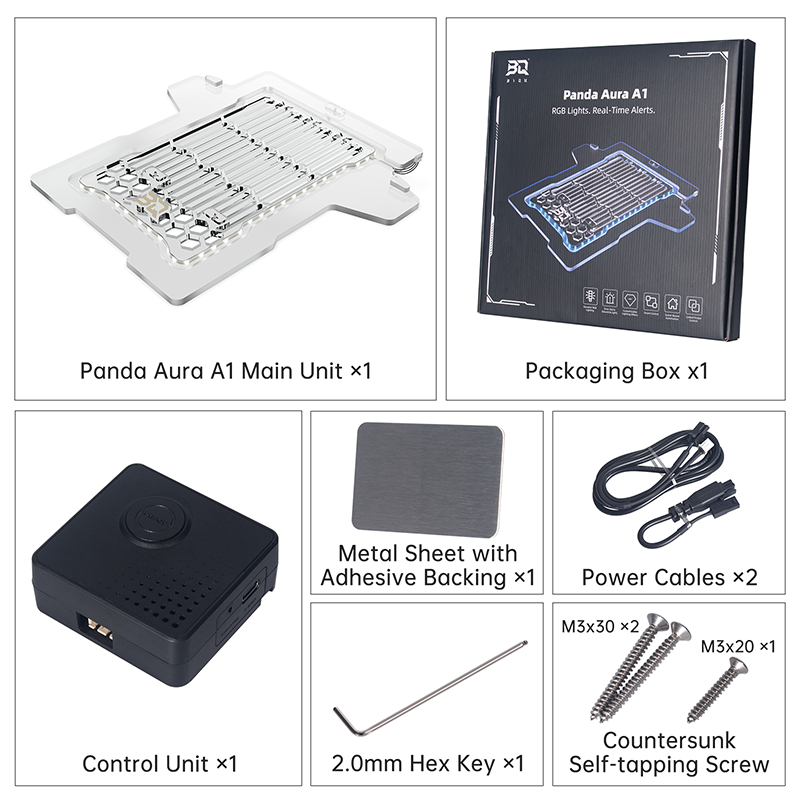
Panda Aura A1 Accessories List
Installation Steps
-
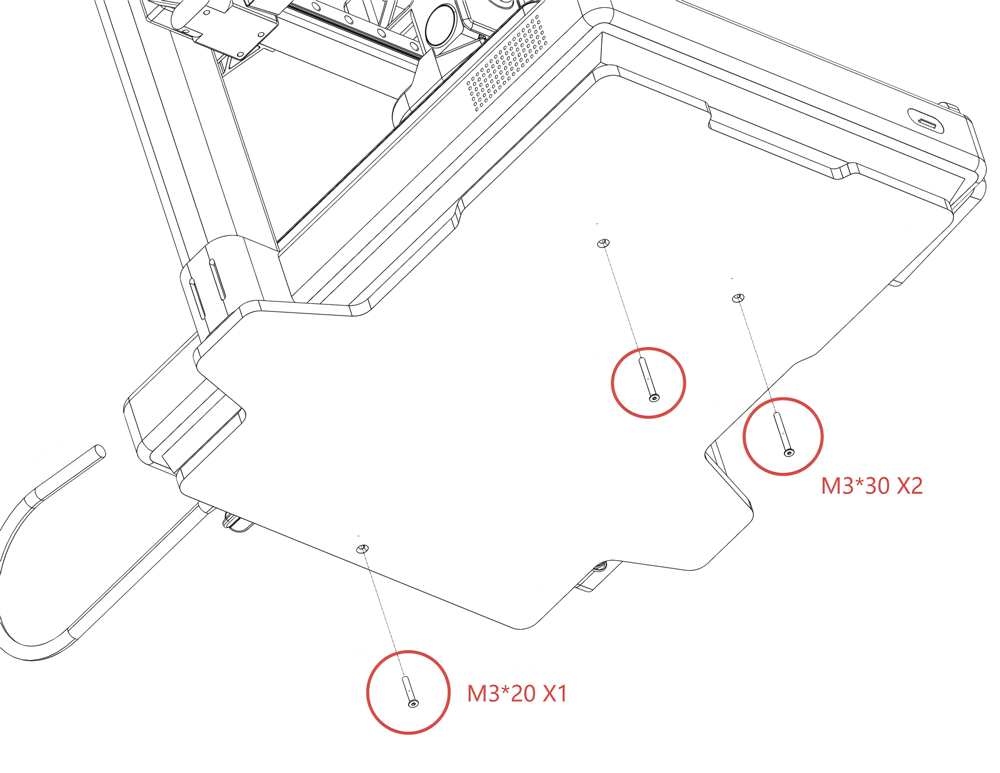
Remove the three screws from the bottom of the A1 printer as shown in the image.

-
Place the A1 printer on the Panda Aura A1 acrylic base.

-
Position the A1 printer so that it is centered and both the left and right columns are flush against the rear limit blocks.
-
For easiest installation, position the device at the edge of your work surface. Then, install the three self-tapping screws from the underside. This method avoids the need to flip the printer over.
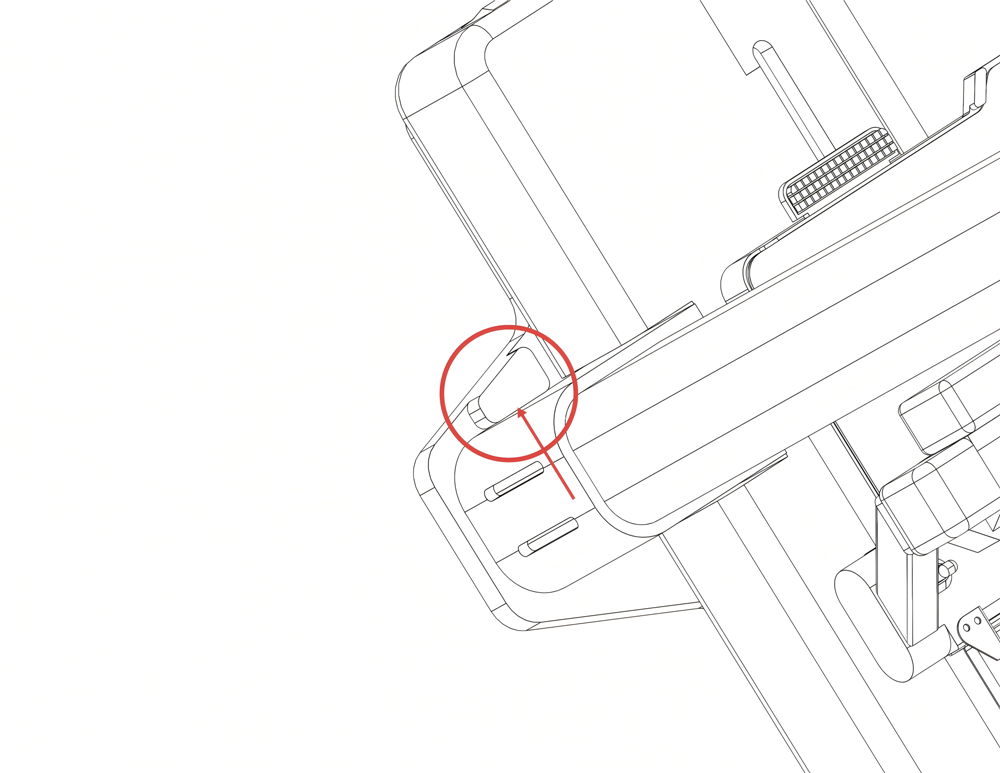
-
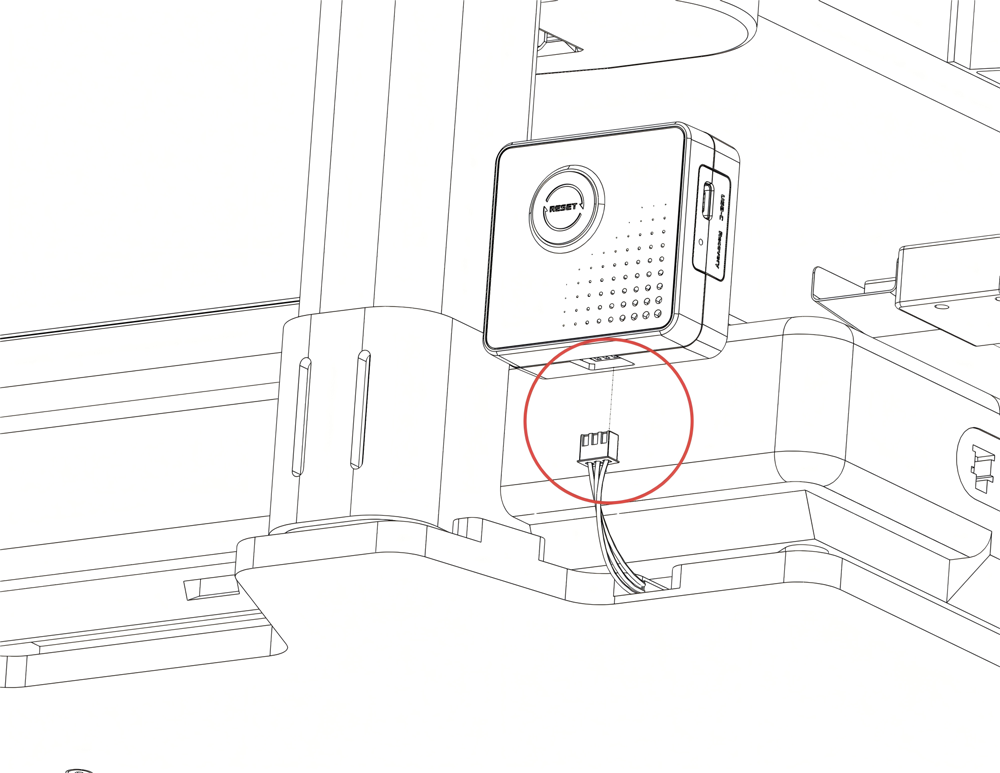
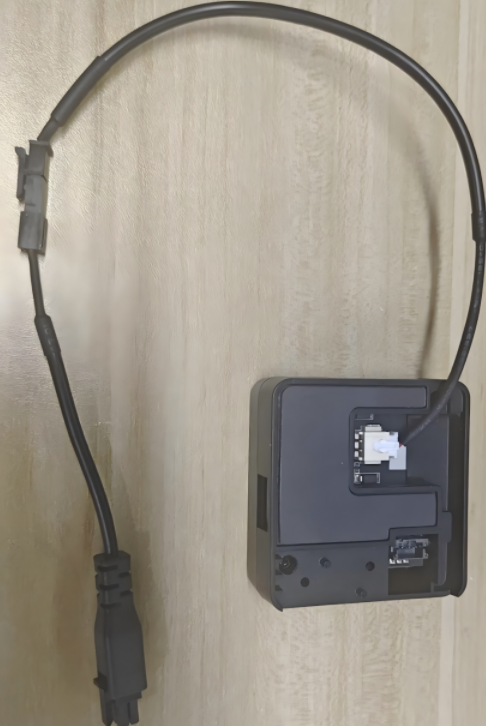
Connect the acrylic light board's cable to the port on the bottom of the control box, as illustrated.
-
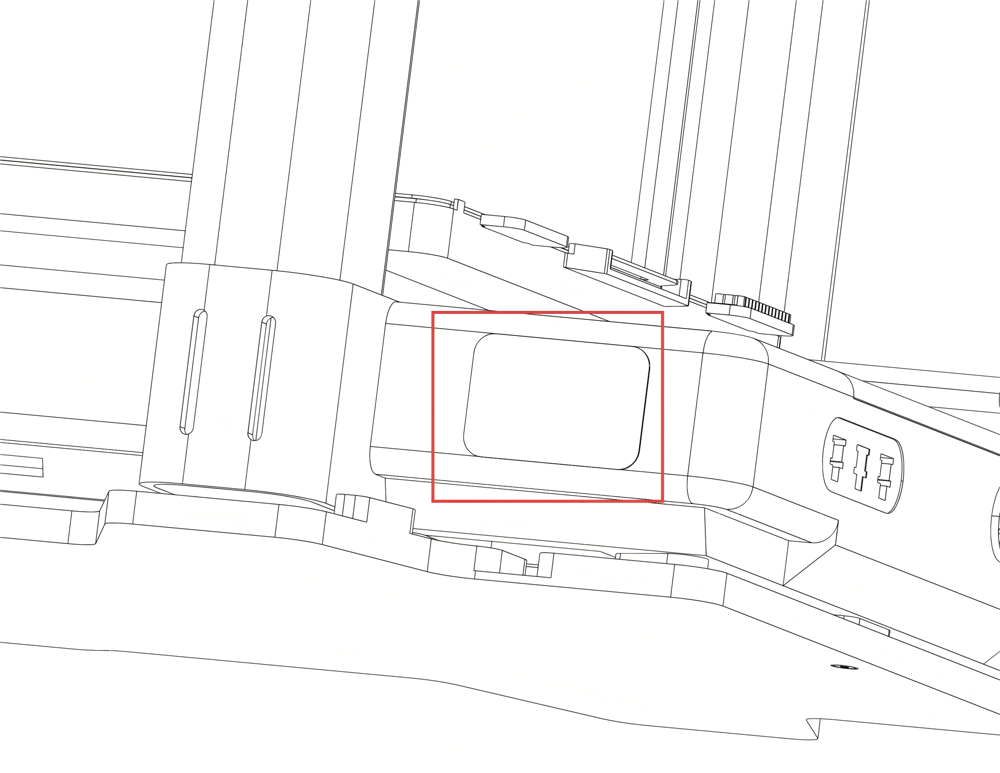
To determine the metal sheet's position, hold the control box in its intended location on the printer. Once positioned, attach the sheet to secure the box.
-
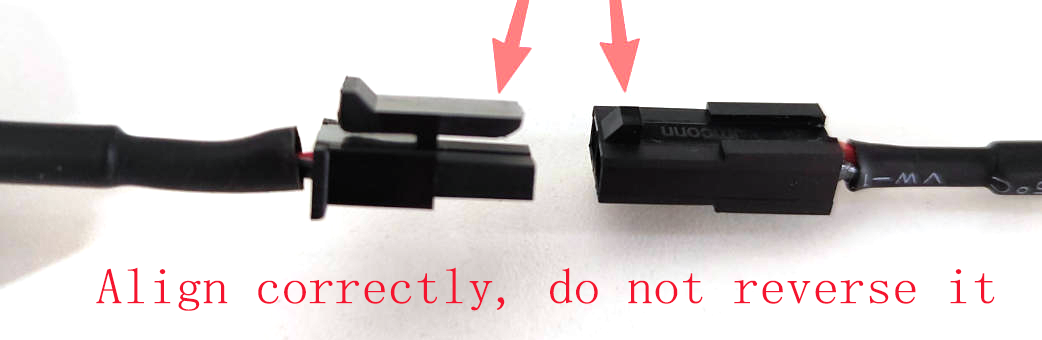
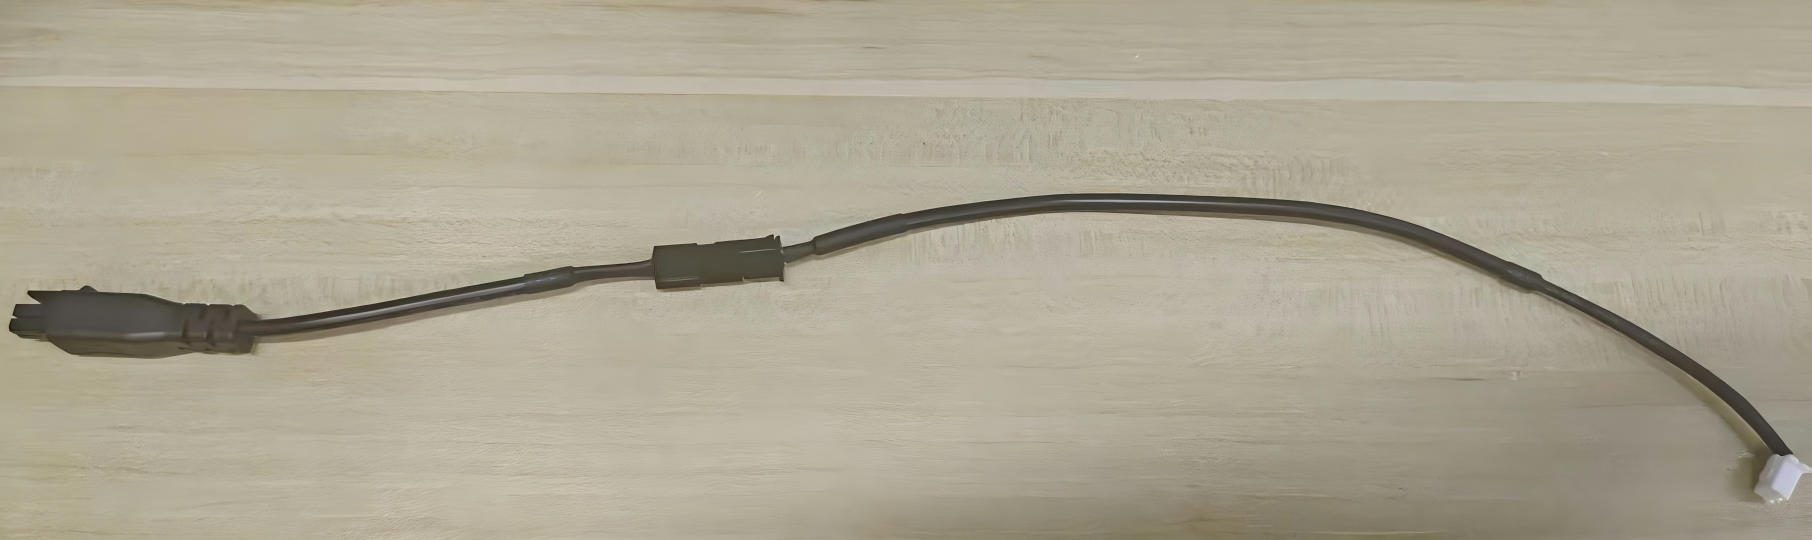
Connect the power cable and the adapter cable, ensuring the clips align.
-
Connect the 2-pin plug to the port on the back. When disconnecting, pull from the plug itself, not the cable.
-
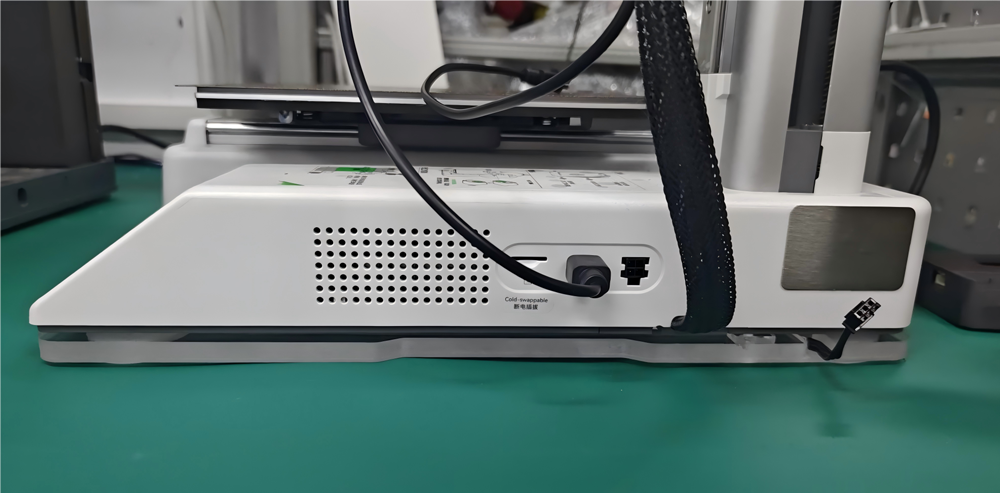
Locate an unused 4-pin MX3.0 power port on the back of the A1 printer. Connect the adapter cable's corresponding 4-pin MX3.0 plug to this port.

Powering through Panda Branch Plus
For an alternative power source, or if the printer's MX3.0 port is occupied, you can use the Panda Branch Plus (sold separately). Simply connect the Panda Aura A1's 2-pin MX3.0 plug directly into the Panda Branch Plus.

Installation on A1 mini Printer
Panda Aura A1 mini Accessories List

Installation Steps
-
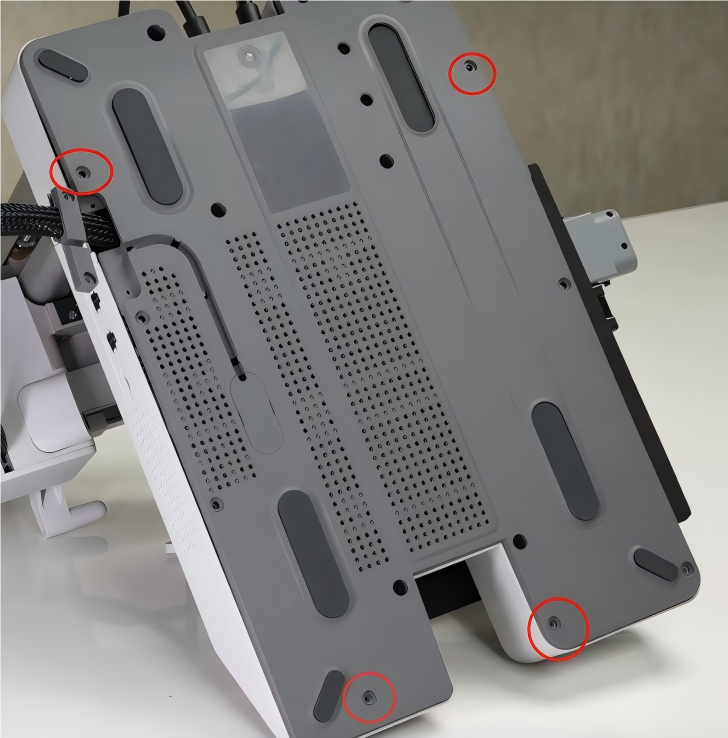
Remove the four screws from the bottom of the A1mini printer as shown in the image.
-
Place the A1 mini printer on the acrylic light board, aligning the board’s edges with the printer body.

-
For easiest installation, position the printer at the edge of your work surface. Then, install the four M3x18 self-tapping screws from the underside. This method avoids the need to flip the printer over.

-
Insert the acrylic light board's connecting cable into the control box’s bottom port, as shown.

-
To determine the metal sheet's position, first place the control box in its intended location on the printer. Then, attach the sheet to secure the box.

-
Connect the power cable and the adapter cable, ensuring the clips align.
-
Insert the 2-pin plug into the rear port. When disconnecting, pull from the plug itself to avoid damaging the cable.
-
Locate an unused 4-pin MX3.0 power port on the side of the A1mini printer. Connect the adapter cable's corresponding 4-pin plug to this port, as shown in the illustration.
Powering through Panda Branch Plus
For an alternative power source, or if the printer's MX3.0 port is in use, the Panda Branch Plus (sold separately) is available. Simply connect the Panda Aura A1 mini's MX3.0 2-pin plug into Panda Branch Plus's MX3.0 port to power it.
First Connection
Note: The software setup and operation for the Panda Aura A1 and A1 mini control boxes are identical. For the remainder of this guide, they will be collectively referred to as "Panda_Aura."
When you power up for the first time or restore factory settings, you'll see a blue flowing light, indicating that Panda Aura is not yet bound to the printer.
WiFi Connection Guide
-
Connecting to the Panda Aura's WiFi_AP Hotspot
-
Connect to the Panda_Aura AP hotspot:
Panda_Aura_XXXXXXXXXX. The default password is987654321.
-
-
Accessing the AP Webpage
- After connecting to the AP, open a browser on your computer and enter the default IP address:
192.168.254.1. On mobile devices, the Panda_Aura Web UI will automatically appear, or you can manually enter the IP address in the browser:192.168.254.1. For Mobile:
- After connecting to the AP, open a browser on your computer and enter the default IP address:
-
Select Language (Default: English)
-
After selecting a language, click
Next.
-
-
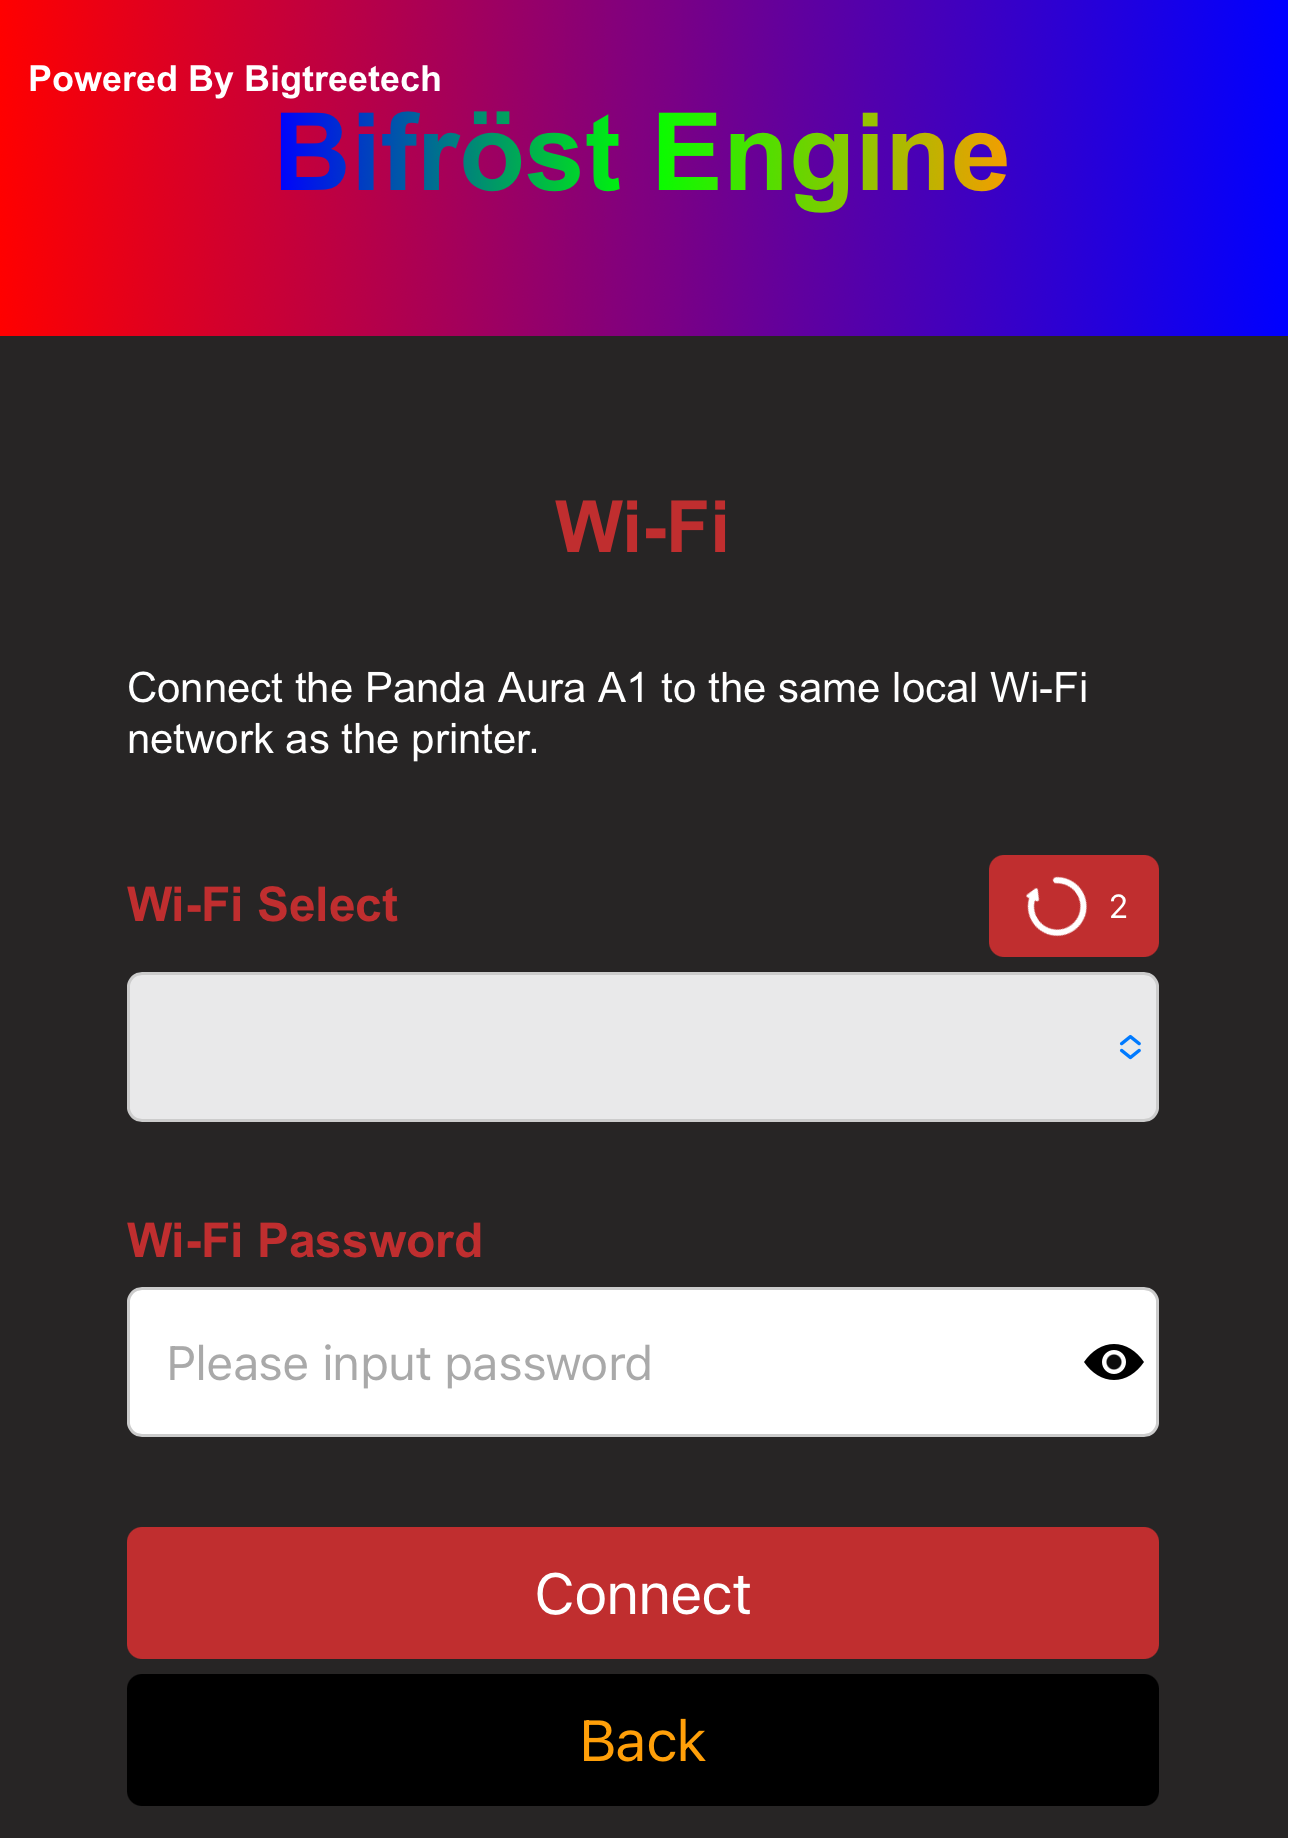
WiFi Connection Page
-
Upon initial setup or after a factory reset, this page will automatically scan for available Wi-Fi networks. You can also manually initiate a scan.
-
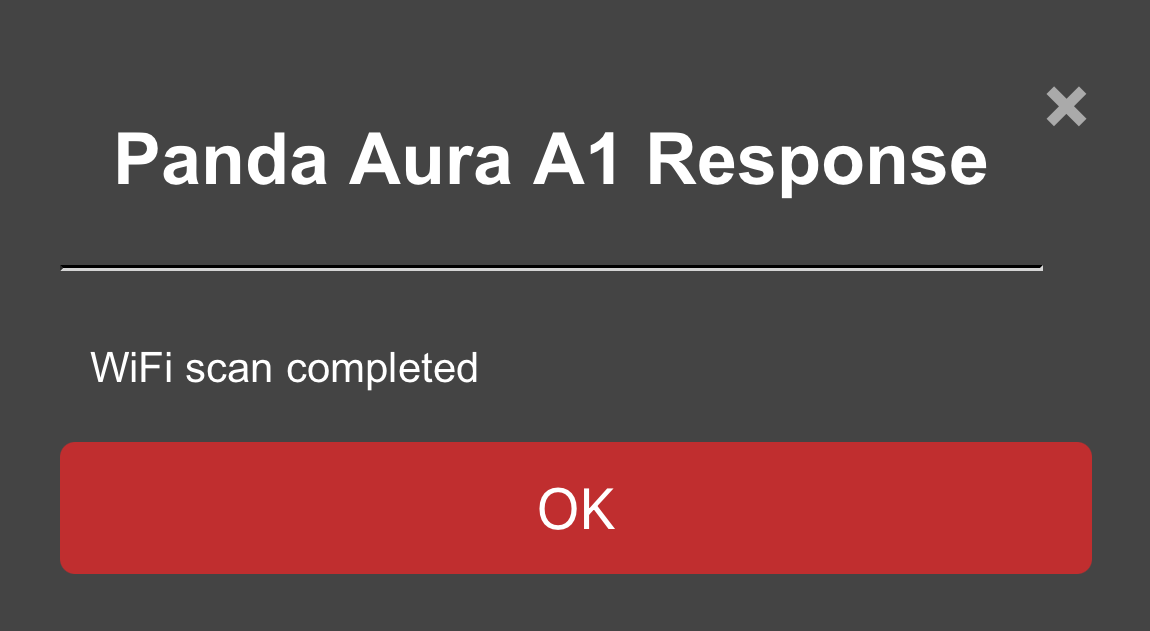
Once the scan is complete, a pop-up will appear notifying you that the scan is finished.
-
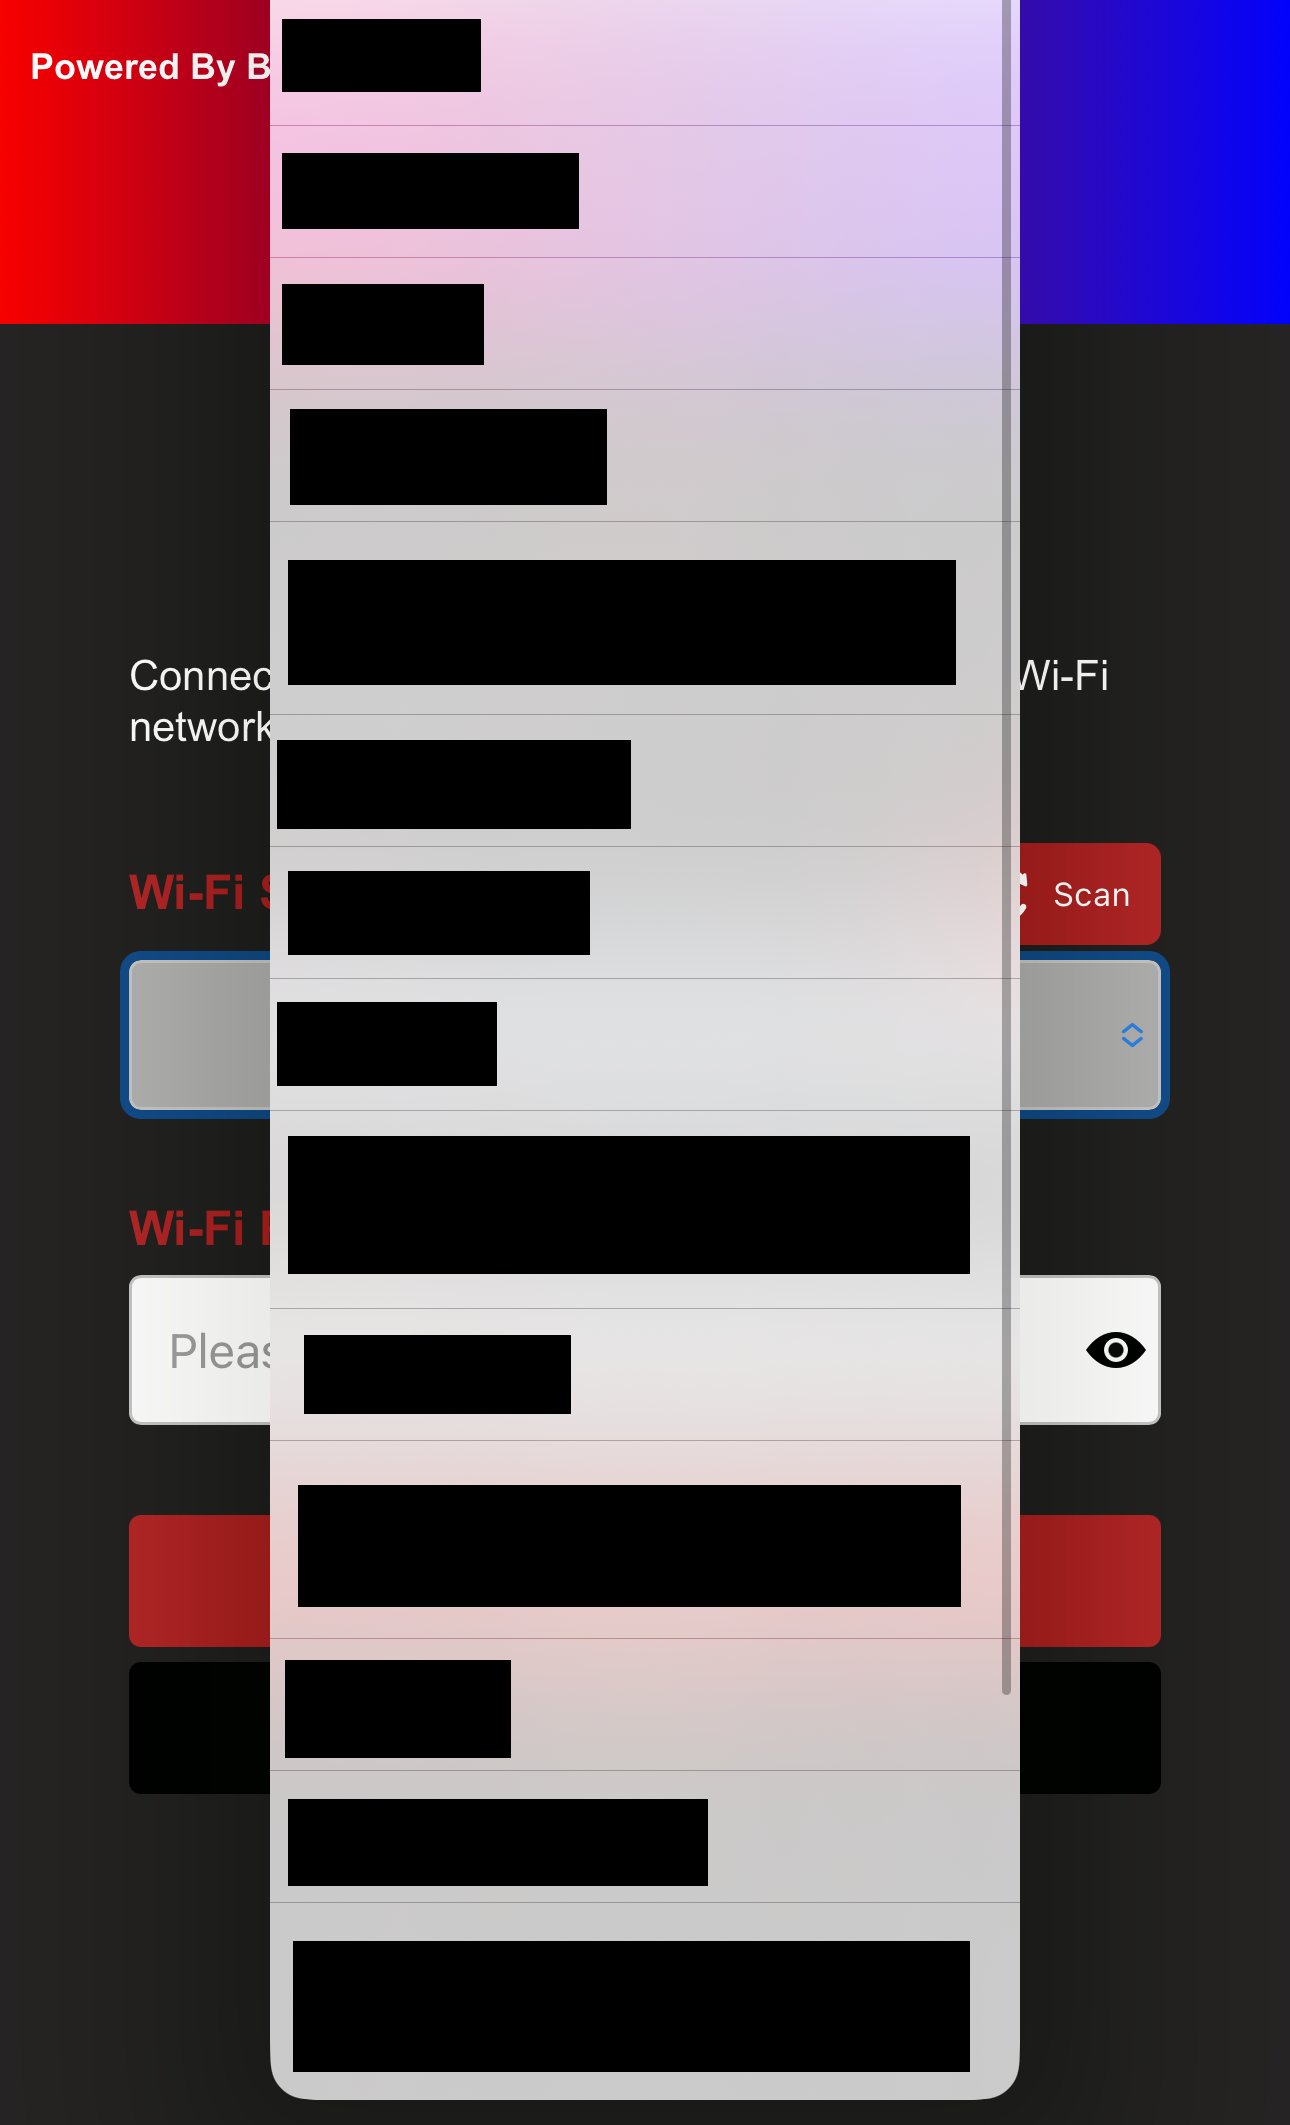
Select the WiFi network you want to connect to.
-
Type your password and tap the
eye iconif you'd like to see the password you've entered.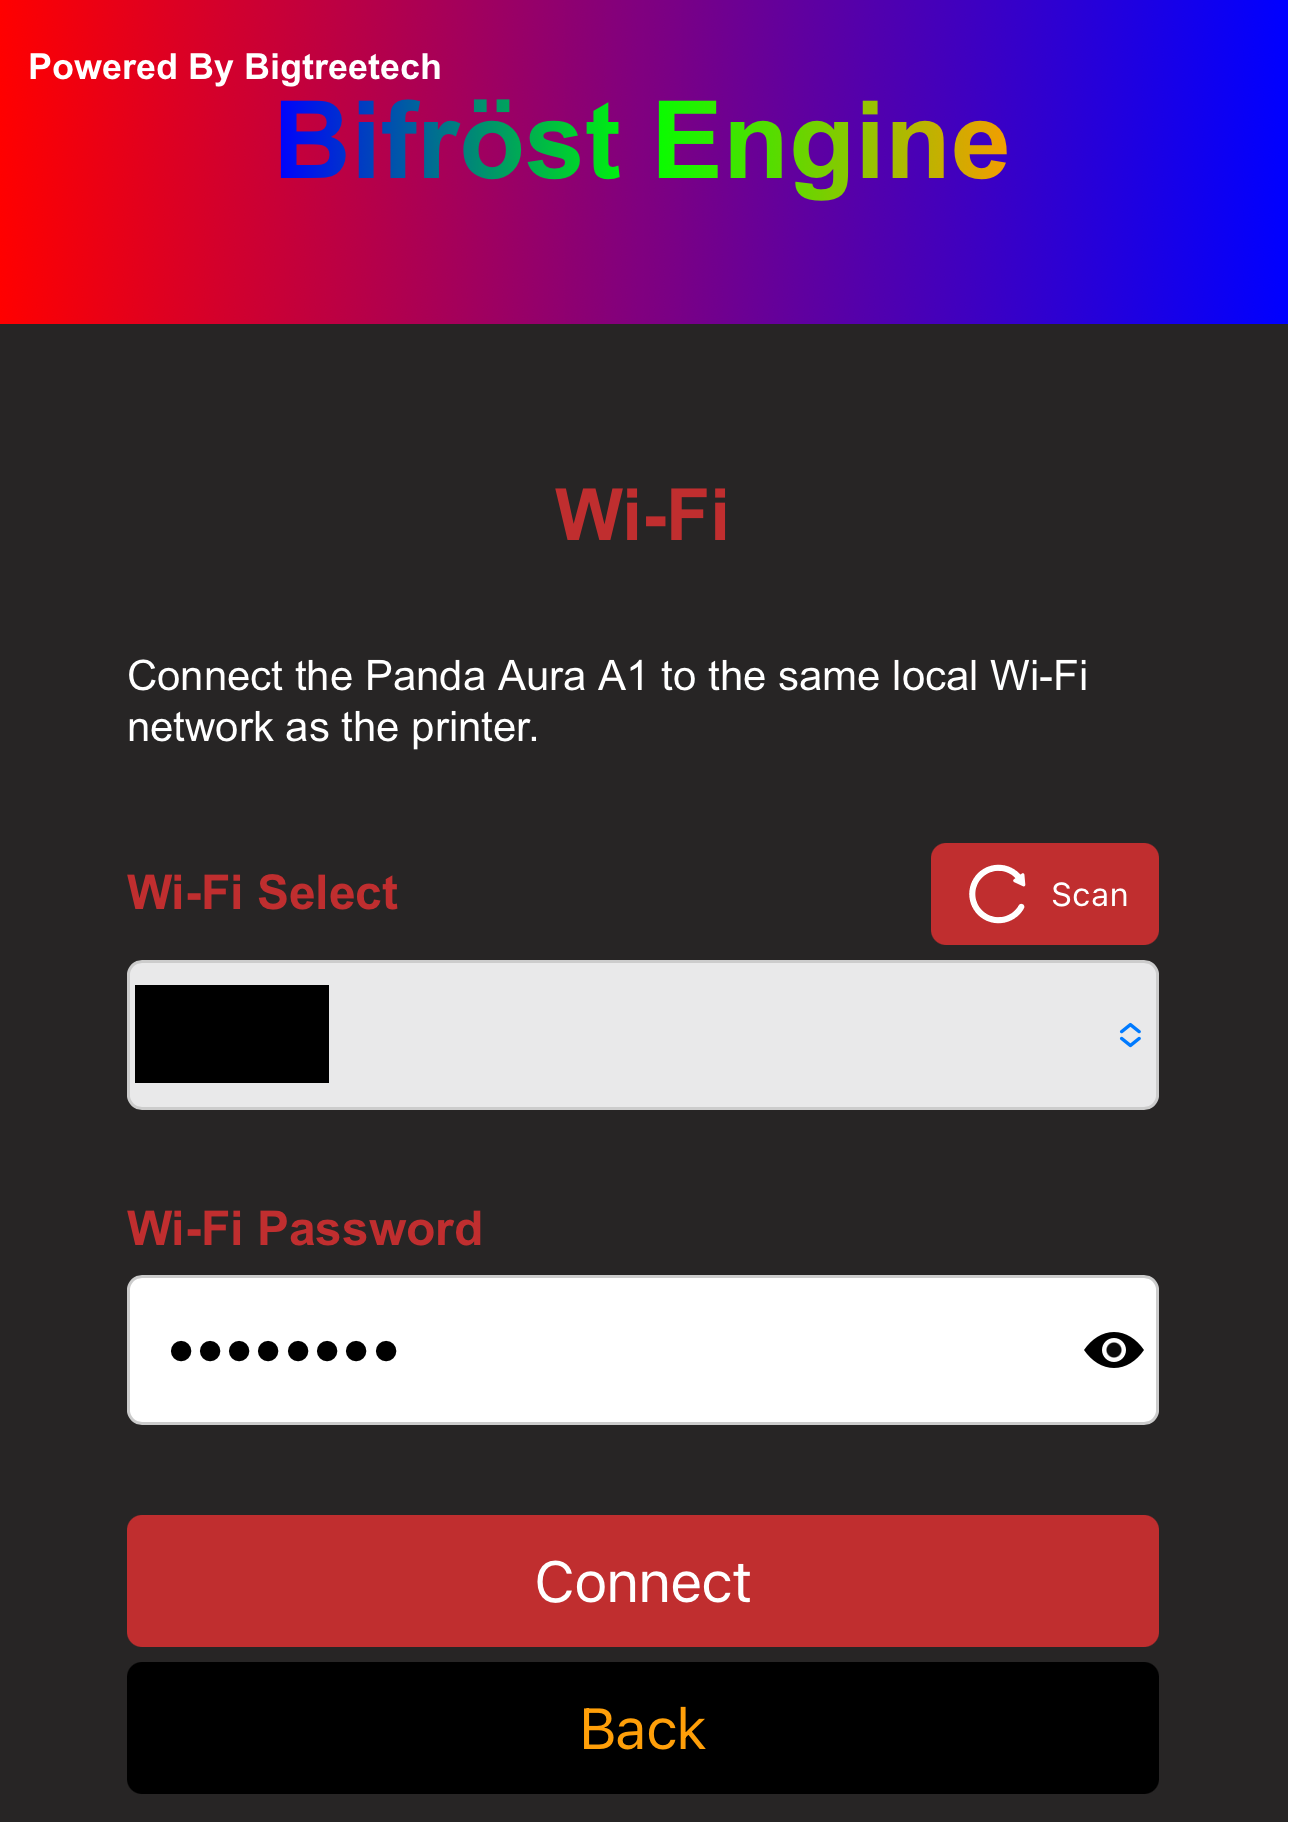
-
Click 'Connect' to proceed to the Wi-Fi connection page, where the status will display as
WiFi connecting....
-
A pop-up will appear shortly to confirm the Wi-Fi connection status.
-
Connection Failed:

-
Connection Successful: You can either bind the printer and proceed to the printer interface or click
Cancelto stay on the WiFi page.
-
-
Printer Binding Page
-
Feature Introduction

-
① Printer Page Selection: When you click the icon, it will turn red to indicate that you are on the Printer page.
-
② Scan for Printers on the Same Local Network
-
③ Select the Detected Printer
-
④ Enter Printer's SN Code
-
⑤ Enter Printer's Access Code
-
⑥ Enter Printer's IP Address
-
⑦ Confirm to Bind This Printer
-
-
How to Bind a Printer
-
Tap
Scanbutton. After a short wait, a pop-up will appear confirming that the scan was successful.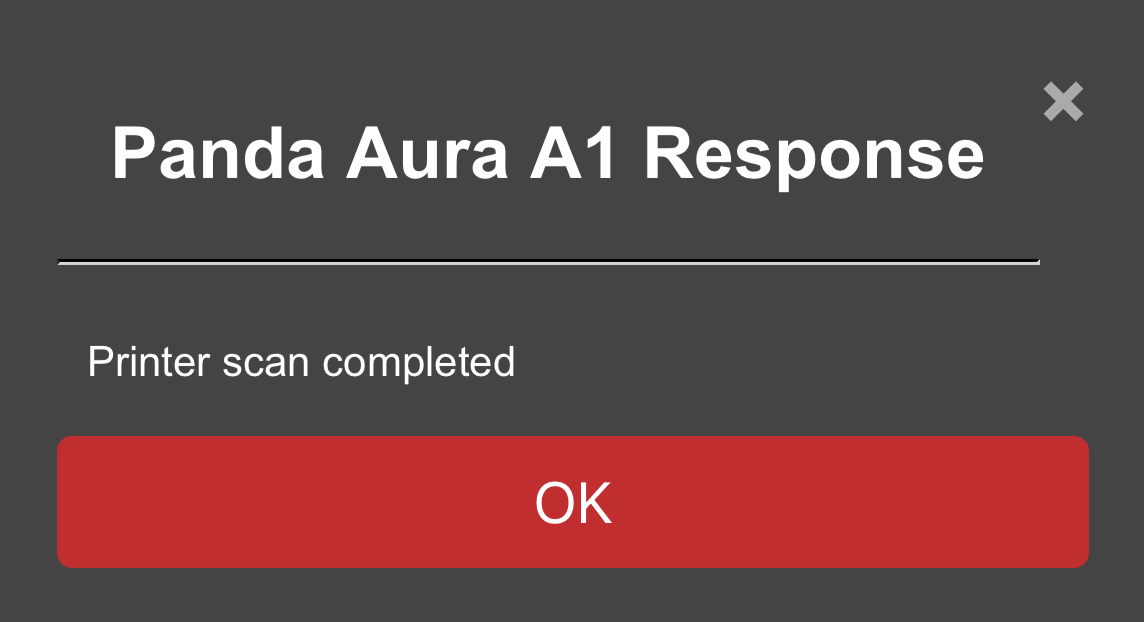
-
Select the printer from the list. The printer's SN code and IP address will automatically fill in.

-
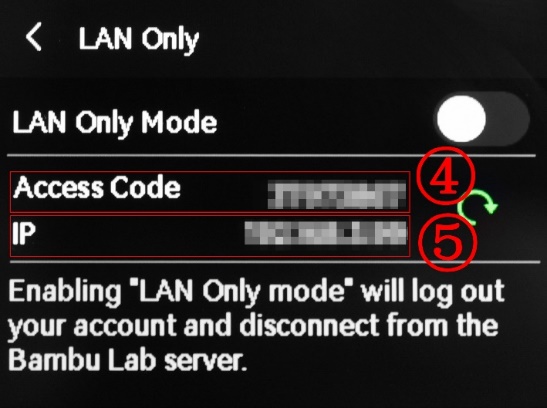
Enter the printer's
Access Code-
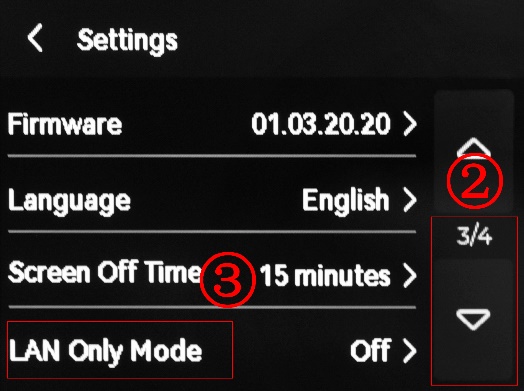
Find the
Access Codein the printer (Using the A1 series printer as an example)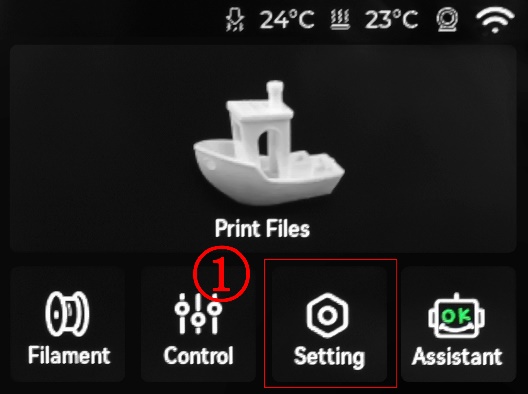
-
Enter
Access Codein the input box, and tapBindto bind the printer.

-
-
Webpage Usage Guide
WiFi Page

-
① WiFi Page Selection: When you click the icon, it will turn red to indicate that you are on the WiFi page.
-
② Current WiFi Connection Status
-
③ IP Address Icon: Click the icon to display a pop-up. If the IP field is blank, ensure Panda_Status shows "Connected." If it says, "Not Connected," check your network settings.
-
④ IP Address Display: Entering this IP in your browser will take you to the Web page, as long as you're on the same local network.
-
⑤ WiFi Network Configuration Button: Click to go to the WiFi connection page
-
⑥ Host Name: The default hostname is "PandaAura." If you forget the IP, you can use the hostname followed by "local" in the browser (e.g., http://PandaAura.local). To modify the hostname, click the text box to edit it, then click "Set Hostname" to confirm.
-
⑦ Confirm Hostname Modification
AP Page

-
① AP Page Selection: When you click on the icon, it will turn red to indicate that you are on the AP page.
-
② AP Hotspot Switch
-
③ AP Name: Default is
Panda_Aura_XXXXXXXXXX -
④ AP Password: Default is
987654321 -
⑤ Hotspot IP: Default Hotspot IP is "192.168.254.1." If your router's IP range is "192.168.254.xxx," an IP conflict will prevent the device from binding to the printer. Change the Panda_Aura hotspot IP to a different range.
-
⑥ Confirm Button: Clicking this will restart the device. After the restart, you can connect to the AP hotspot.(How to connect to the AP hotspot)
Settings Page
-
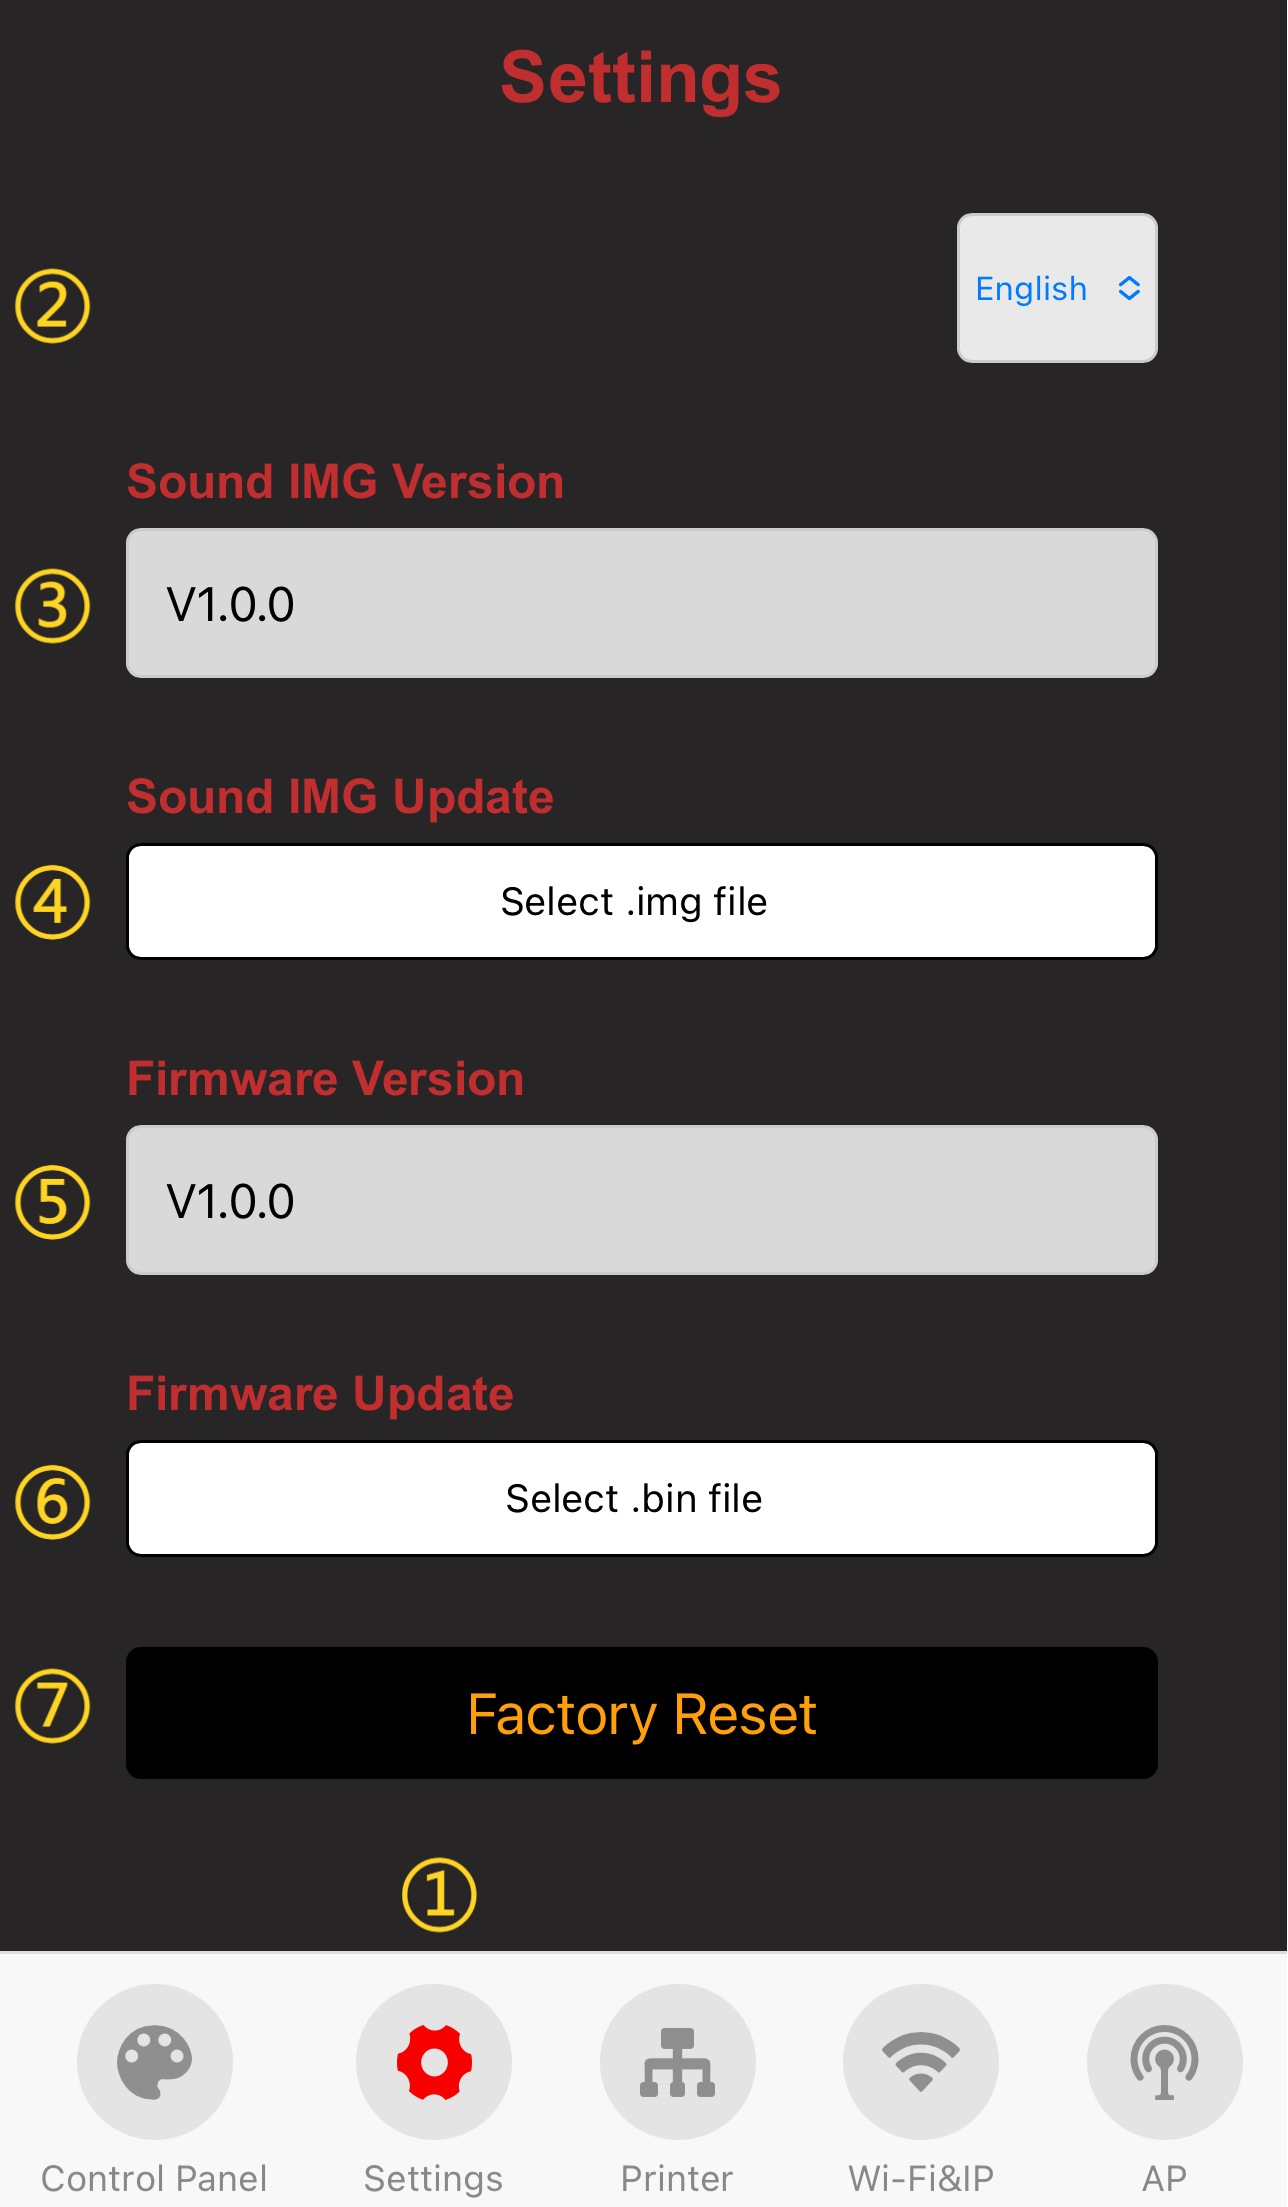
① Settings Page Selection: When you click the icon, it will turn red to indicate that you are on the Settings page.
-
② Choose Language. (Default: English)
-
③ Show Current IMG and Firmware Version
-
④ Sound IMG OTA Update: Select a
.imgfile for the update. -
⑤ Show Current Firmware Version.
-
⑥ Firmware OTA Update: Select a
.binfile for the update. -
⑦ Factory Reset.
-
Click the 'Select .bin File' button to choose the bin file that requires OTA.
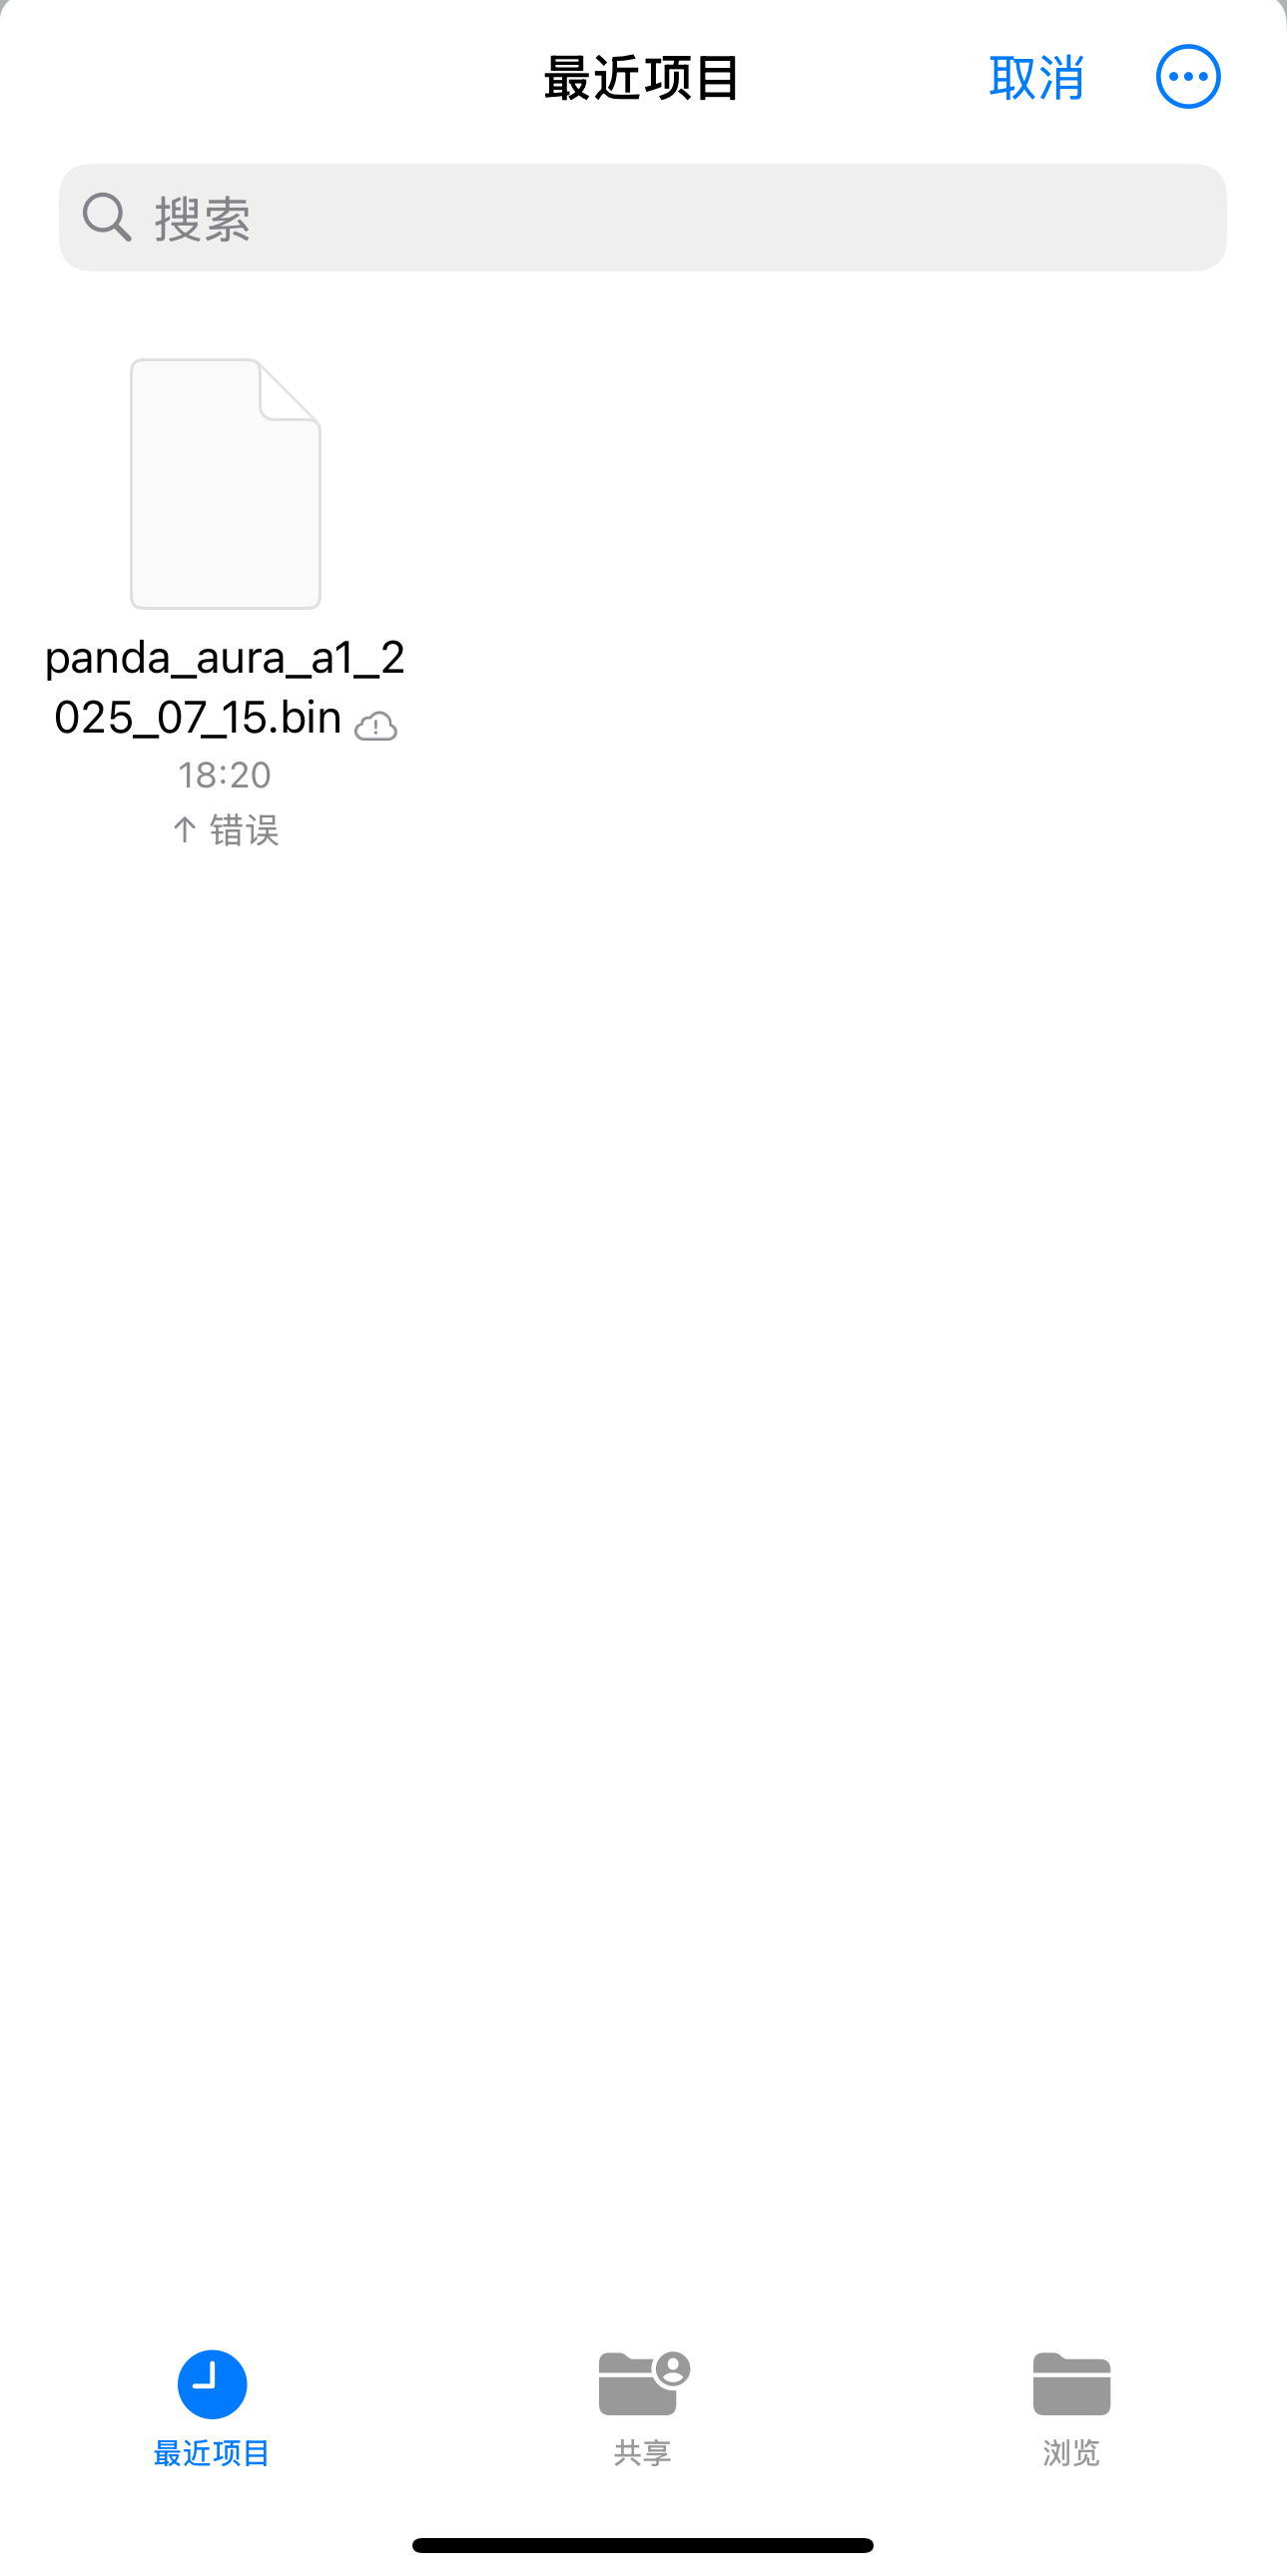
-
Wait for the update to complete; the device will then restart automatically.

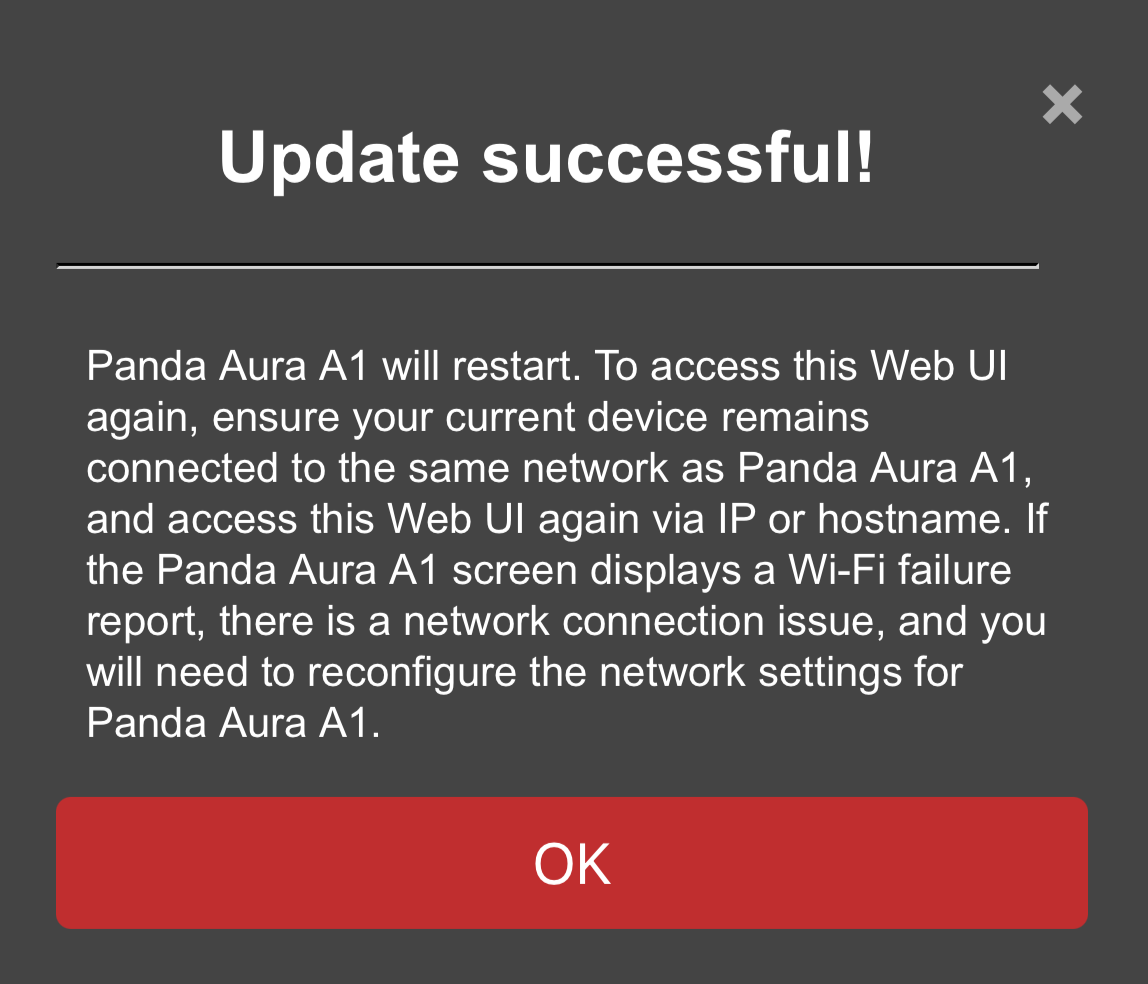
-
-
⑤ Click to Confirm Restore Factory Settings
Control Page
-
Feature Introduction
-
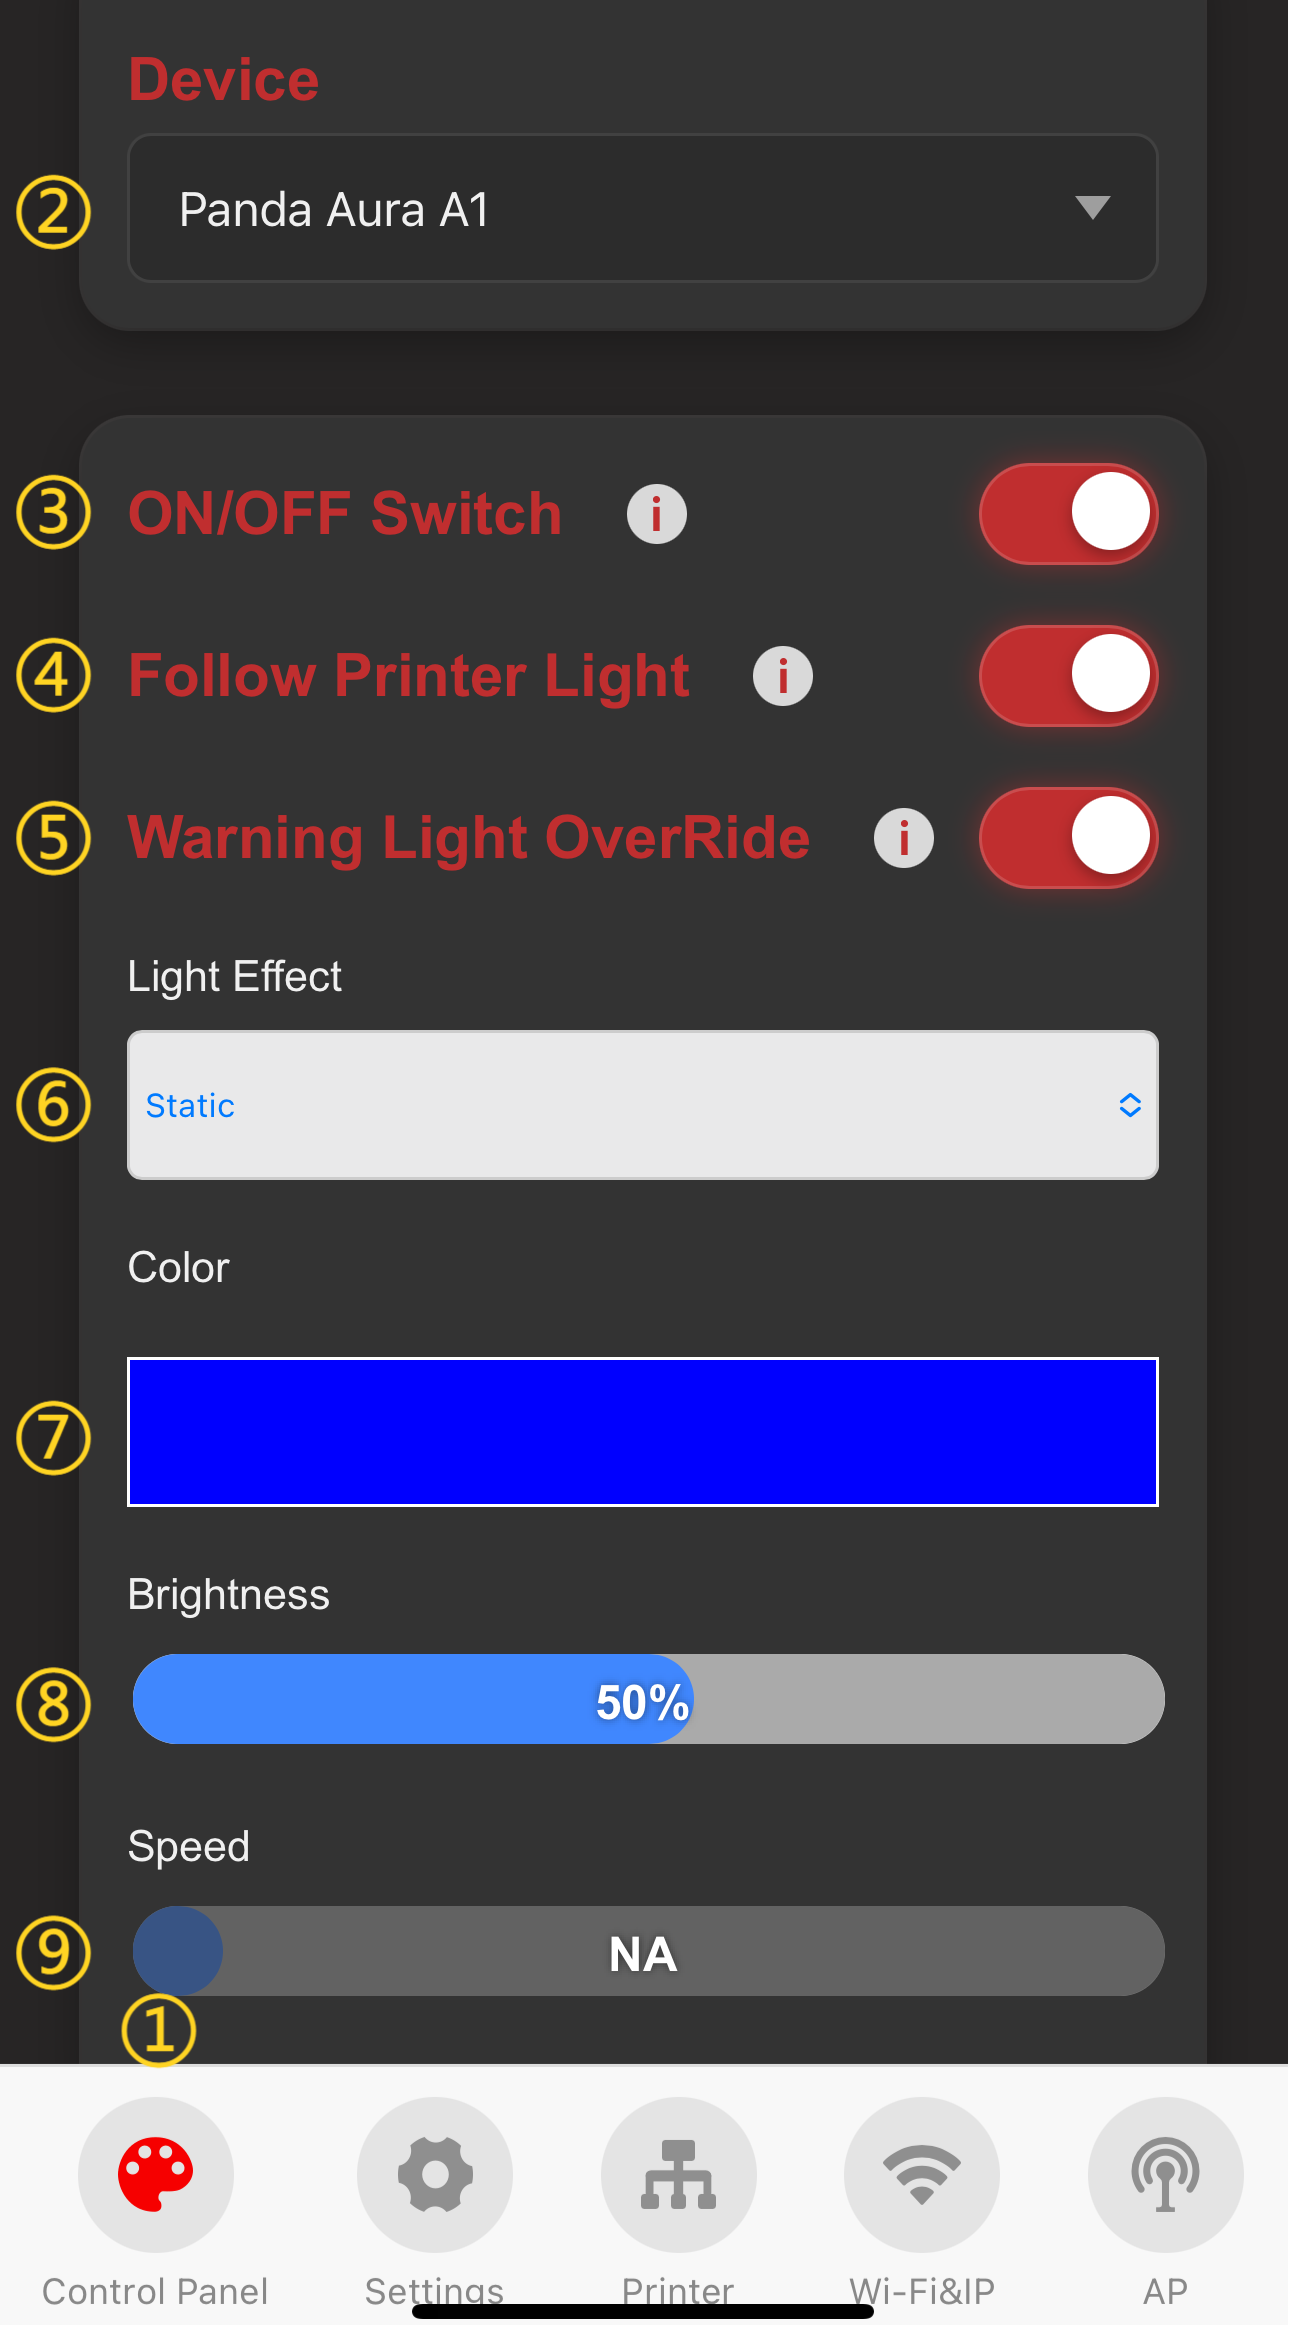
① Control Page Selection: When you click the icon, it will turn red to indicate that you are on the Control page.
-
② Current Device Name
-
③ Use the 'Switch' button to turn the RGB lighting effects on or off.
-
④ Automatically turns RGB effect ON and OFF following the printers stock light.
-
⑤ Click switch to override Red flashing warning light when printer is in error state.
-
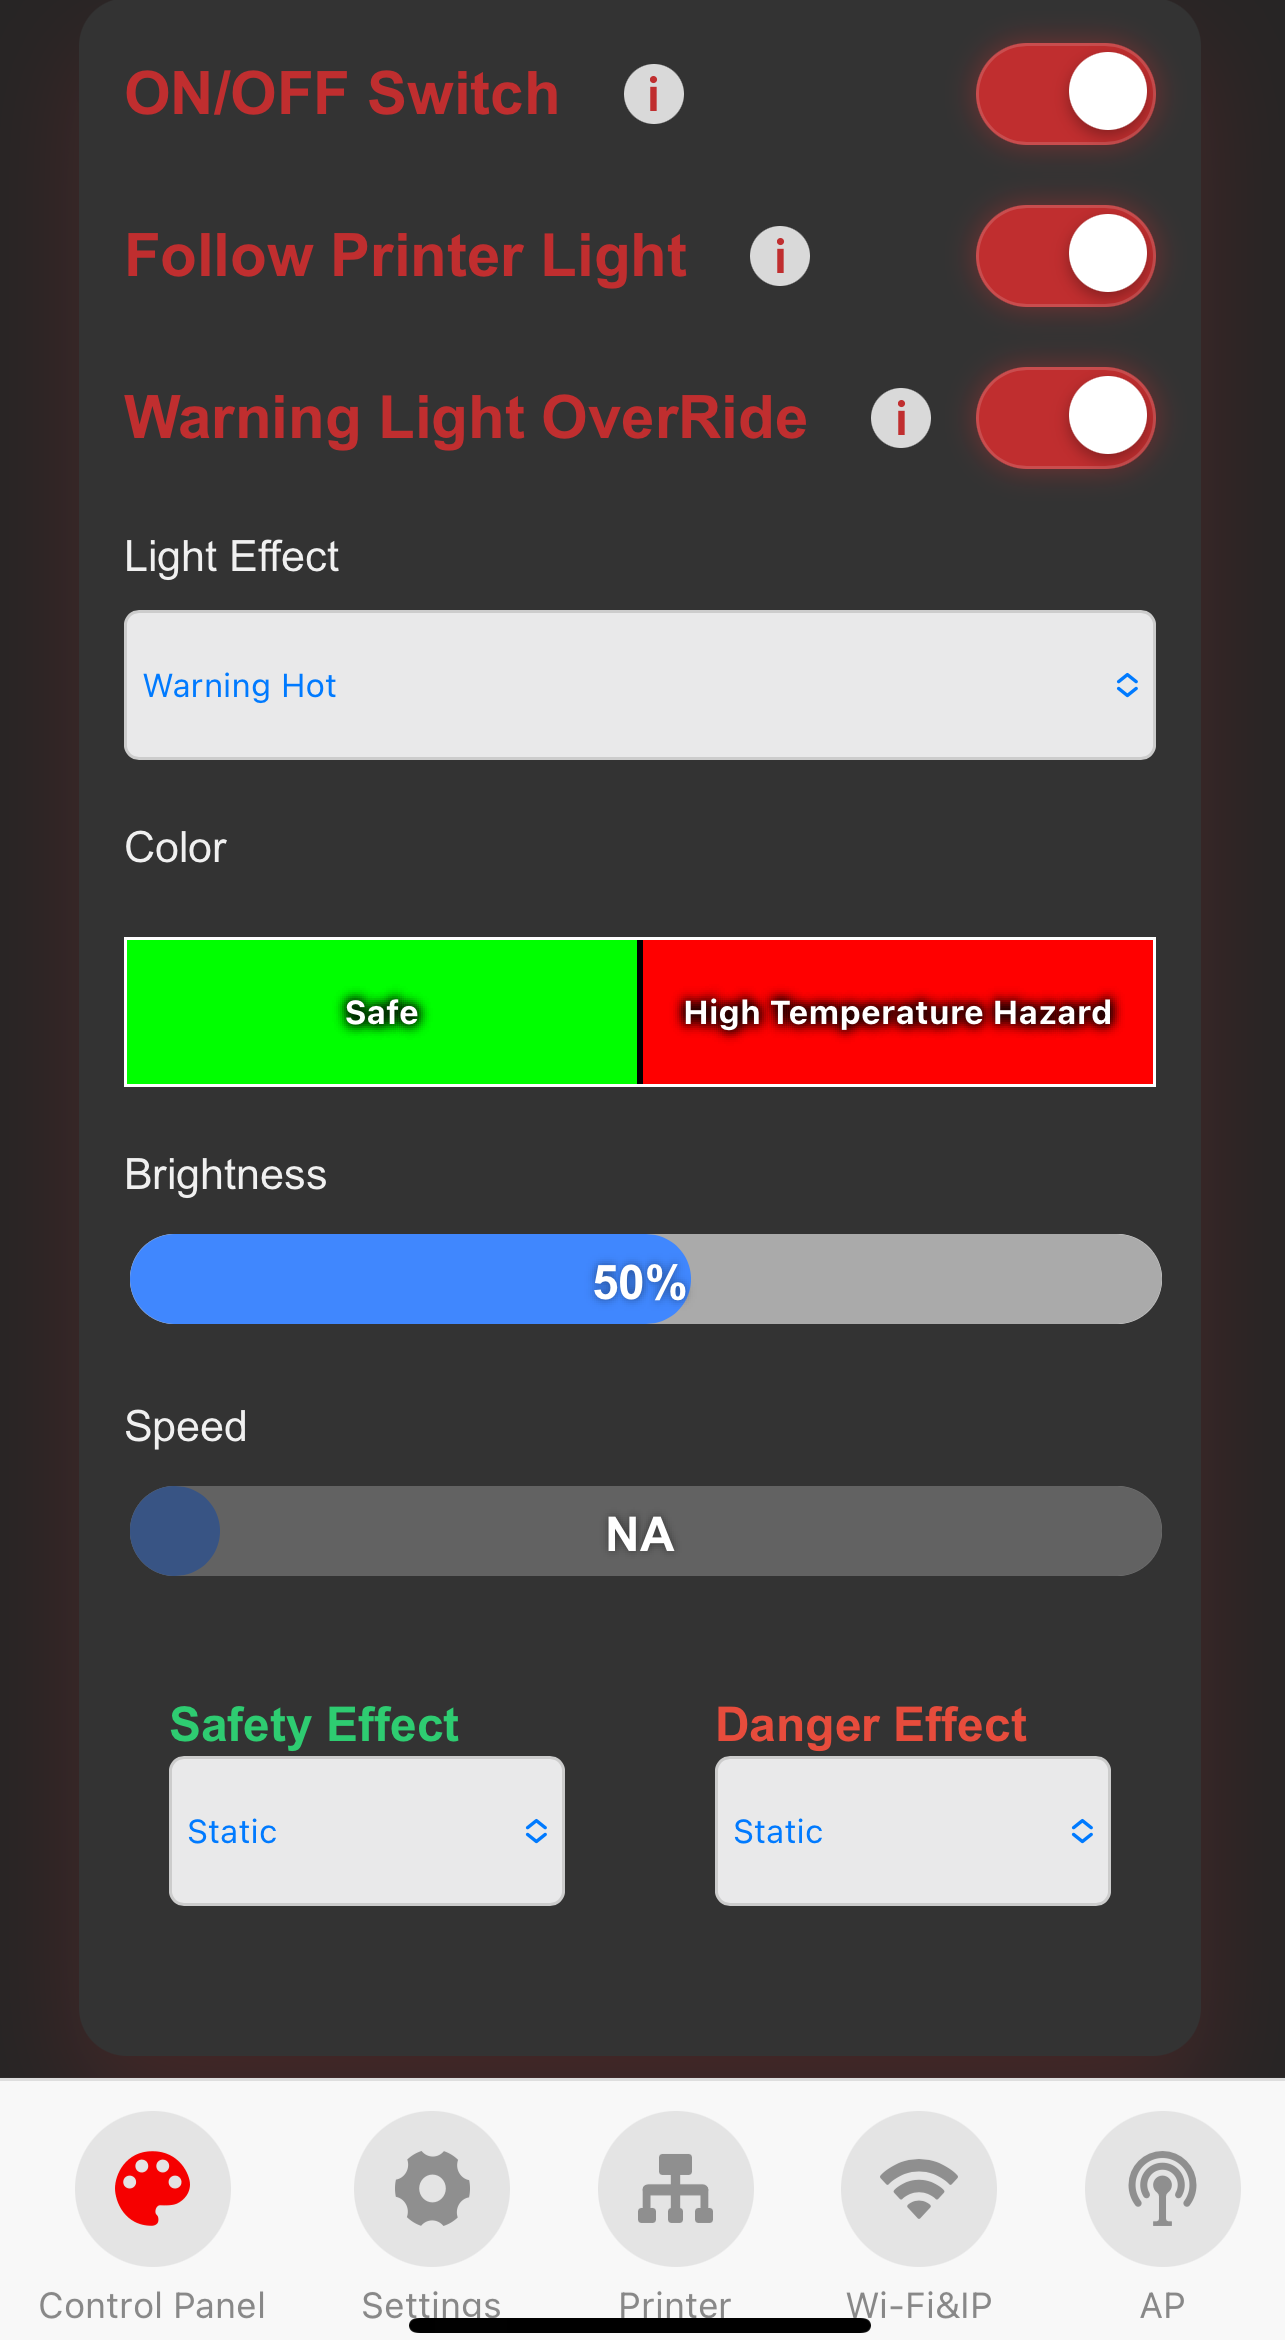
⑥ Select the lighting effect and the current effect.
-
⑦ Light color setting.
-
⑧ Brightness.
-
⑨ Speed.
-
-
Device Light Effect

-
①-⑥The lighting effect will change in real-time as you make your selection.
-
⑦The color of the light can be adjusted according to the temperature of the printer.You can choose between two lighting effects, Static or Strobing, under Safety Effect and Danger Effect.
-
⑧ After selection,The color of the light can be adjusted according to the printer.
-
-
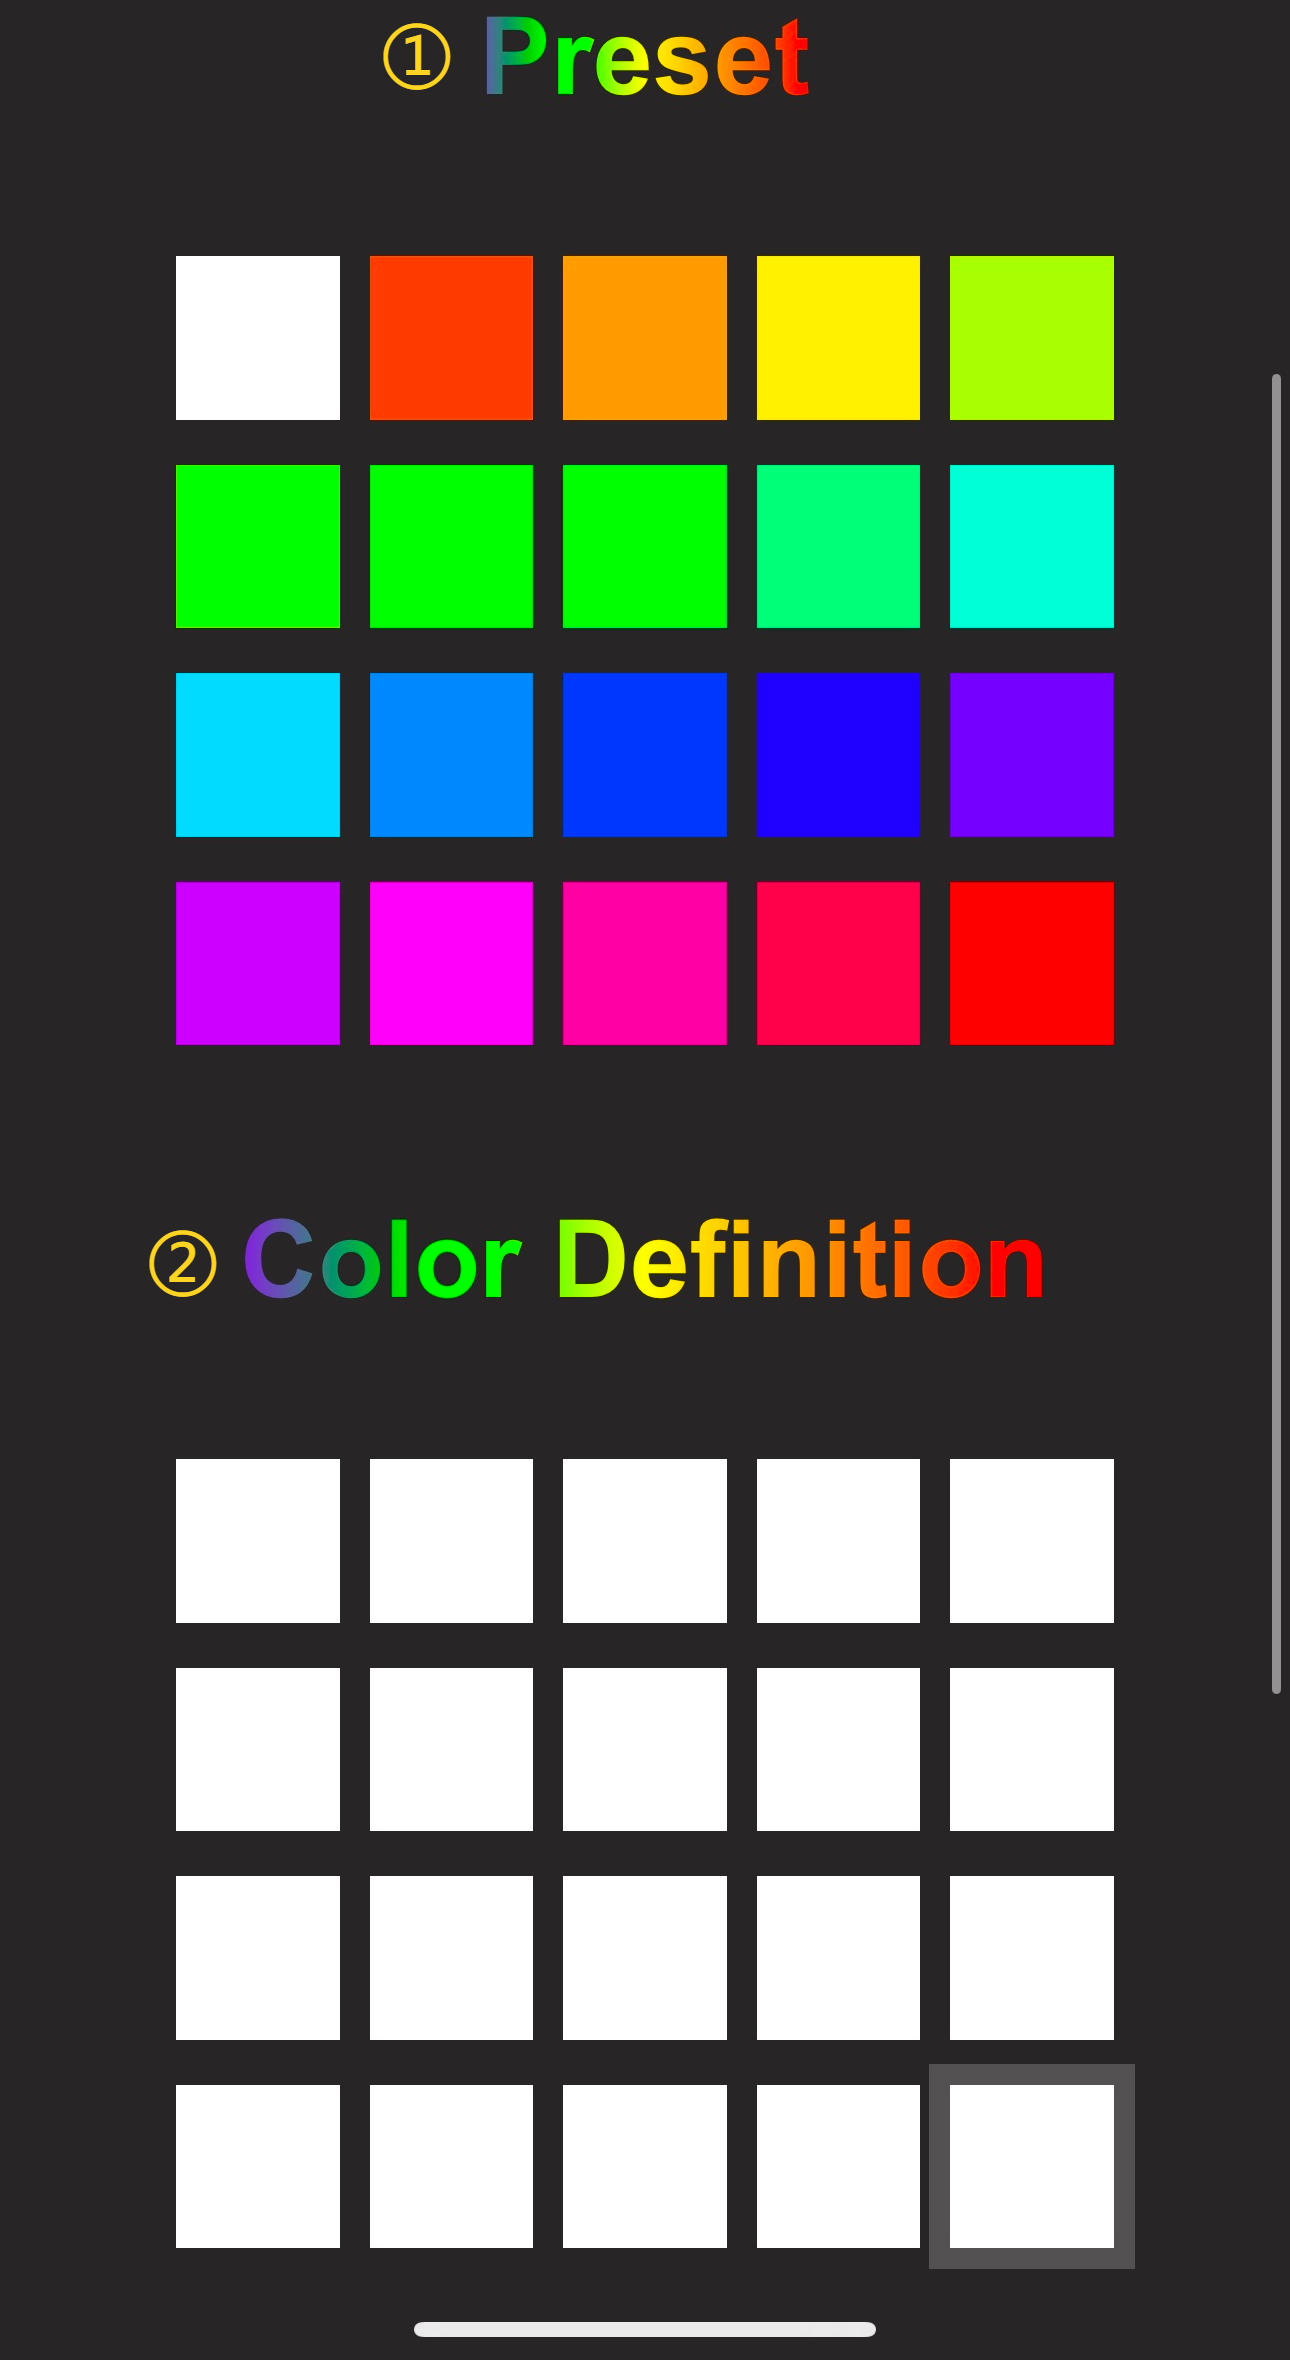
Customizing Light Color (using the Static mode as an example):
-
Click the color setting option to open the color selection page.

-
Choose your desired color.
-
① Factory default preset color.
-
② Select Custom Color to open a color picker and set a specific color value.

-
-
After selecting a
PresetorColor Definition(custom color) color block, clickConfirm. You can set the RGB lights to your selected color.

-
-
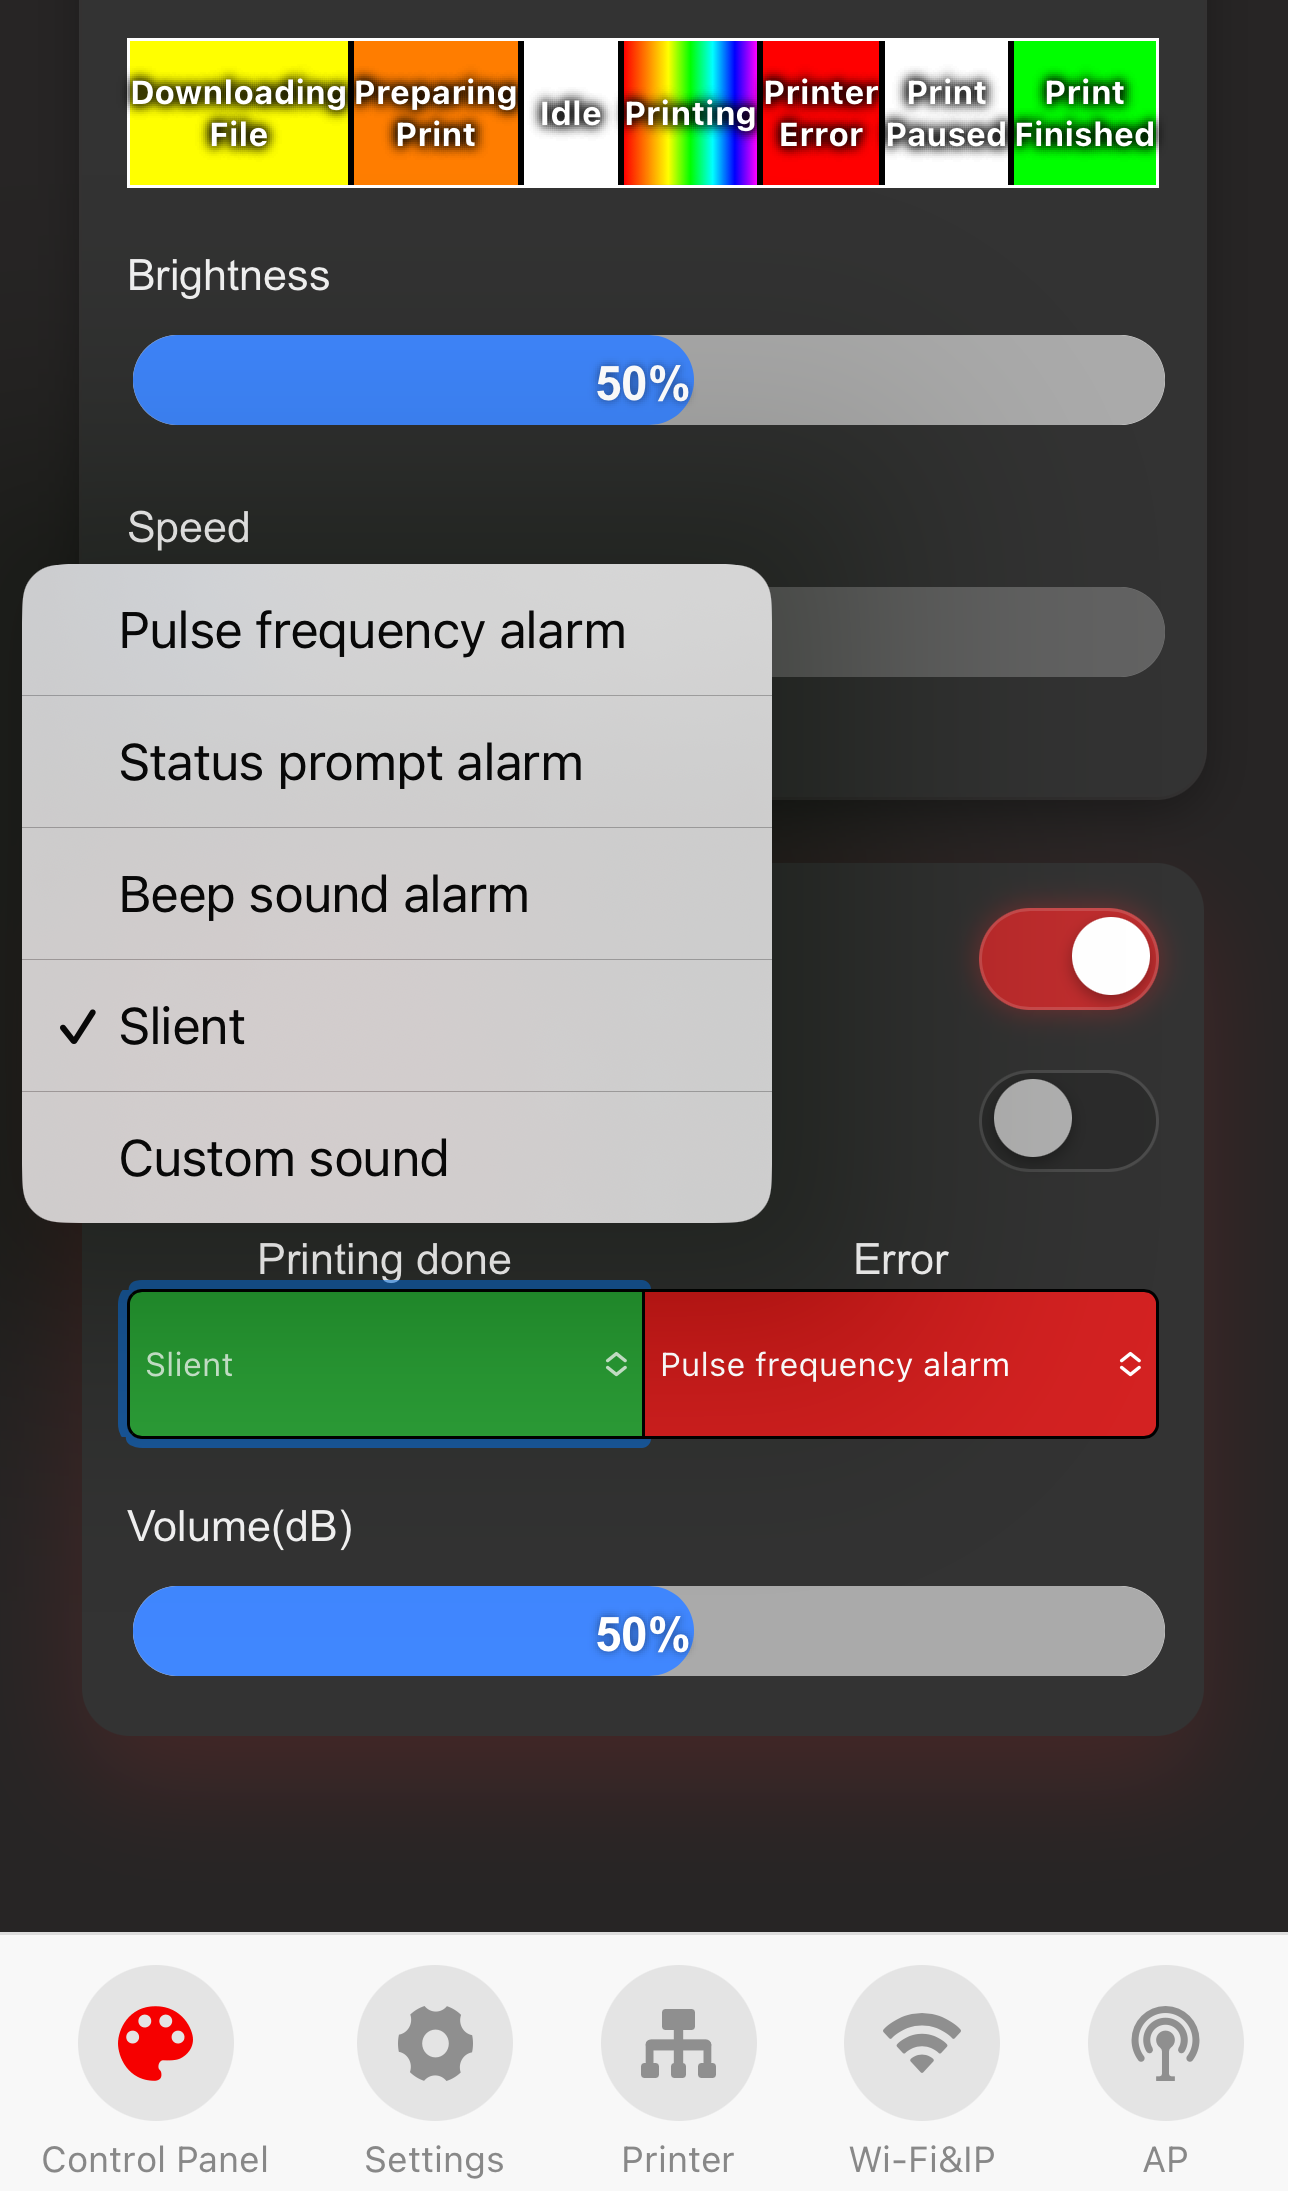
Device Sound Effect

-
① Click Switch to turn on and off the device sound effects.
-
② "Preview Mode": Used for previewing the device's "Audio Effects". When this mode is turned on and a "Simulated State" is selected, the device will display the corresponding "Audio Effects" according to the selected result.
-
③ Choose different sound effects.
-
④ Volume level.
-
Firmware History
V1.0.0
- First released factory firmware.
Feature Requests
If you'd like to see certain features in the upcoming firmware release, please submit a feature request on the official GitHub repository. Feature Requests