Panda Perch
Panda Perch Installation Guide
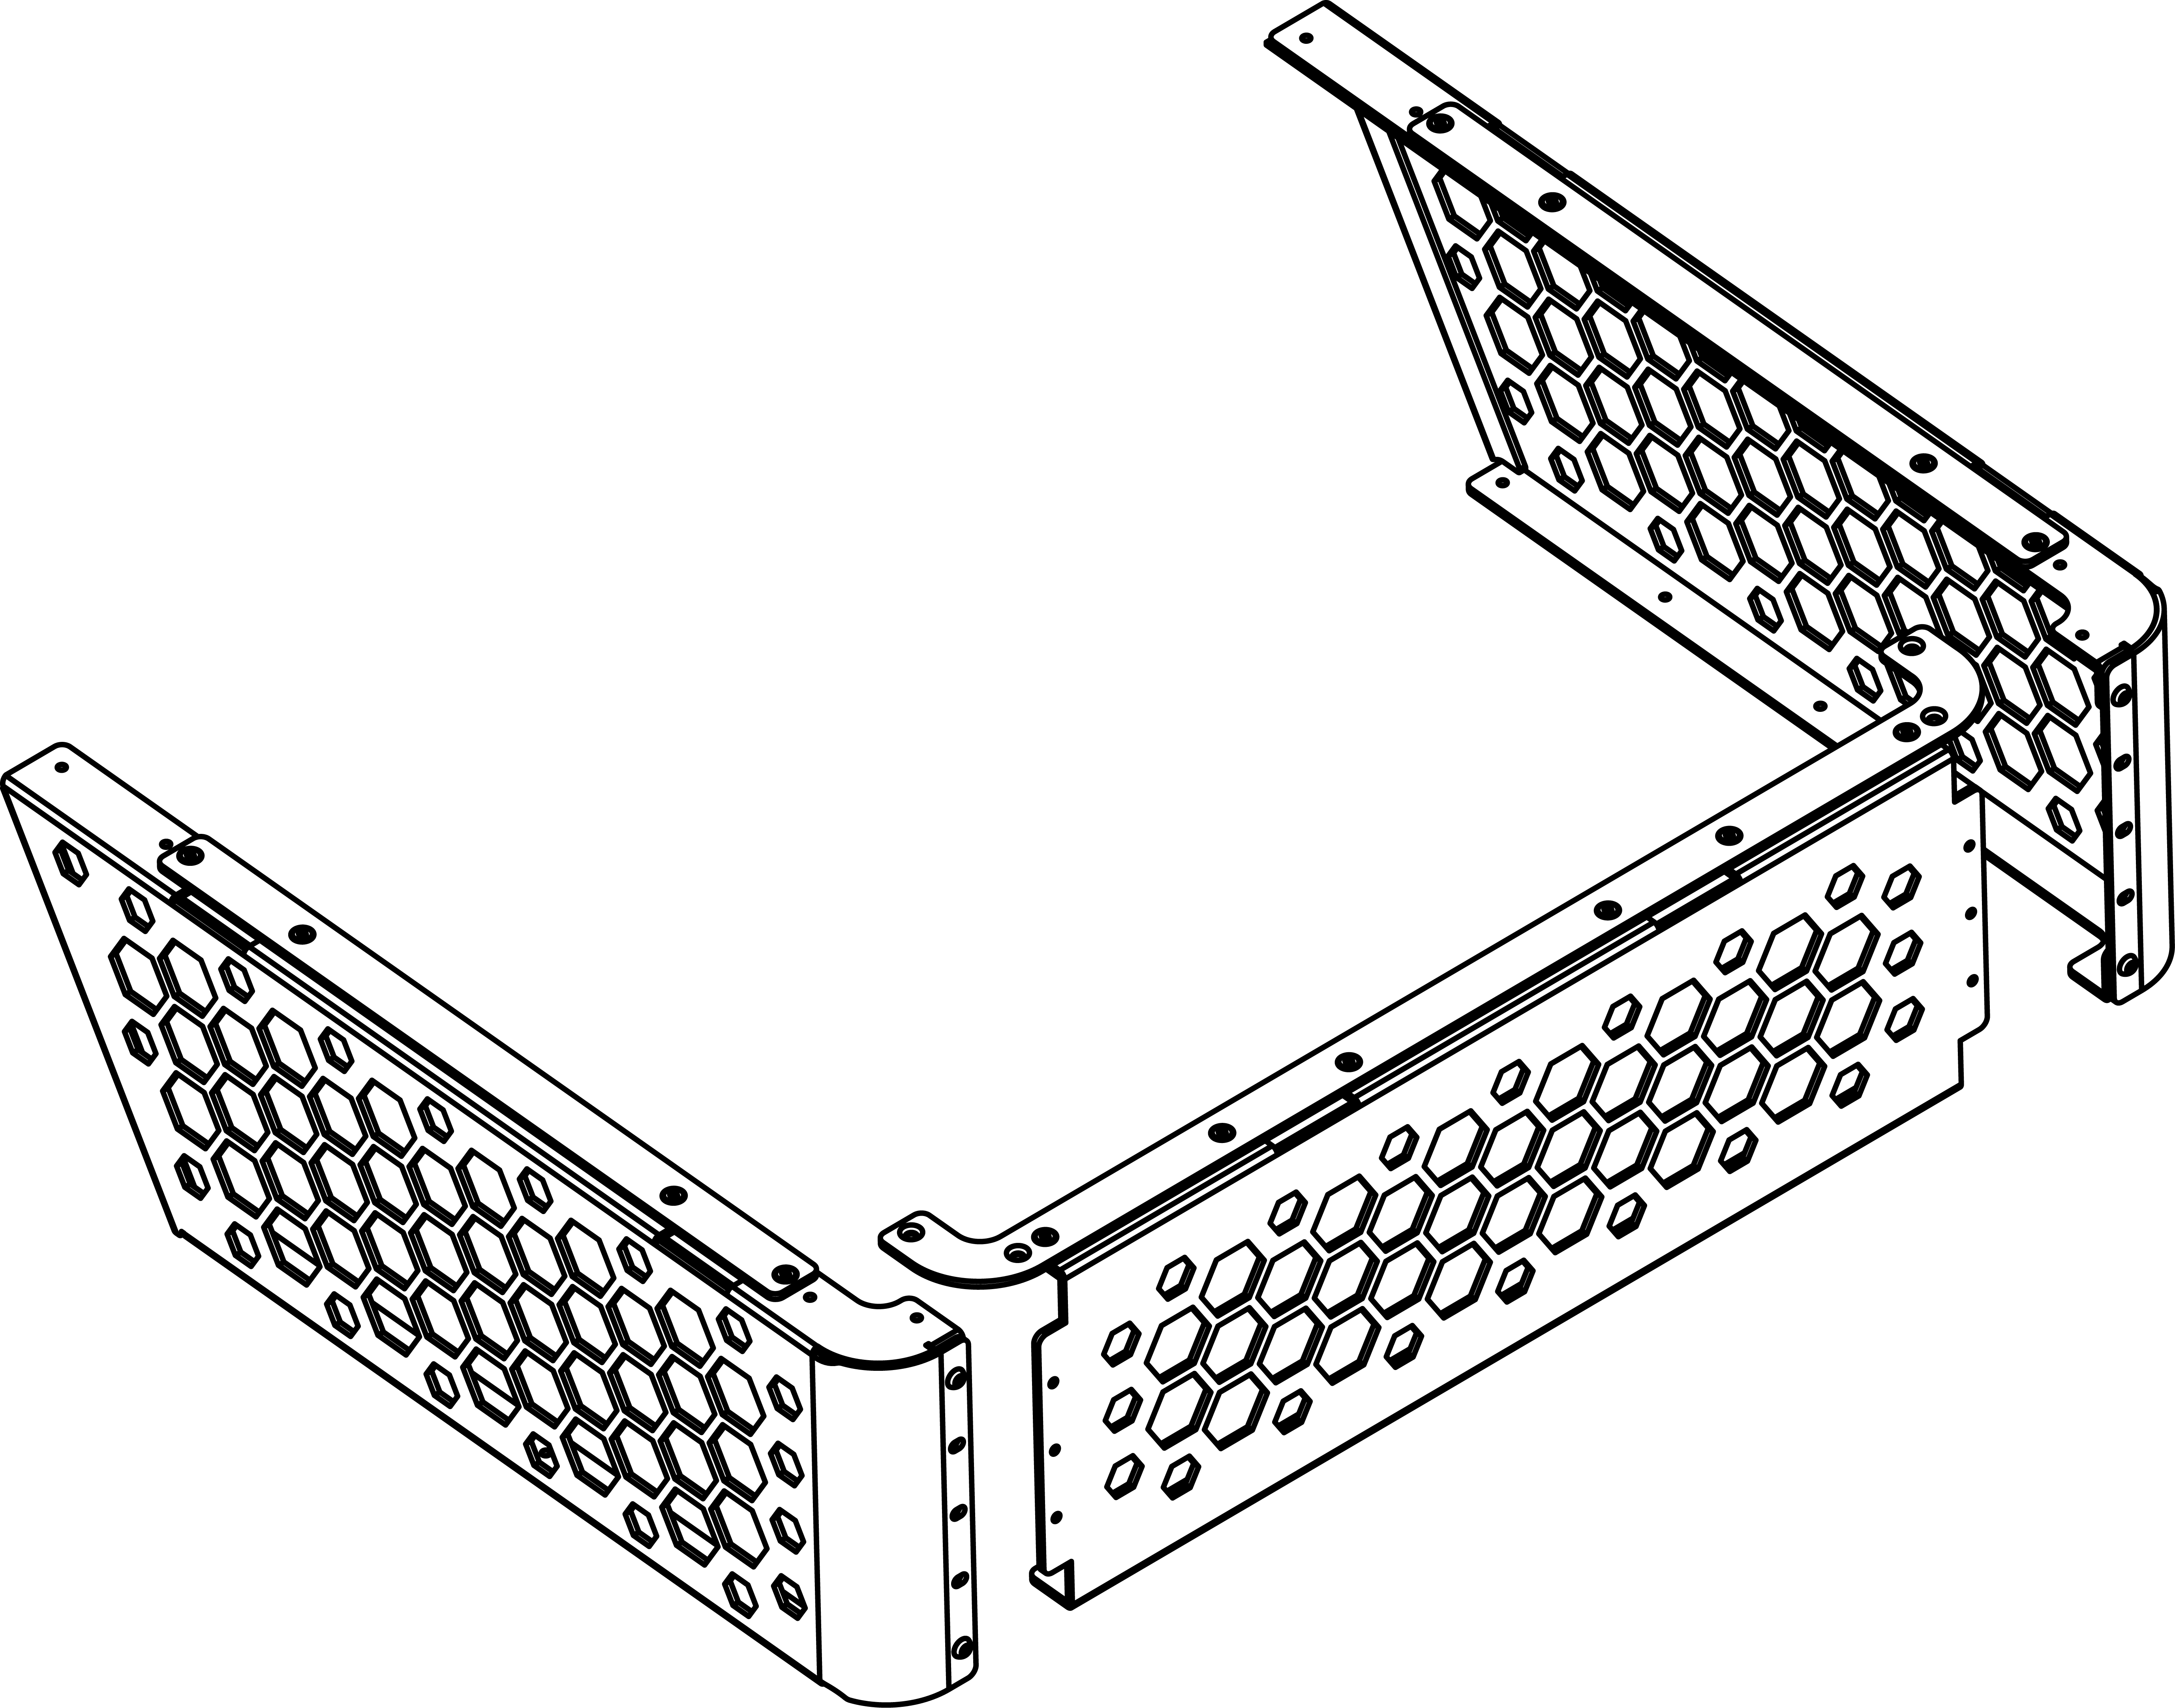
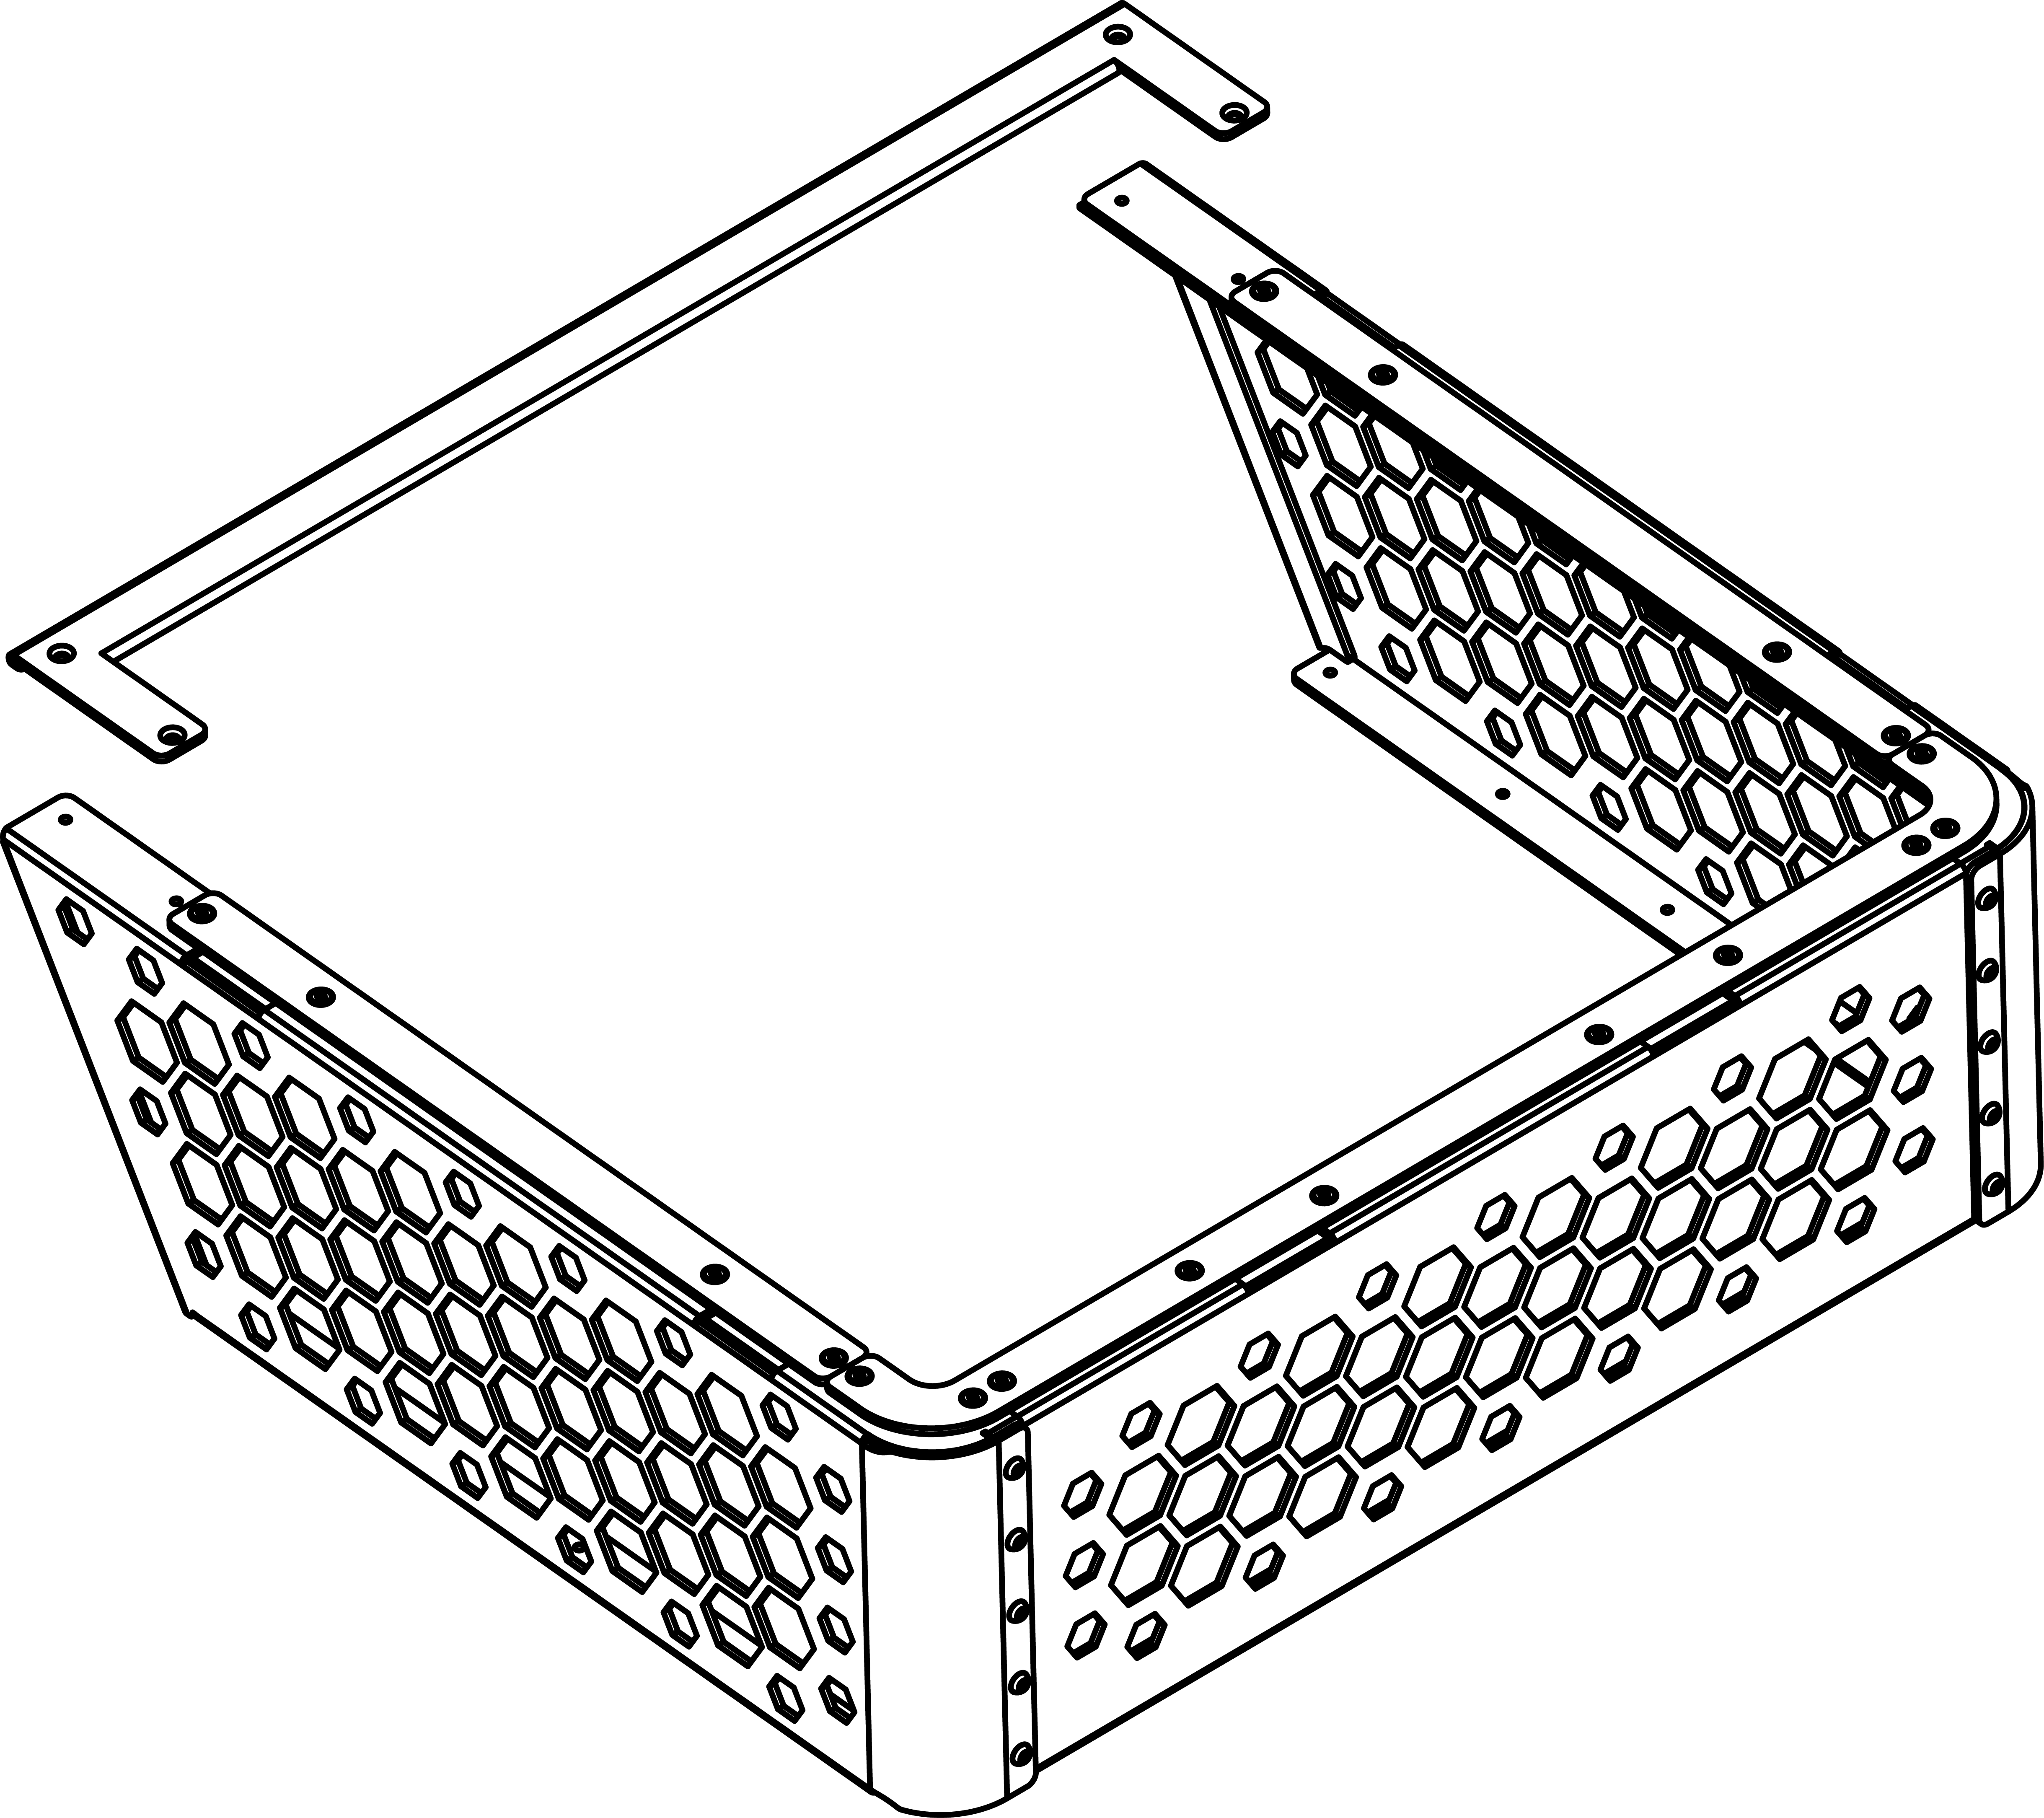
Step 1: Assemble the Side Plates
Position the left and right side plates against the rear plates, ensuring all edges and screw holes align.
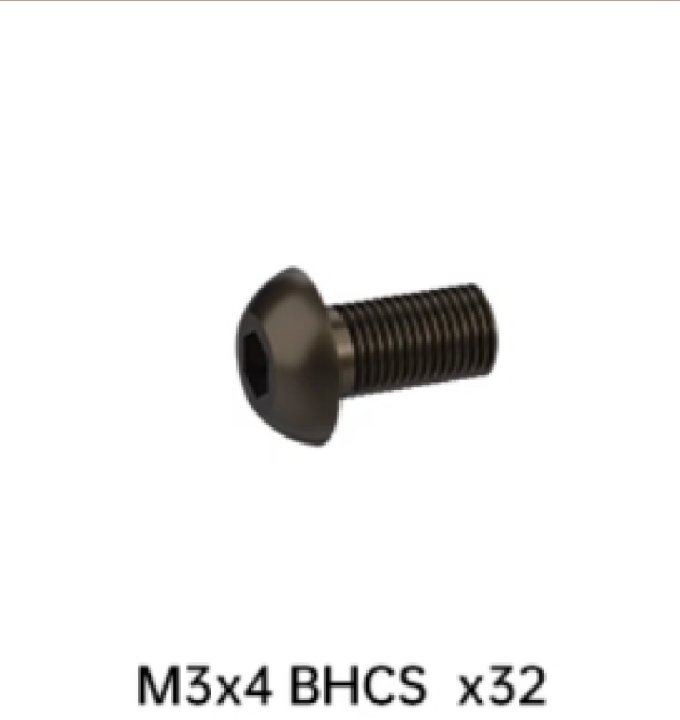
Secure them together using the M3x4 button head cap screws. Tighten firmly but avoid over-torquing.
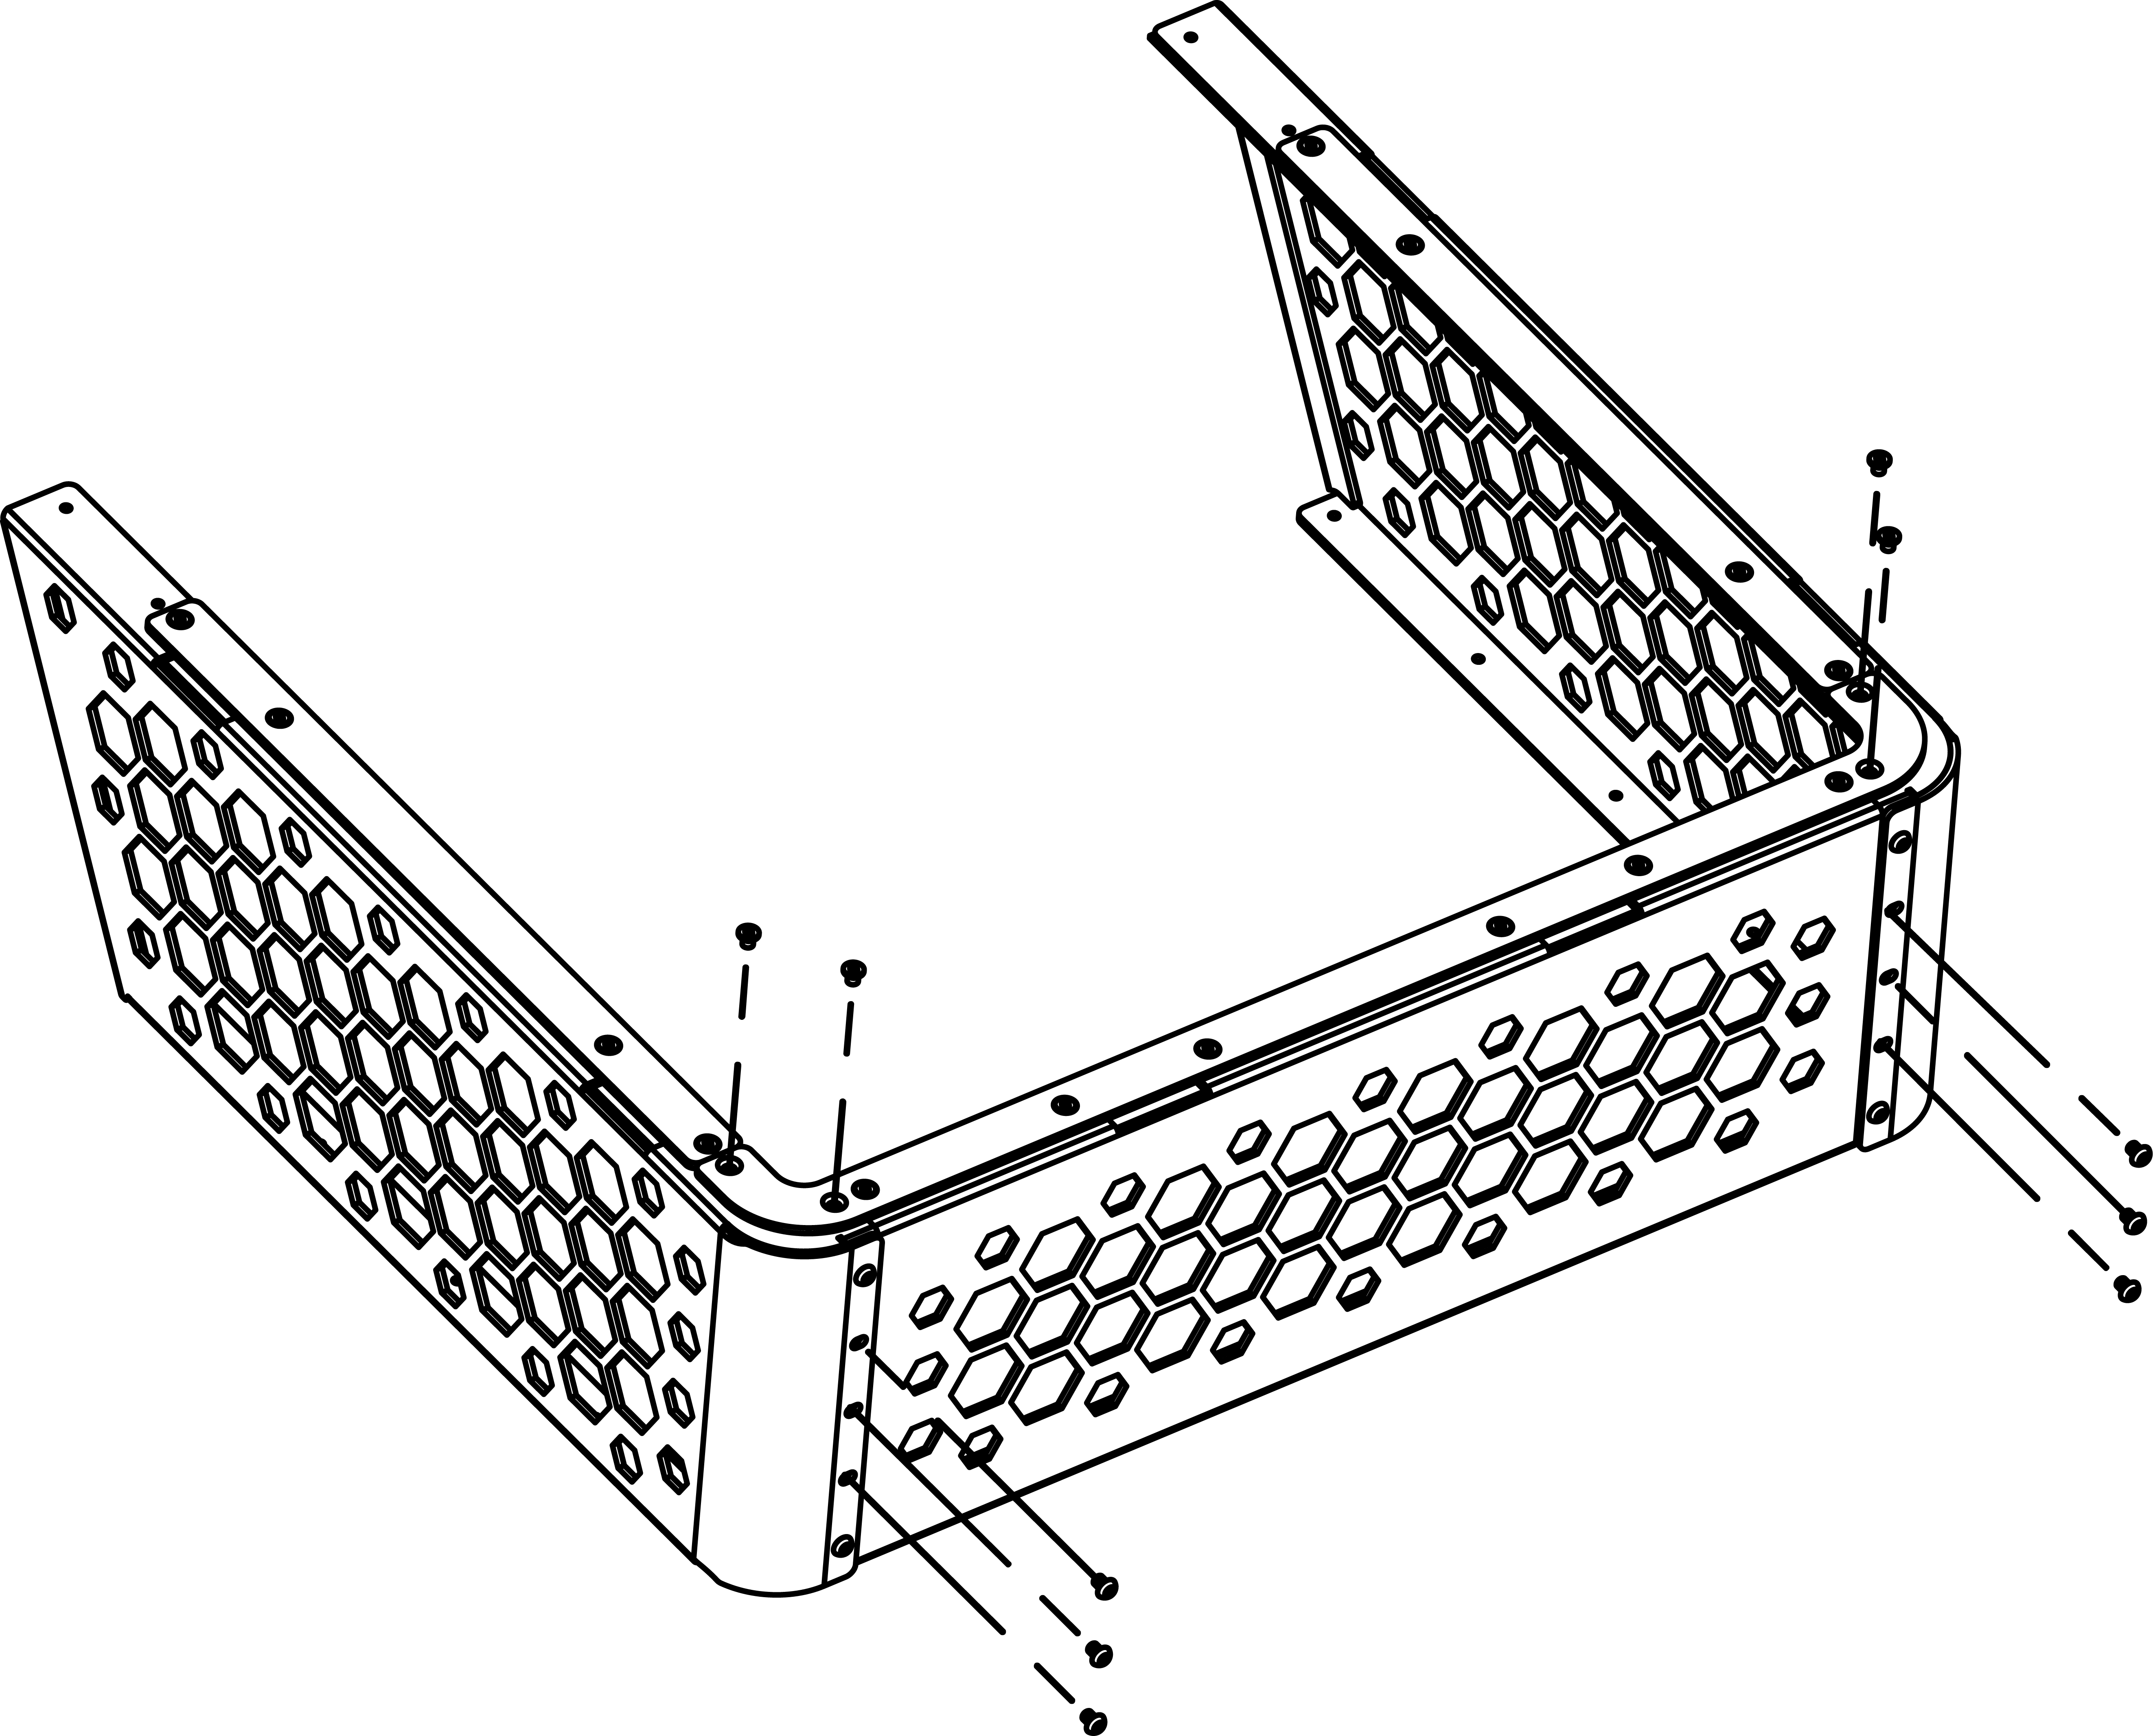
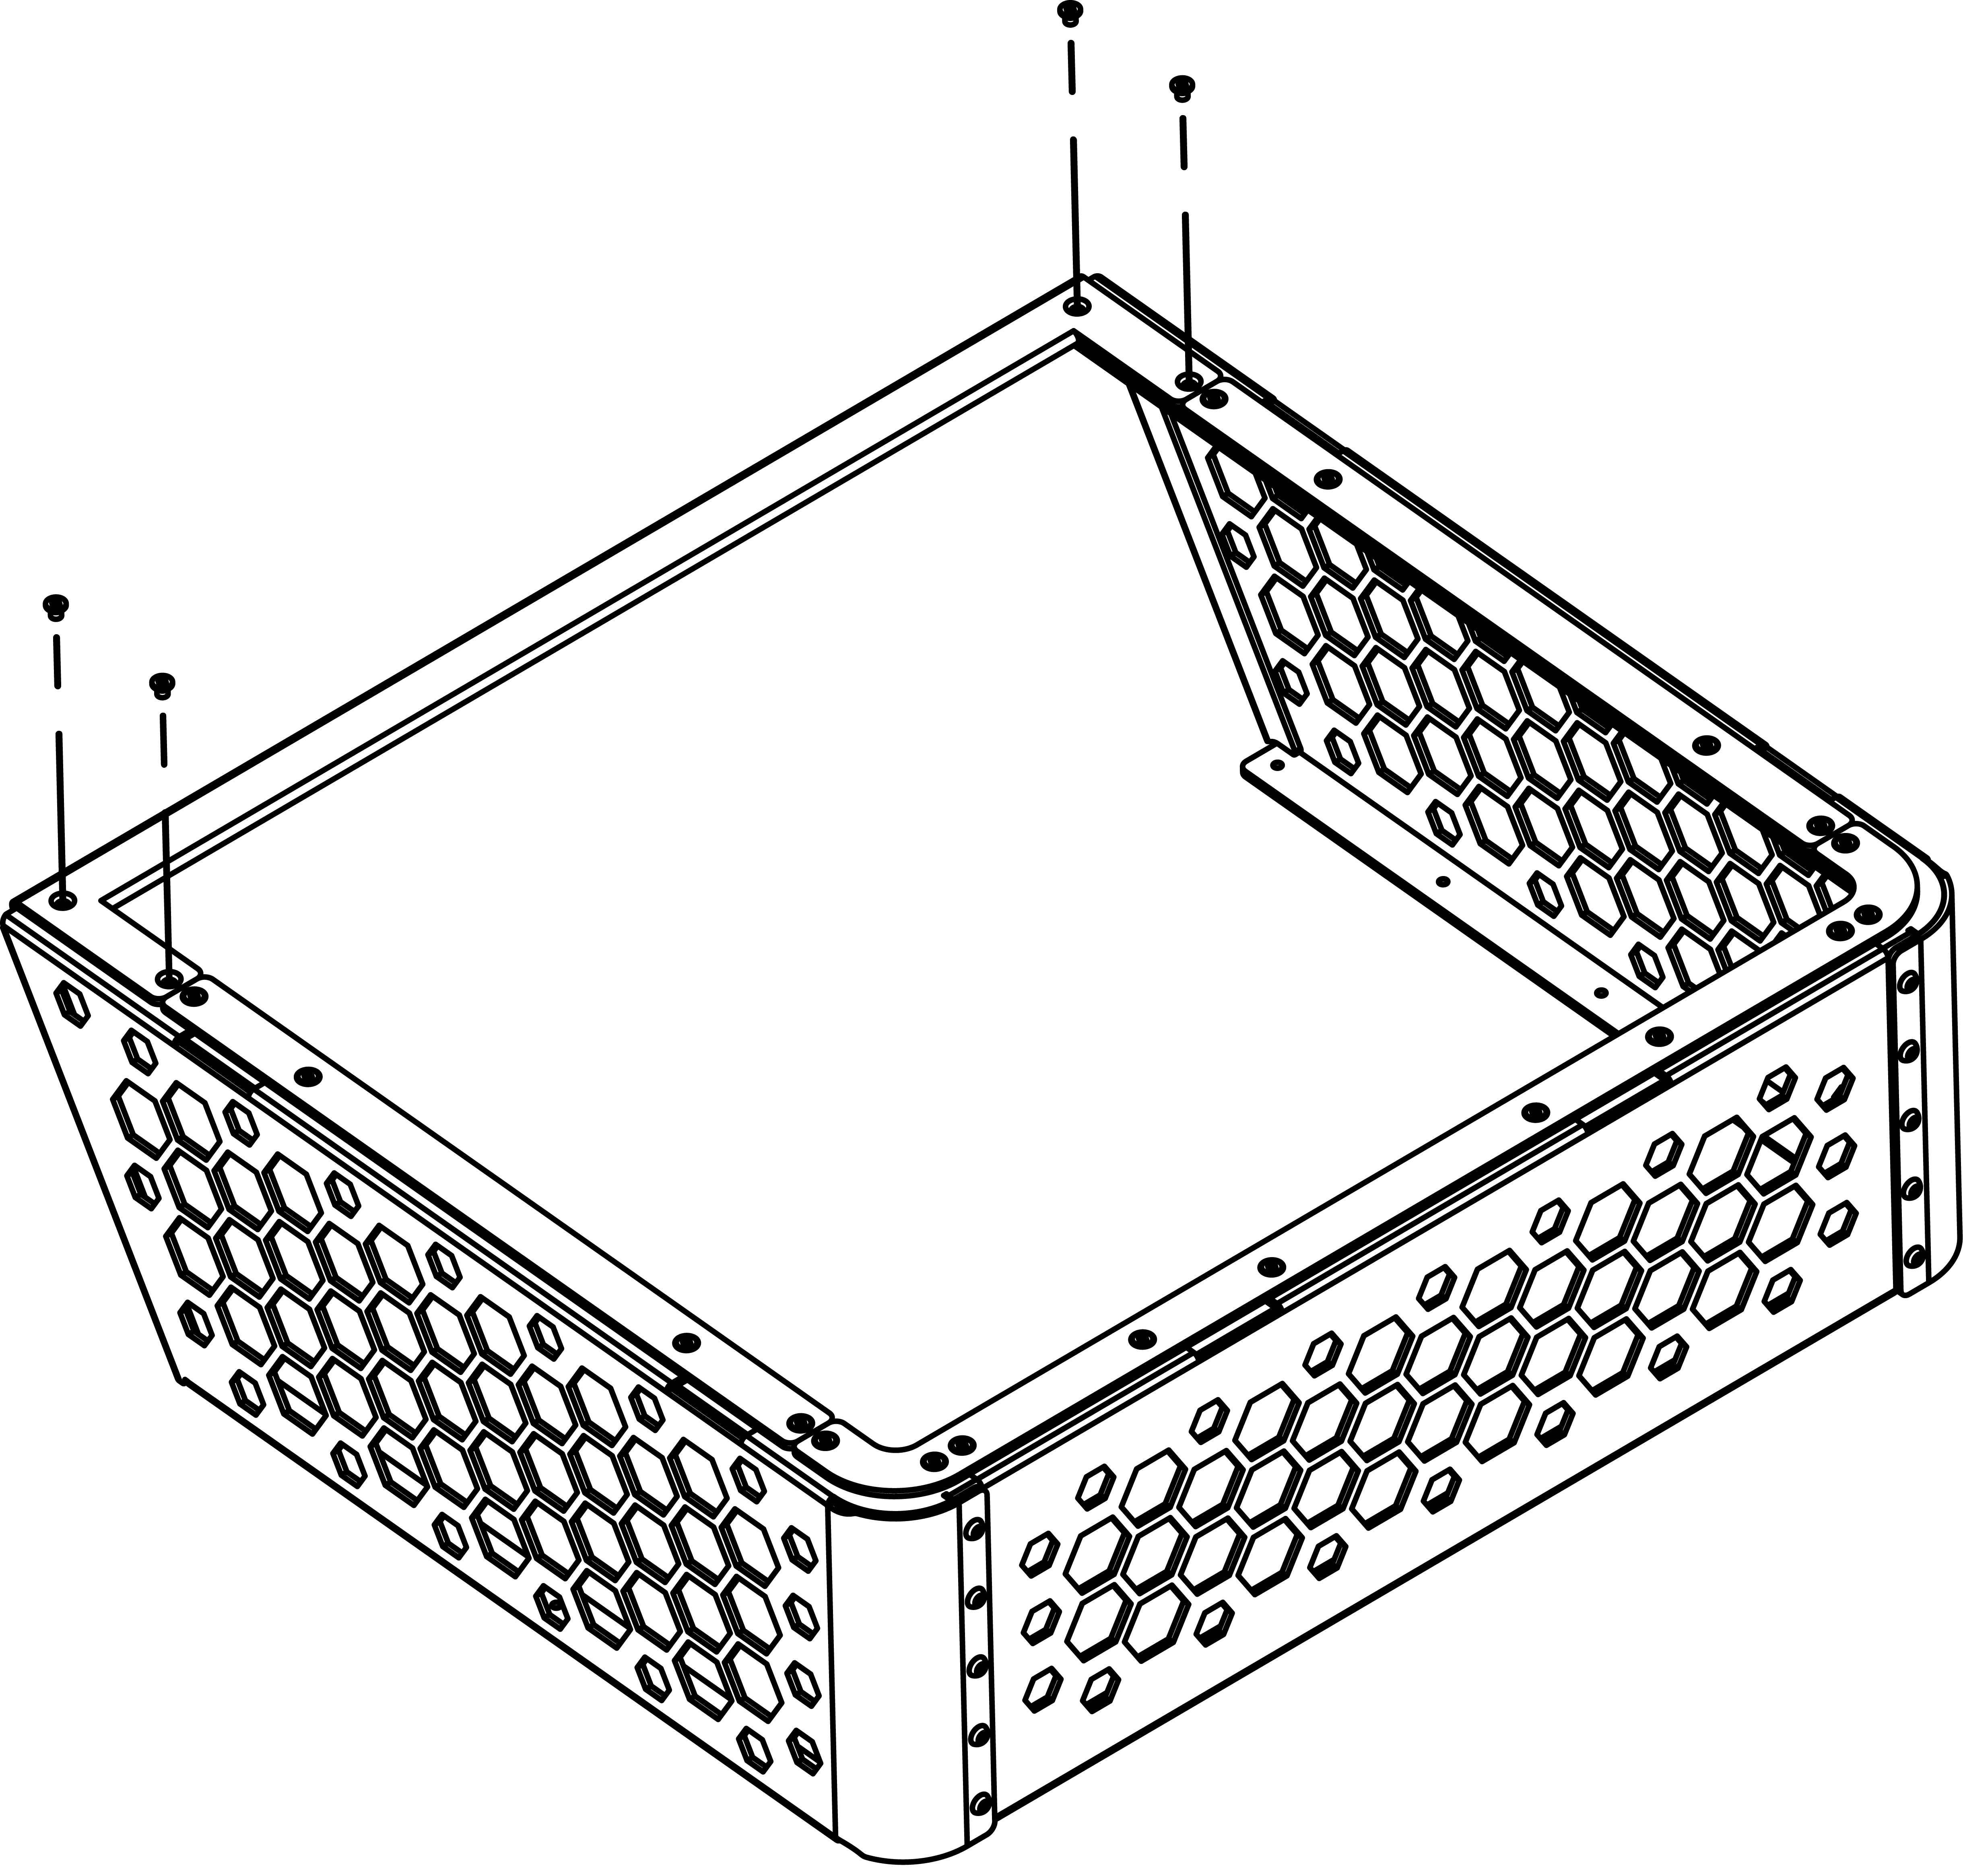
Step 2: Attach the U-Shaped Frame
Place the U-shaped frame onto the assembled side plates, checking that it sits flush with no gaps.
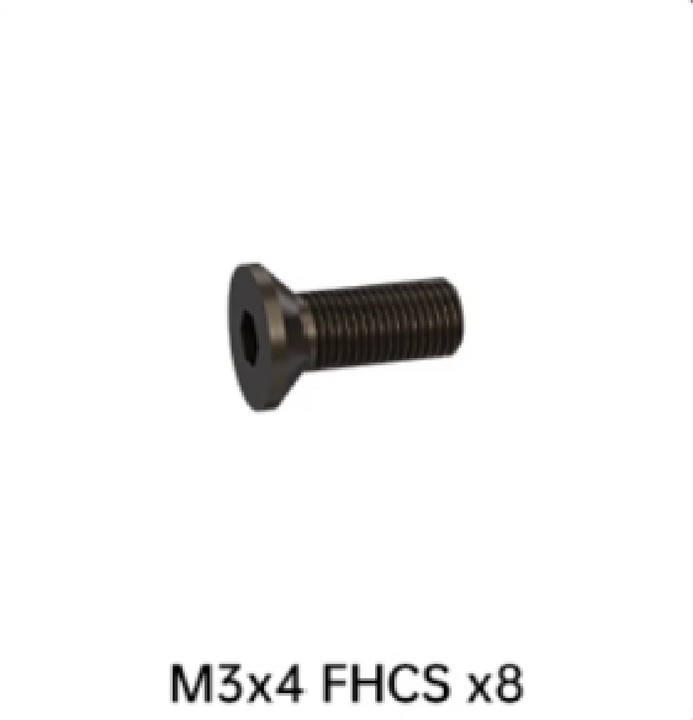
Fix it in place using M3x4 flat head countersunk screws. Ensure screw heads sit flat for a clean finish.
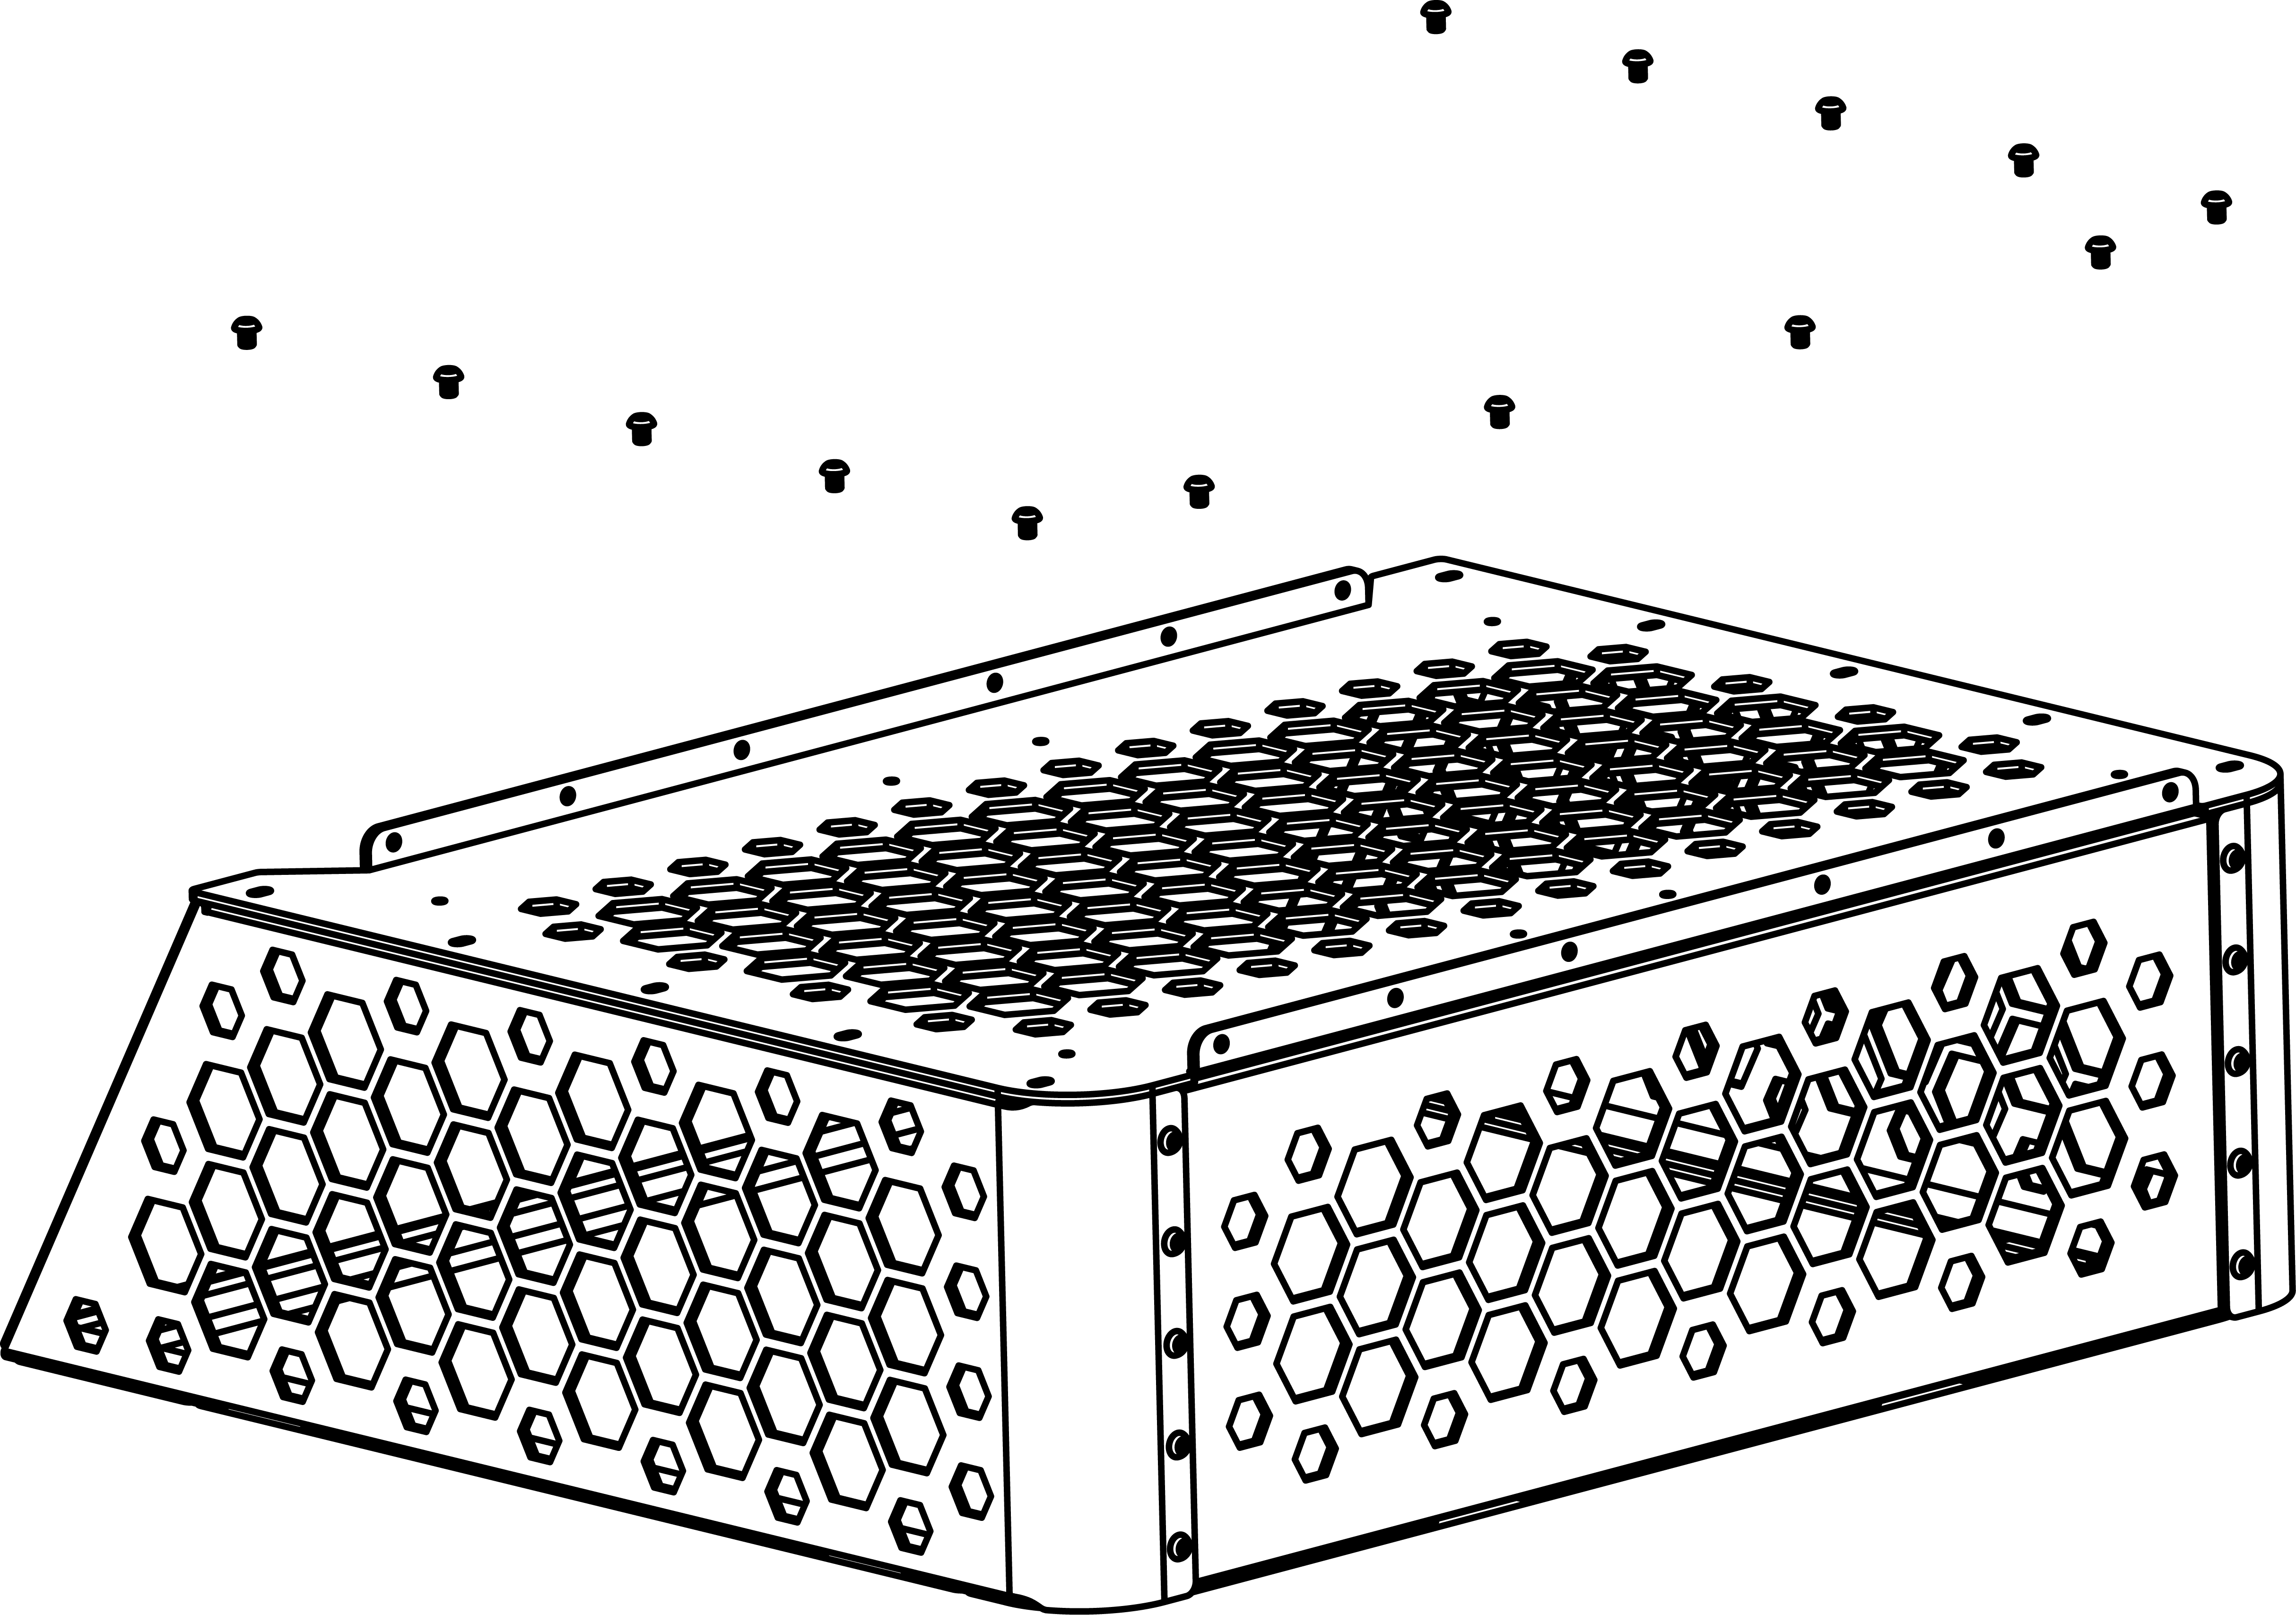
Step 3: Install the Top Plate
Flip the assembly upside down on a soft surface to avoid scratches.
Align the top plate with the frame, confirming all edges are even.
Secure with M3x4 button head cap screws.
Step 4: Mount the AMS Support Bars
Use M3x14 flat head countersunk screws and M3x4 button head cap screws to attach the AMS Support Bars: M3x14 screws for vertical mounting, and M3x4 screws for side mounting onto the top plate.
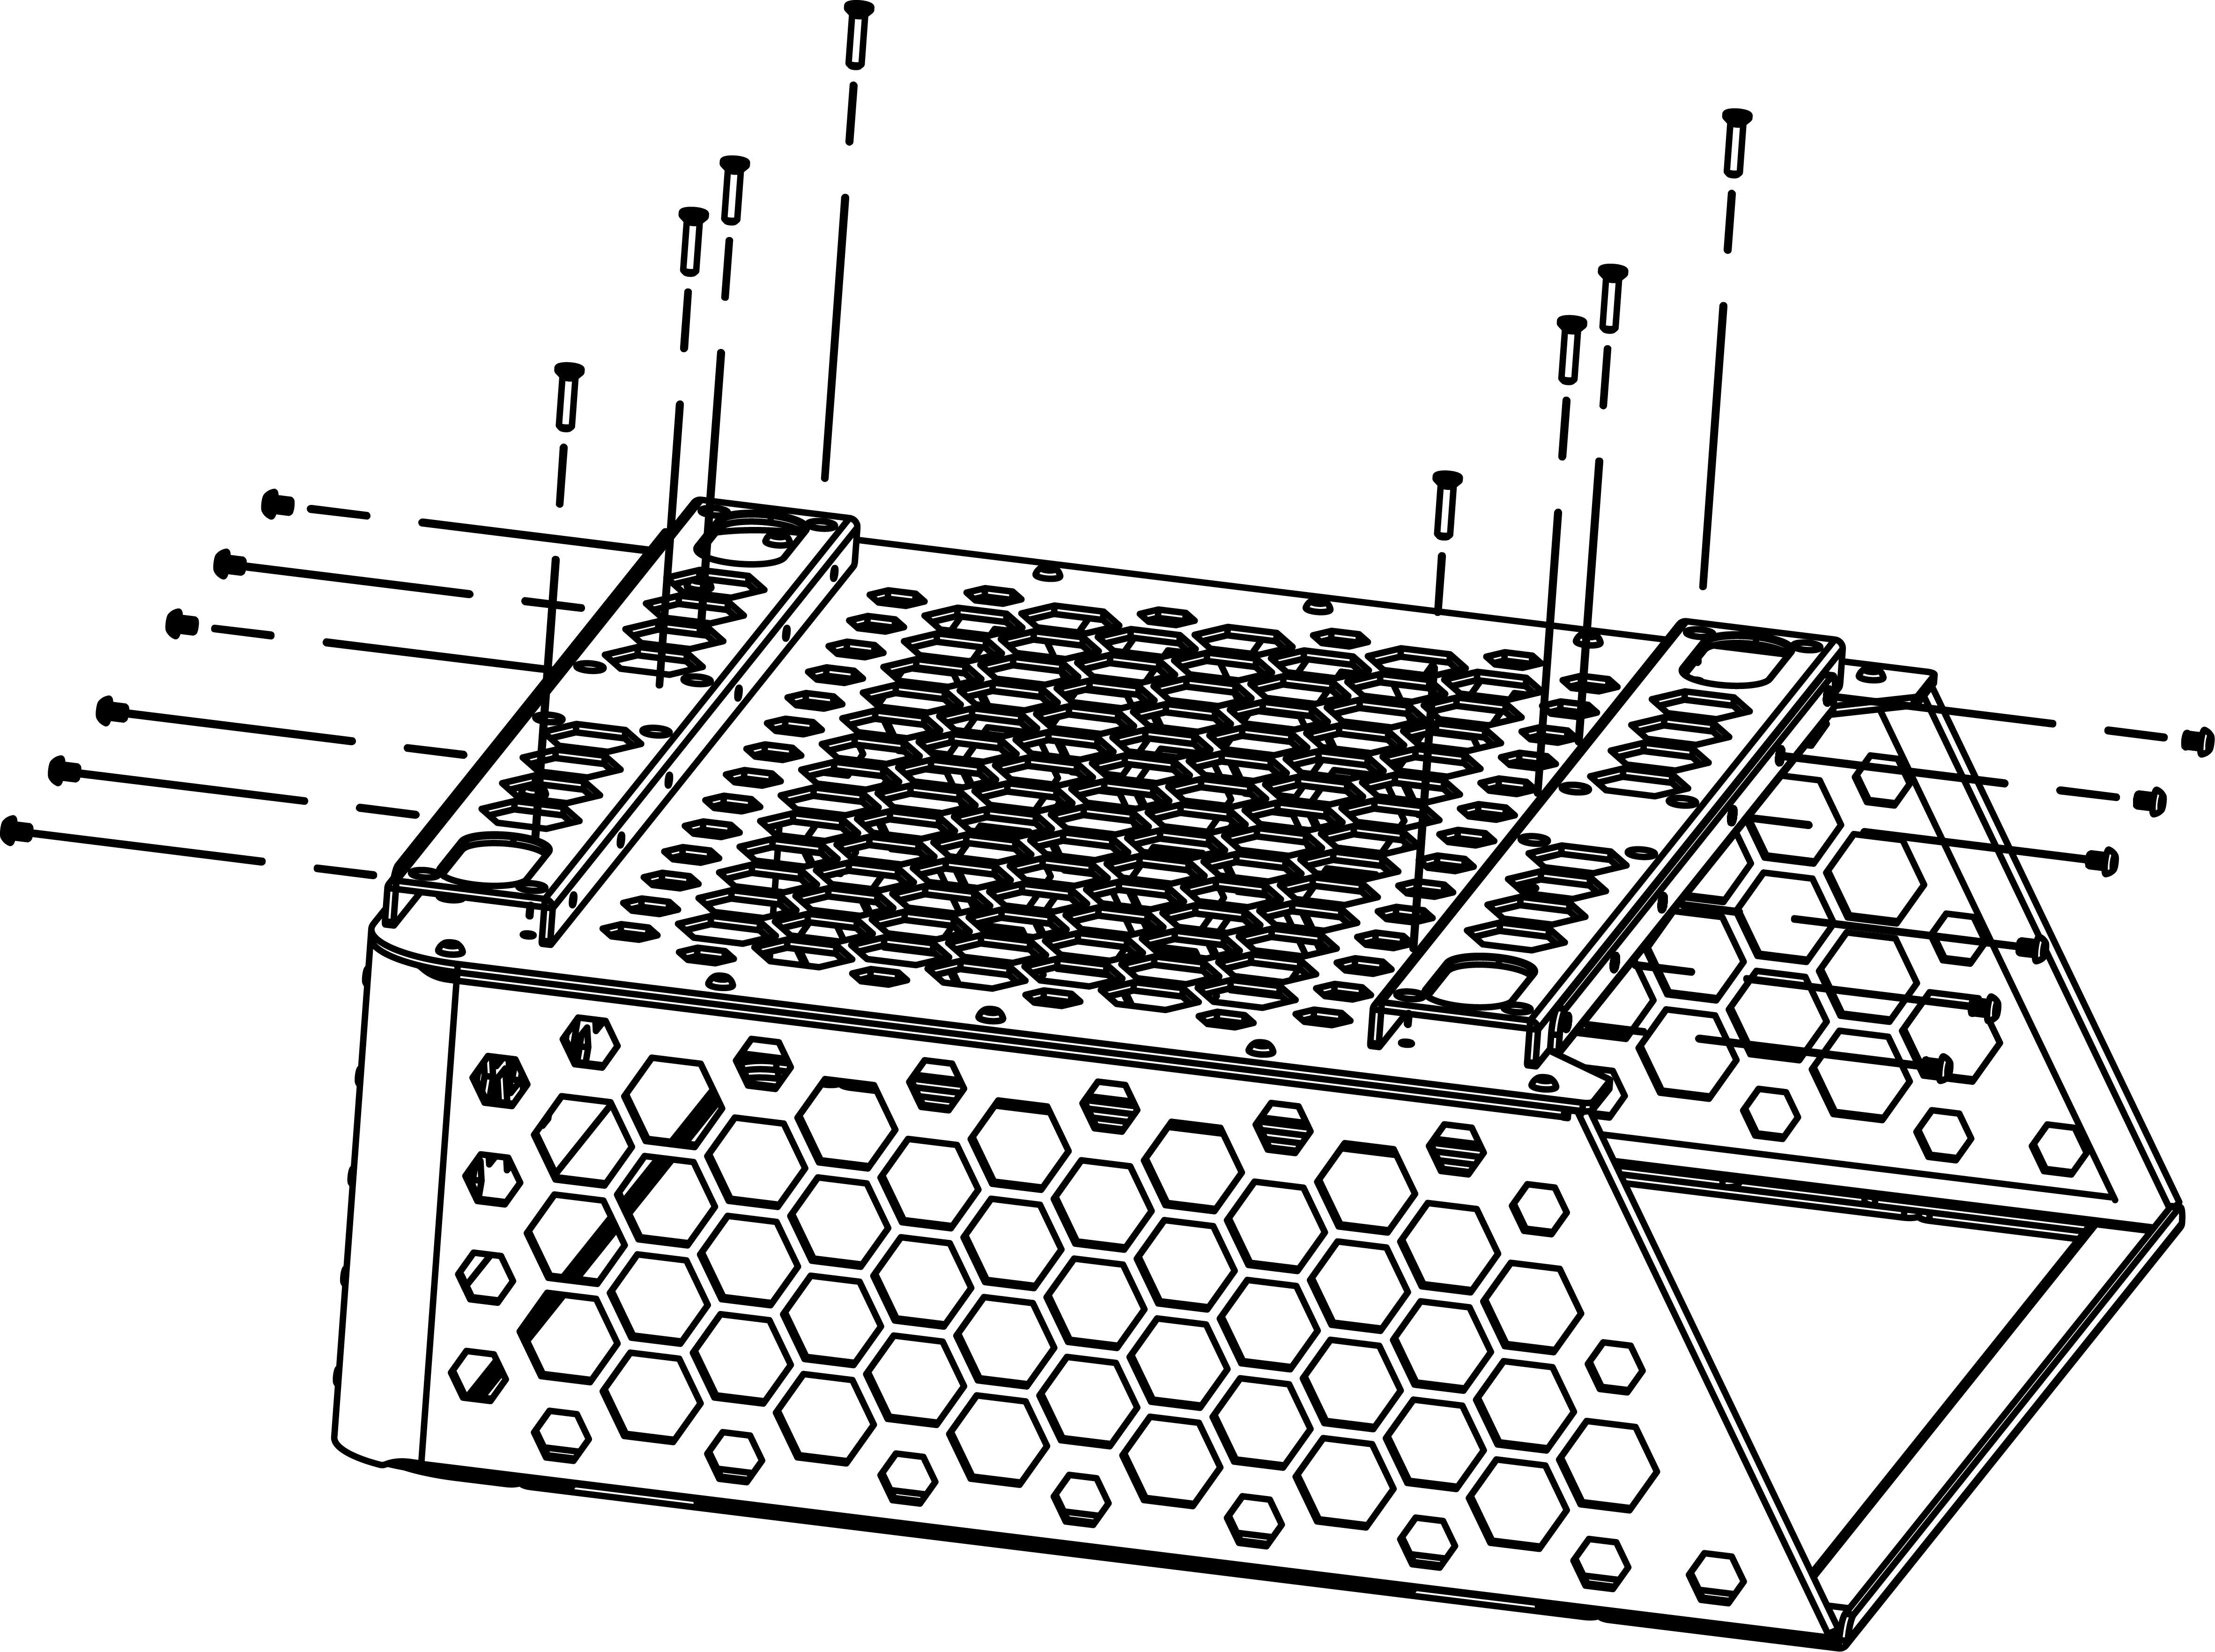
For one AMS or AMS 2 Pro unit: Install two support bars only.
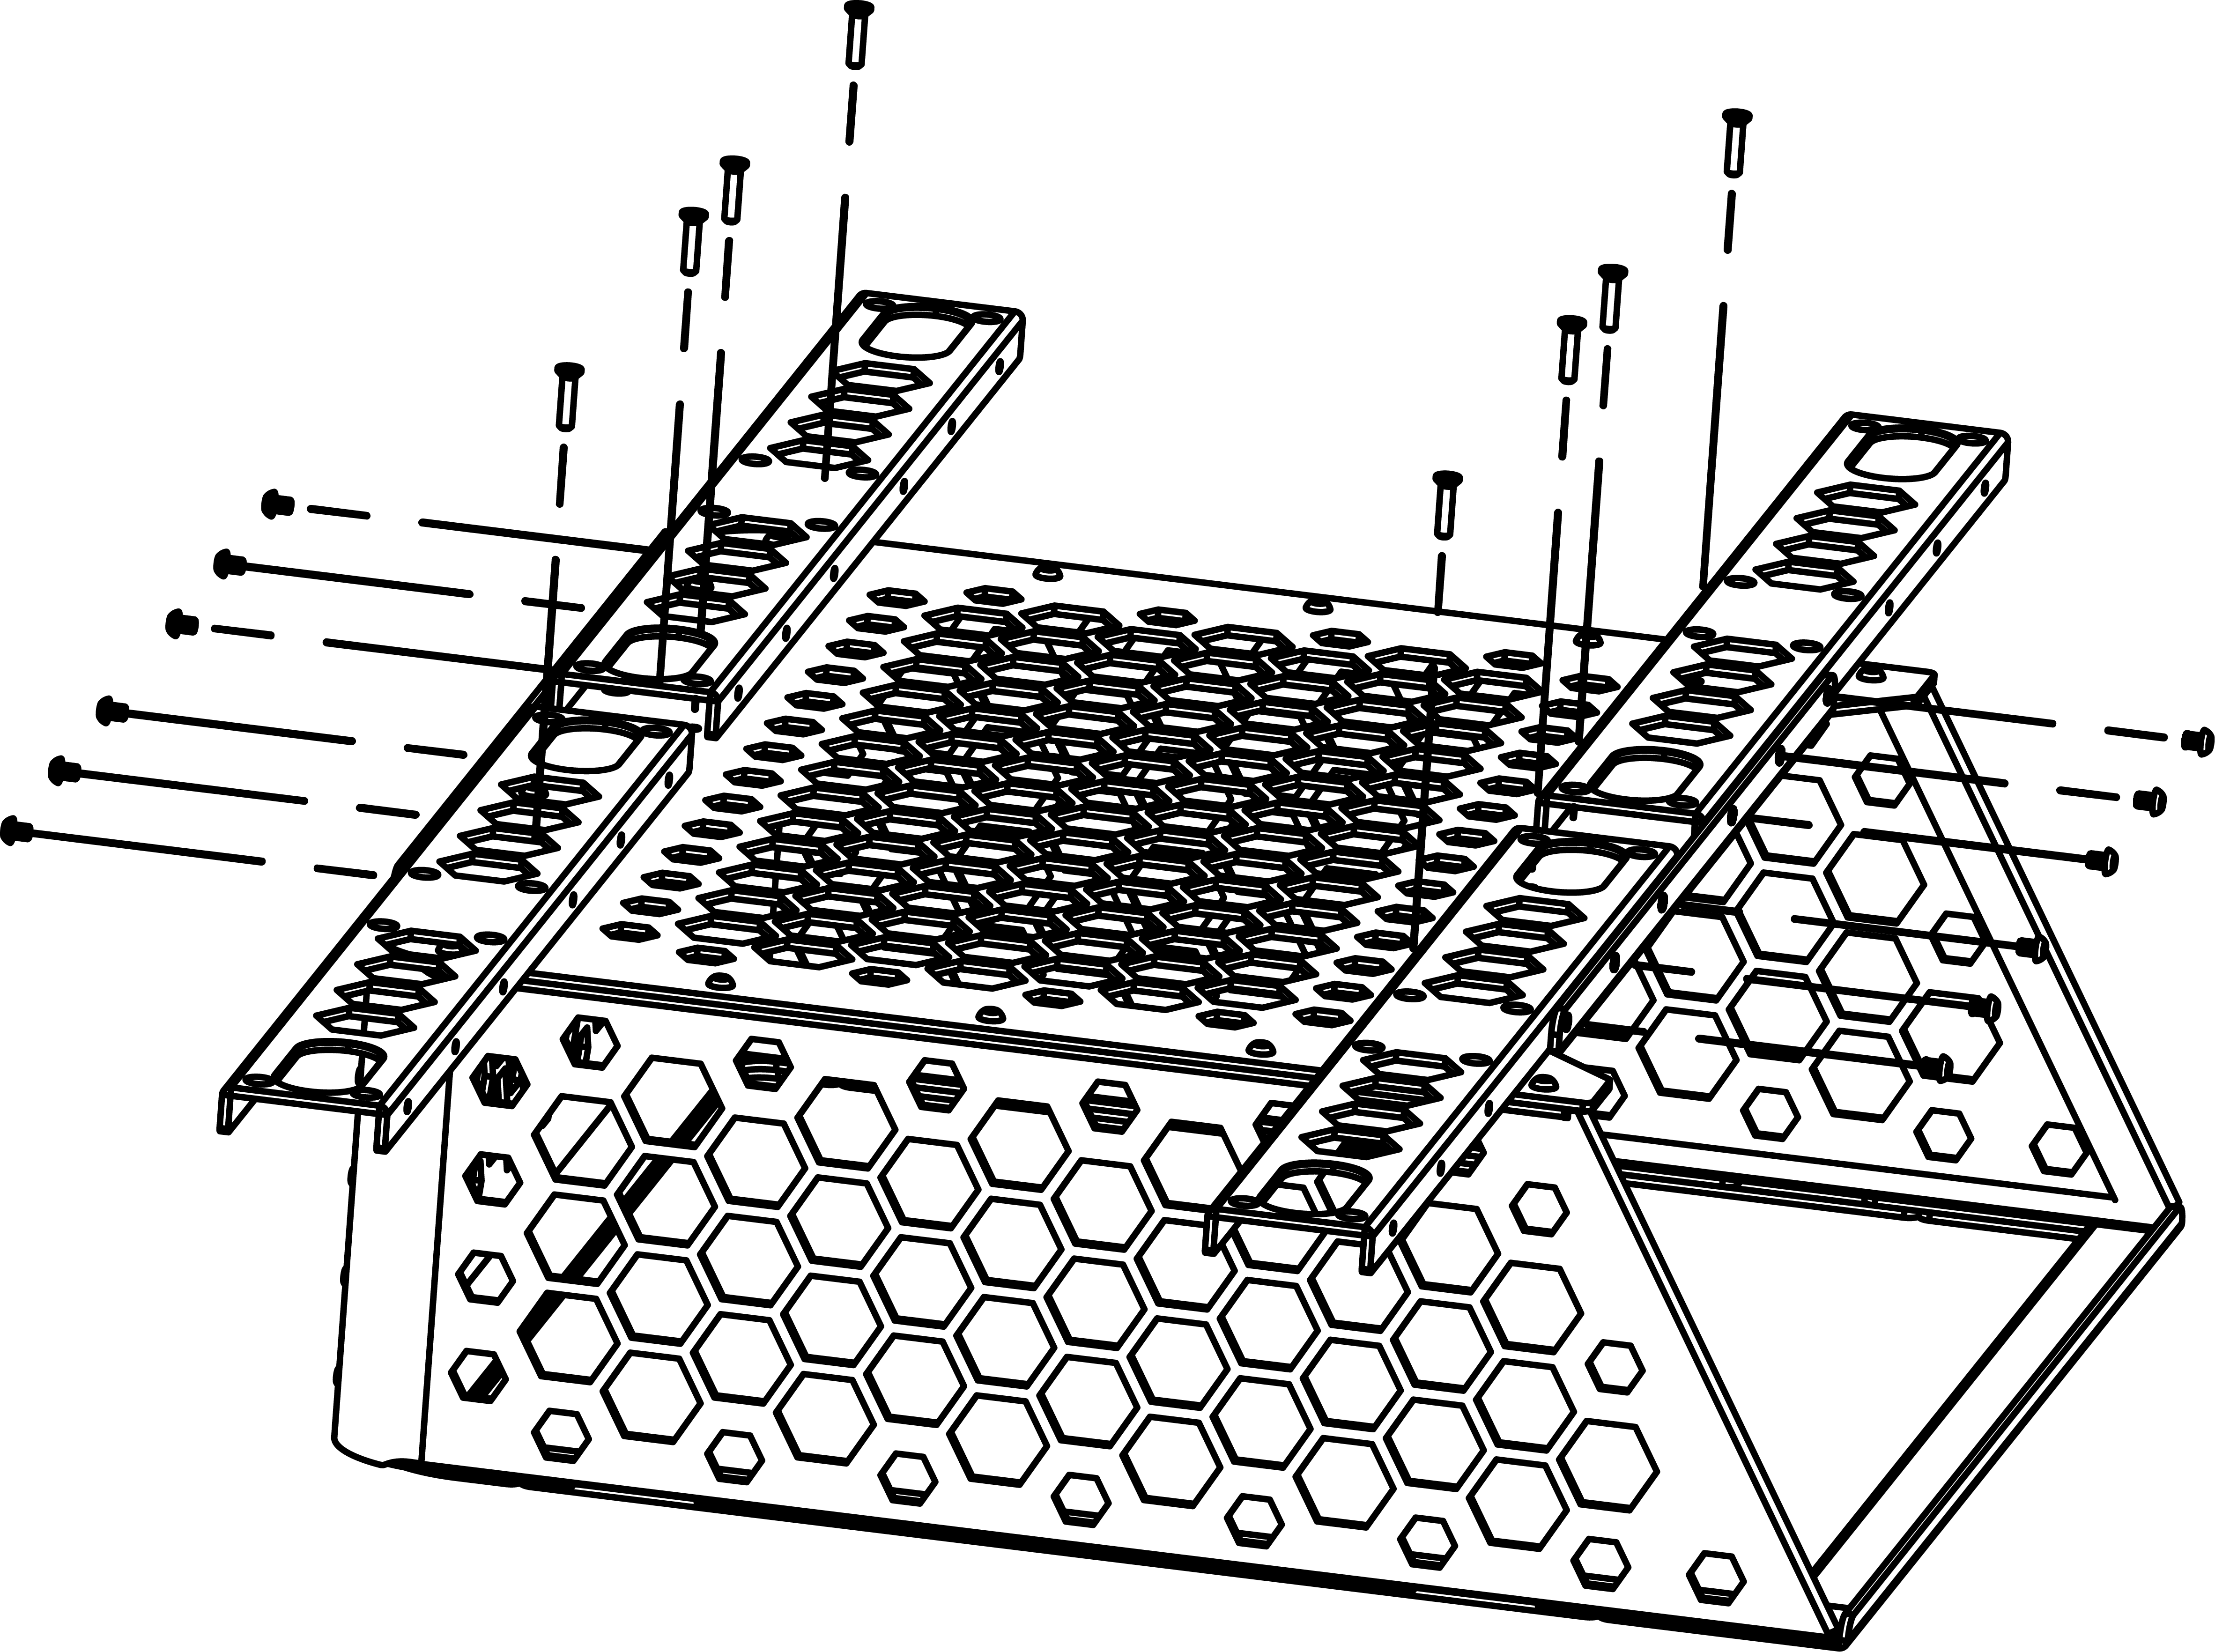
For two AMS or AMS 2 Pro units: Install all four support bars.
Additional printable files (such as build plate storage, tool storage, and top glass cover stays, and more) are available on GitHub.