K-Touch
Product Link: BIGTREETECH Official Website
Important Usage Information
- When the K-Touch is powered by its built-in lithium battery, the operational duration varies between 20 to 30 minutes, influenced by the brightness level of the screen. To preserve the battery and extend the device's lifespan, it is advisable to charge the K-Touch or turn it off when not in use.
- The screen may flicker when the lithium battery is low on power. This flickering is normal and acts as a warning to users that the battery is almost empty. Users should then promptly charge the battery or turn off the K-Touch.
- For users who frequently power the printer on and off, it's recommended to use the K-Touch in DC5V mode. This setting bypasses the battery to avoid excessive wear from repeated charging cycles. For battery operation, slide the switch at the back to battery mode.
- Home page sensor names within the Klipper configuration must be limited to 30 characters. If the sensor name or temperature does not display correctly, please adjust the klipper configuration names accordingly. For instance,
temperature_sensor BQ_MCUis an acceptable name as it contains 24 characters and displays properly. - K-Touch supports adding multiple Klipper printers for users to switch and control. Currently, up to 50 printers can be added at the same time for selection and switching.
- K-Touch starts printing thumbnails. Currently, it only supports previewing the first 50 Gcode files. If more than 50 Gcode files are uploaded, K-Touch may run out of memory. Please delete some old files to ensure normal display.
Basic Specifications
| MCU | Xtensa 32-bit LX7 dual-core ESP32S3R8 clocked up to 240MHz |
|---|---|
| Memory | PSRAM-8MB, Flash-16MB |
| Display Size | 5” |
| Resolution | 800 x 480 |
| Viewing Angle | IPS Full View |
| Display Color | 16.7M |
| Connection | 2.4G Wi-Fi (IEEE 802.11 b/g/n) |
| Operating Temperature | 0-60°C |
| Operating Current (Fully Charged) | Screen on: 0.6A, Screen off: 0.2A |
| Operating Current (Charging) | Screen on: 1.25A (Post May 2024: 0.95A on), Screen off: 0.85A |
| Logic Voltage | 3.3V |
| Battery Life | Enables K-Touch portable use for up to 0.5 hours. |
| Charging Time | Approximately 1.2 hours |
| Expansion Interfaces | I2C (for future firmware-supported temperature/humidity sensors) USB Drive (supports 3mf files from USB drive - FAT32 only) |
Assembly Instructions
Power Management
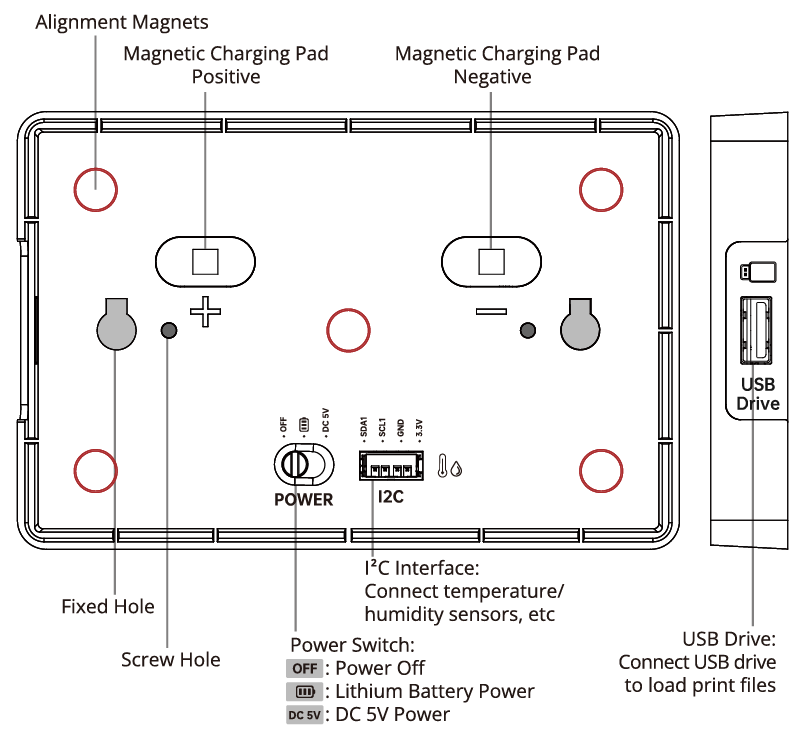
- Slide the power switch to
Lithium Battery Powerfor portable use. Slide it toDC 5Vto power directly from the magnetic charging dock, thereby extending the internal battery's lifespan. If you frequently turn the printer on and off, this mode is recommended. Turn off the K-Touch by switching toOFF.
Magnetic Charging Dock
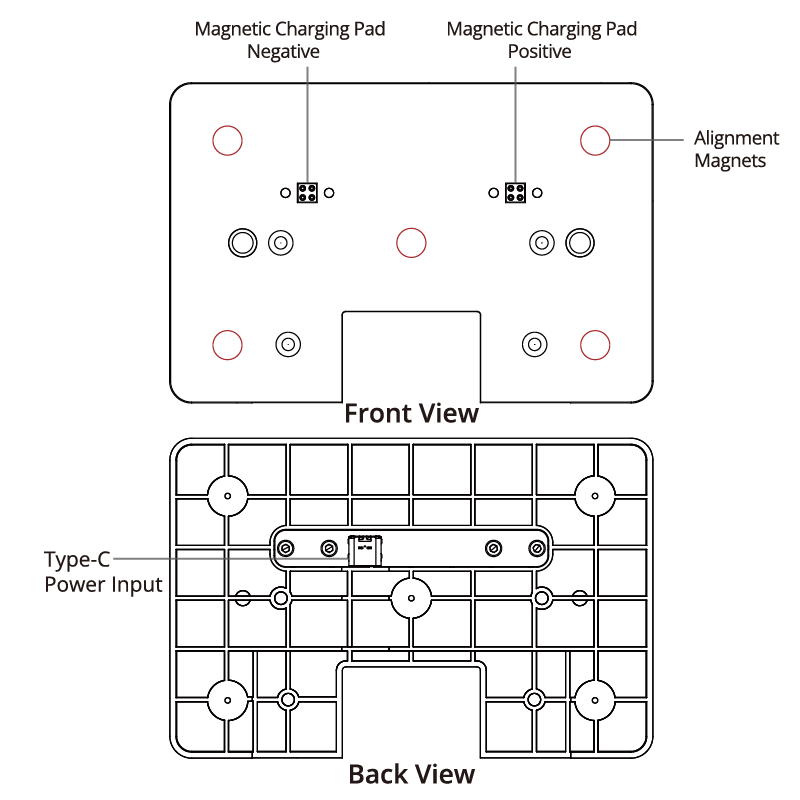
- *The power input has been outfitted with hot-plug protection, allowing users to hot-plug the power supply.
Packaging List
 |
 |
|---|---|
| K-Touch x1 | Mounting Bracket x1 |
 |
 |
| Magnetic Charging Dock x1 | USB-C Charging Cable x1 |
 |
 |
| M3x6 Screws x 4 Hex Key x1 |
BTT Duck x1 |
User Interface Description
First Connection
After the first startup or performing the "Restore to Factory Settings" command, you will see the display below.
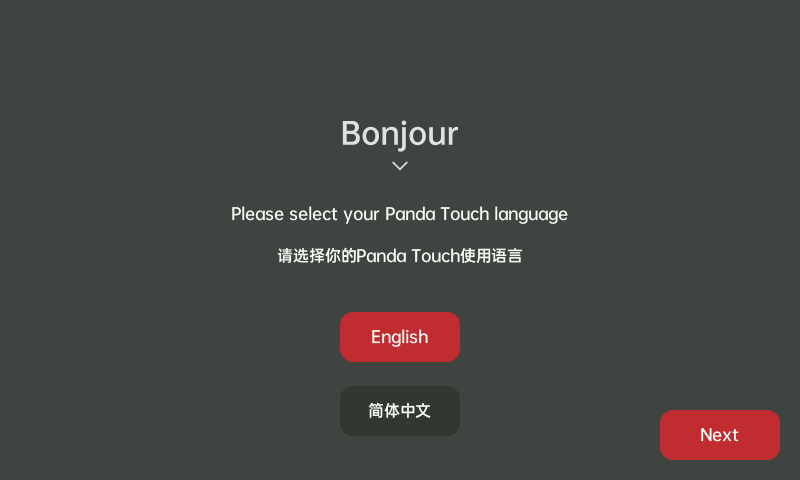
Language Selection Guide
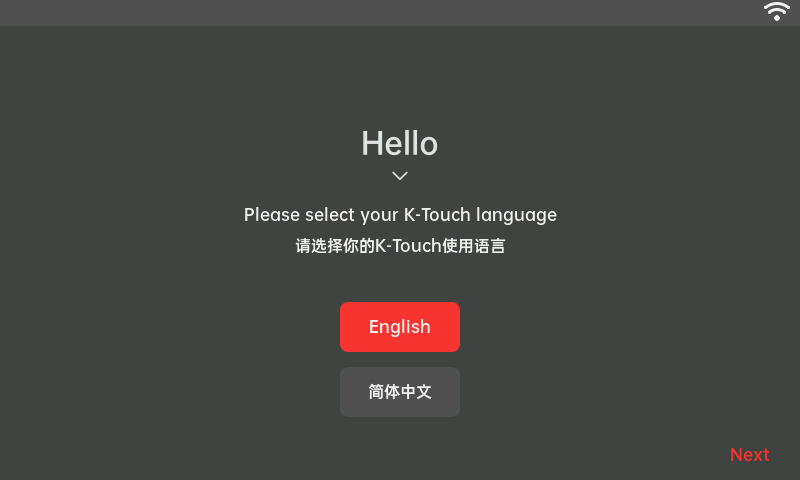
- Selecting a language for K-Touch.
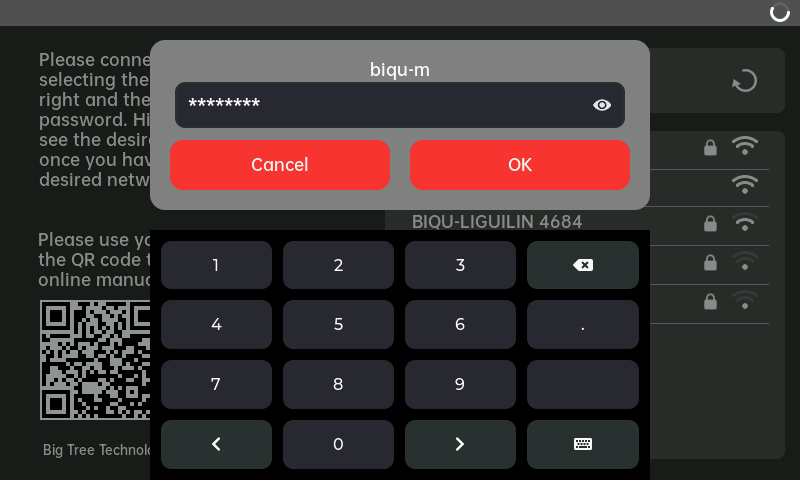
WiFi Connection Guide
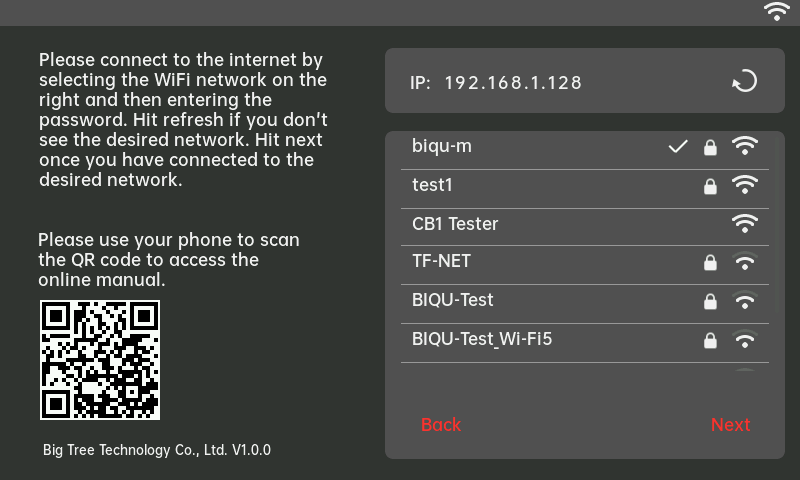
- During the initial setup, K-Touch will scan for WiFi networks and display up to 20 networks with the strongest signals. If your network does not appear on the list, tap
Refresh, K-Touch will then re-scan for WiFi networks. - The Firmware version (
V1.0.0) does not support connecting to hidden WiFi networks. Also, K-Touch cannot scan for WiFi networks while it is connected to one. - Tap on a WiFi name from the list to access the Keyboard Interface. After entering the correct password (password length should be between 8-64 characters), click "OK" to initiate the WiFi connection.
- The connection status will be displayed next to the WiFi network signal strength. A
spinnericon indicates that WiFi is still attempting to connect, while a✔icon indicates a successful connection. - Once connected, the
Nextbutton will be activated. ClickNextto advance to the printer connection menu.
Printer Connection Guide
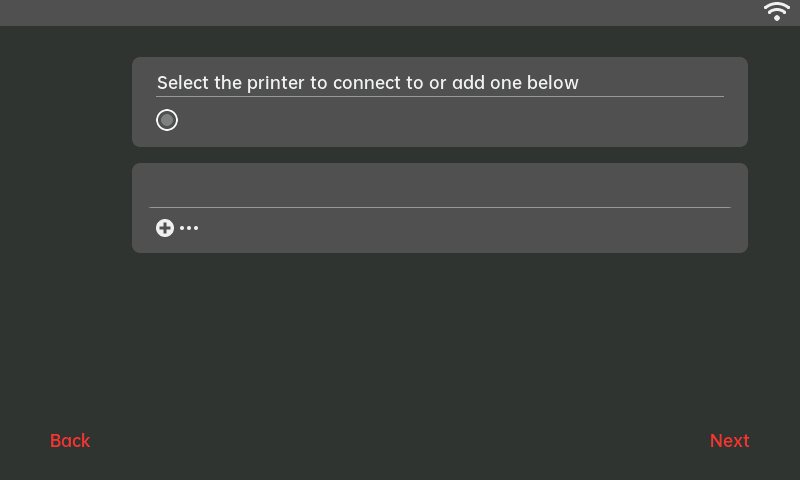
- Upon first accessing this interface, you must connect a printer to proceed to the main interface.
- Click the
+...to add a printer.
Adding a Printer
- K-Touch offers two methods to add a printer:
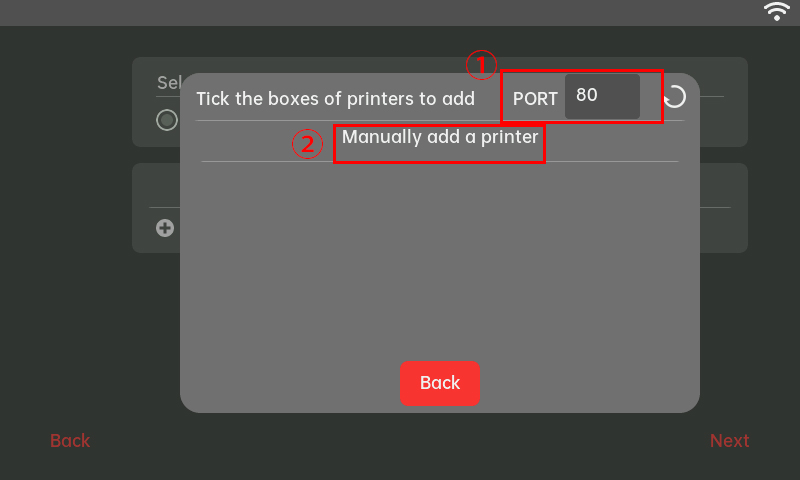
①:Scan to Add Printer: Scanning and adding Klipper printers that are on the same network as the K-Touch.
②:Manually Add Printer: Directly entering the Klipper printer's IP address and port number to add the printer.
Renaming a Printer
- Long press the printer name to rename the printer (length: 2–20 characters).

①:Scanning for Printers

- After entering the port number, which by default is: 80 (length 2~5 characters), click the refresh button on the right to initiate the scan. The scan, which takes about 60 seconds (depending on network conditions), will identify printers on the same WiFi network.

- The list of detected printers, along with their IP addresses and port numbers, will automatically update once the scan is complete.
②:Manually Adding a Printer

- Click
Manually add a printerto open the manual addition interface.
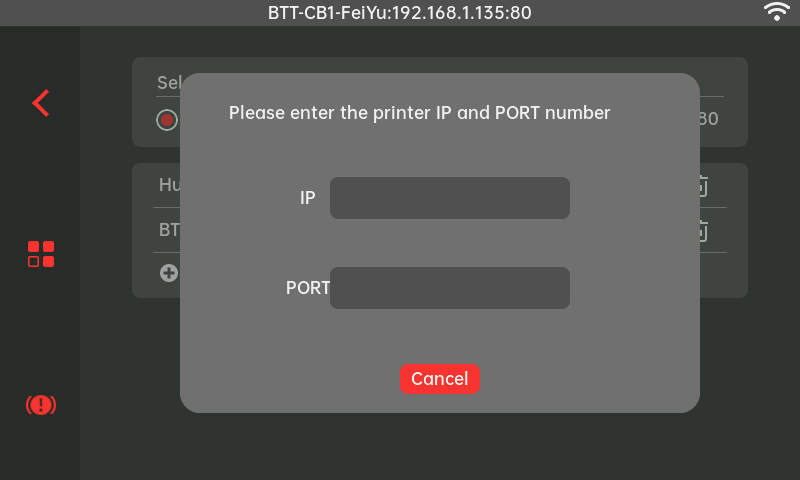
- Enter
IP(length: 11–14 characters) andPORT(length: 2–5 characters), then click confirm to successfully add the printer. You will then be directed to the printer selection page.
Selecting the Printer to Add
Note: K-Touch currently only supports adding up to 50 printers for connection switching.
-
Printer not selected: -
Printer selected: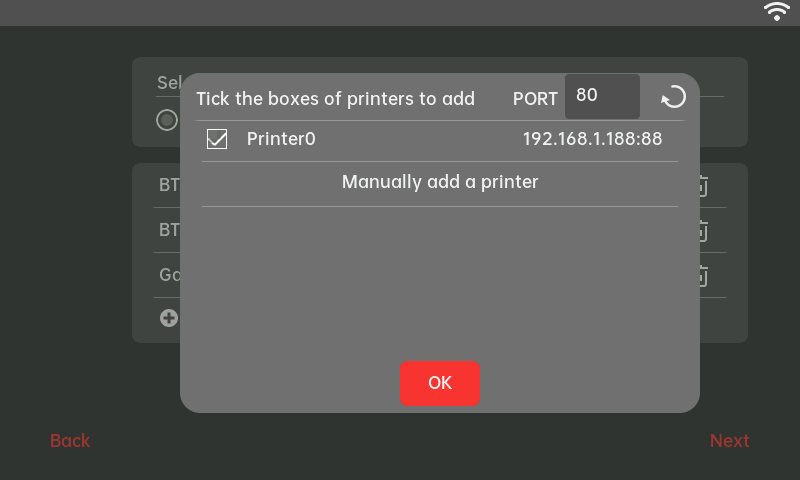
-
Tap on the printer you want to add. A
√will appear in the box once selected, and theBackbutton will change to aOKbutton. Click it to add the printer to the connection list. - Note: The refresh and printer connection list include duplicate removal functions, please verify before adding and selecting printers.
Select the Printer to Connect
-
Select the printer to connect
-
Tap the
OKbutton to establish a connection with the selected printer.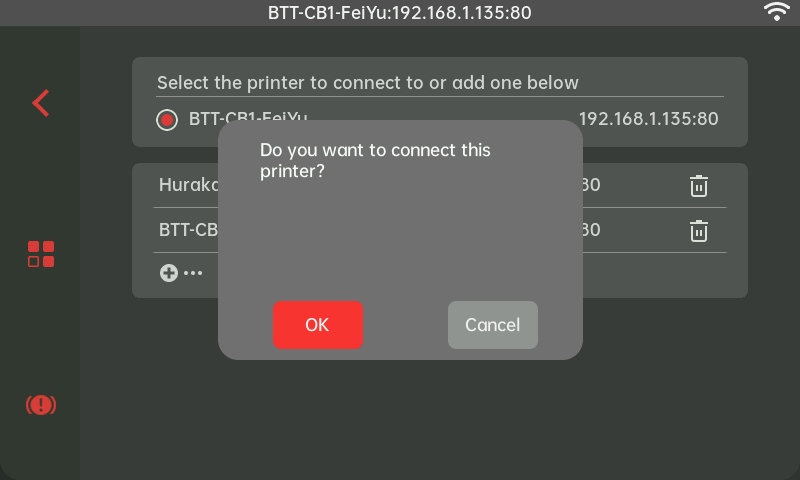
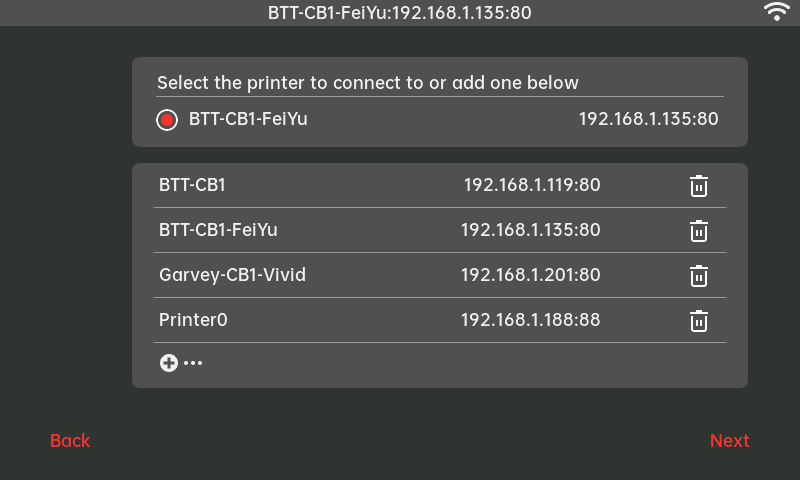
-
Printer connection successful.
-
Once a printer is successfully connected, the circle icon will change to the theme color (default is red), and the connected printer’s name, IP address, and port number will be displayed on the top.
- The selected printer's information will be visible at the top of every interface within K-Touch.
- After completing the connection, click
Nextto navigate to the main interface.
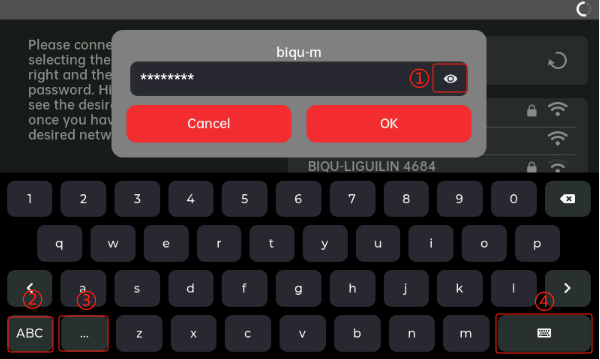
Keyboard Description
① :Use this key to hide or display the inputted information.
② :Uppercase/lowercase letters.
③ :Switch to “symbol input.”
④ :Switch to “numeric input.”
-
Letter Input:
-
Symbol Input

-
Numeric Input
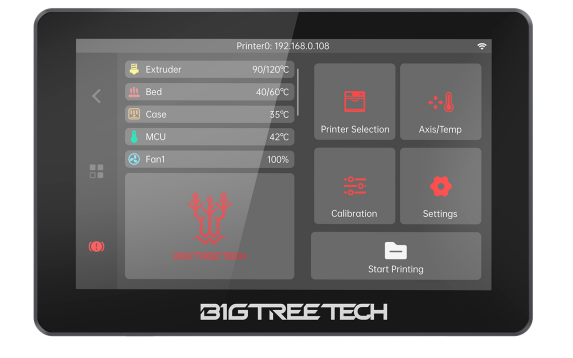
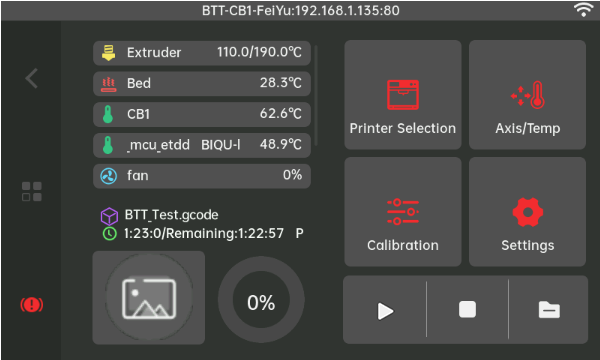
Main Interface

- The K-Touch main Interface is intuitively designed, featuring six key elements and navigation keys:
- Printer Selection: Navigate to the printer selection interface, which functions similarly to the initial connection process.
- Axis/Temp: Access controls for temperature settings, extruder feed and retract, axis movement, and motor unlocking.
- Calibration: Endstops status checks, auto PID tuning, and Z-offset Calibration.
- Settings: Adjust WiFi connectivity, screen brightness, screen timeout settings, language, and theme color. Access system information such as device ID, current language, firmware version, and factory reset options. Also, the navigation guides for firmware OTA and feedback are also provided.
- Start Printing: Search and display print files, including printer name, estimated print time, and thumbnails.
- Real-time Temperature Display: Navigate to the temperature and axis movement interface.
- Navigation Keys: Three dedicated buttons on the left allow for easy navigation:
- ① :Back Button: Disabled on the main interface, click to return to the previous interface on other interfaces.
- ② :Home Button: Disabled on the main interface, click to return to the main interface on other interfaces.
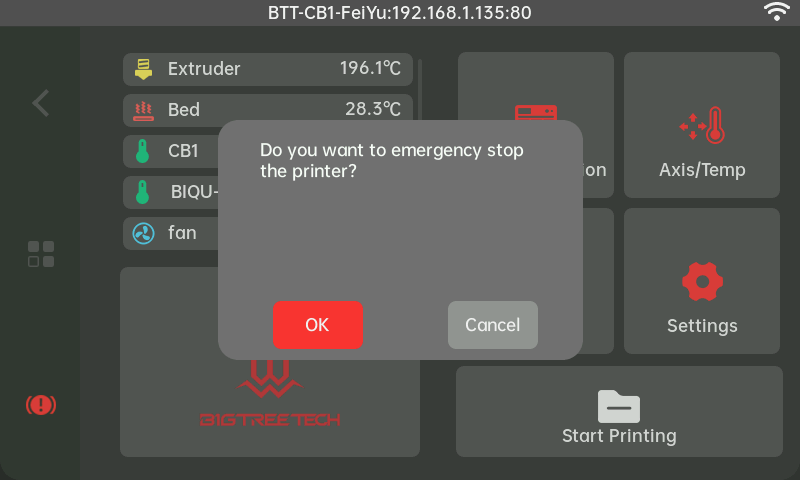
- ③ :Emergency Stop Button: Click to send an emergency stop command to the printer.
Axis/Tempe Interface
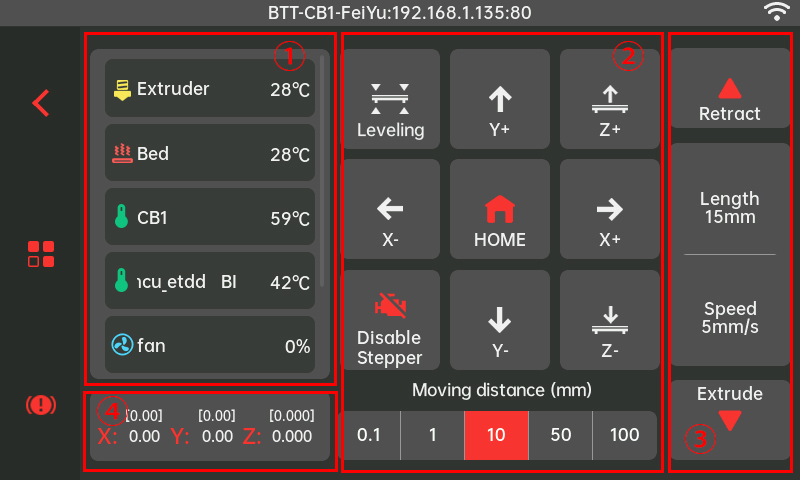
① :Real-time temperature and fan speed; adjust extruder/heated bed temperatures, fan speed.
② :Leveling, unlock motors, and home commands; select the single movement distance for X, Y, Z axes.
③ :Manually extrude or retract the filament; choose the extrusion length and speed.
④ :Display the real-time positions of the `X/Y/Z` axes; navigate to the Z-offset Calibration.
① Settings
Setting Extruder/Heated bed Temperatures
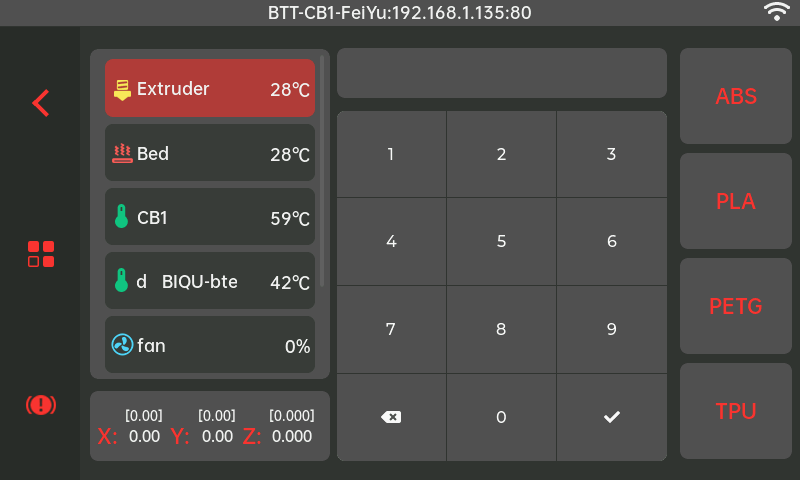
- Tap the
Extruder/Bed, enter the desired temperature, and press√to set. The process for setting the bed is similar. -
On the left side of the keyboard are
Quick Temperature Adjustmentbuttons, which allow for one-click temperature settings for the extruder and bed.① :ABS: Extruder Temp:230°C,Bed Temp:90°C
② :PLA: Extruder Temp:200°C,Bed Temp:60°C
③ :PETG: Extruder Temp:240°C,Bed Temp:70°C
④ :TPU: Extruder Temp:220°C,Bed Temp:50°C
Setting Fan Speed
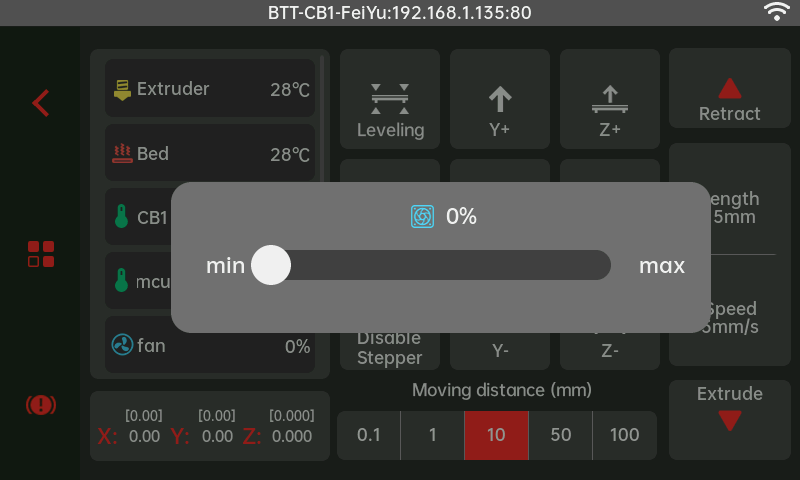
*Tap the Fan to access the fan speed settings interface. Adjust the fan speed within the range of 0-100% by tapping or long pressing and dragging the slider.
② Axis Movement
Leveling

- Tap the
Levelingbutton to initiate the process on the printer. Once completed, a popup will appear with the option toSave Data. This popup can appear on any interface (shown above in the Z-offset Calibration interface).
X/Y/Z Axis Movement
- Select the button corresponding to the desired axis to perform movements. The default movement increment is 10mm but can be adjusted as needed.
Homing
- Tap the
Homingbutton to execute homing operations for the X, Y, Z axes.
Unlock Motors
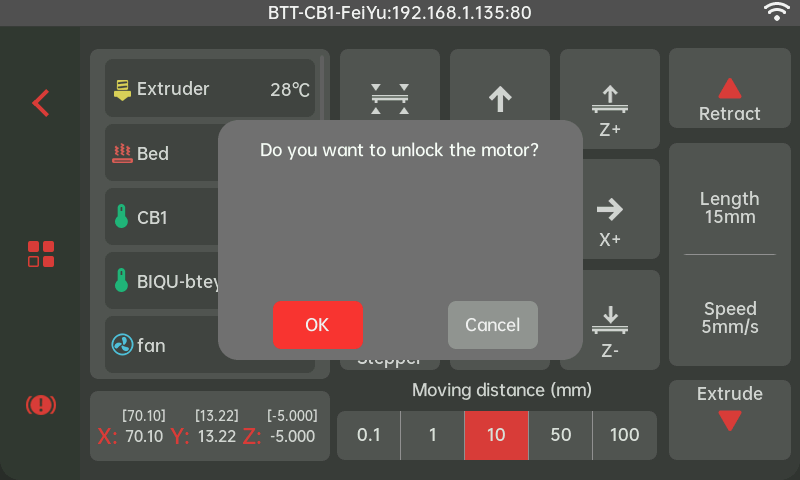
- Tap the
Unlock Motorsbutton to bring up a confirmation dialog. ChooseOKto unlock the motors orCancelto abort.
Extrusion Settings
Extrude/Retract

- Tap the
Extrude/Retractto extrude or retract the filament. If the temperature is below 200°C, a prompt will appear offering the option to heat up by selectingOKor to cancel by selectingCancel. If the temperature is adequate (≥200°C), the chosen extrusion or retraction will proceed with default settings of15mmlength and5mm/sspeed.

- Adjust the
Extrusion LengthandExtrusion Speedby tapping the respective buttons, allowing you to customize the settings.
X/Y/Z Position Display
- The interface provides a real-time display of the X, Y, and Z axes' relative and absolute positions. Access this feature to proceed to the
Z-offset Calibration.
Utilities
- Navigate to the utilities interface by tapping the
Calibrationbutton on the Main Interface.
Endstops Status
-
Check the status of the endstops by tapping the corresponding button. A popup will display the current state.
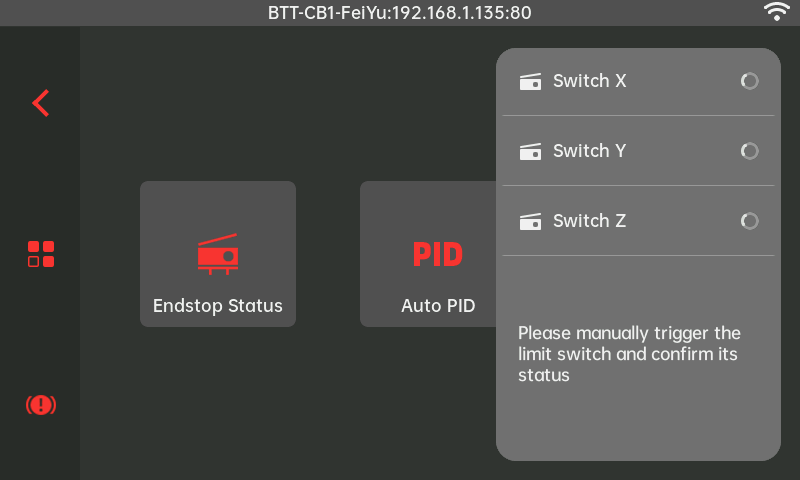
-
The K-Touch checks the endstops
X, Y, Zevery two seconds to monitor their triggered status, which requires manual triggering.
Auto PID
-
Select the extruder or heated bed to PID by tapping it. The button will be highlighted in the theme color (default red).
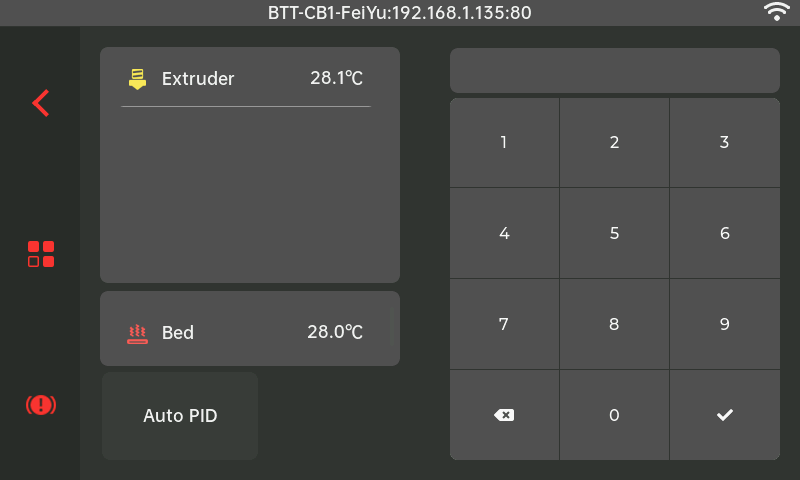
-
Enter the desired PID value on the right side and tap
√. TheAuto PIDbutton below will become clickable and light up in the theme color.
-
Tap the
Auto PIDbutton to bring up a confirmation popup for initiating the PID process.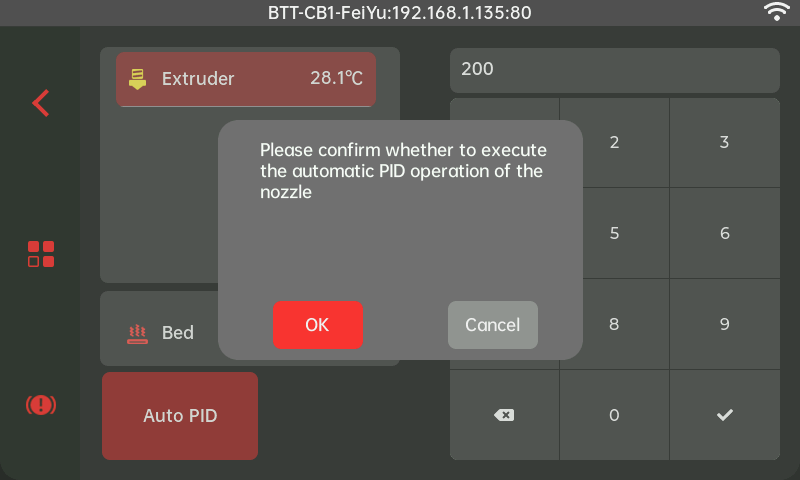
-
Tap the
OKbutton to start the PID process, and a popup indicating the ongoing PID adjustment will appear.
-
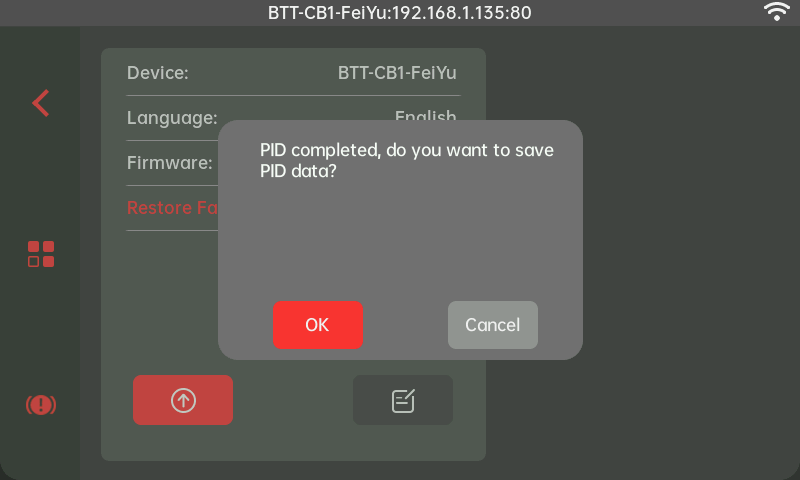
PID is completed, and a pop-up window will appear to confirm whether to save. After clicking the OK button, the pop-up window will close and the PID value will be saved. At this time, you can perform PID again or use the net bed to level. Please note that if you click the Cancel button, the pop-up window will close, but the PID data will not be saved. If you need to perform PID or net bed leveling again, you need to restart K-Touch.
Z-Offset Calibration
-
Select the desired movement unit (mm), default is 0.05mm. Use the
↑+and↓-buttons below to operate the Z-axis.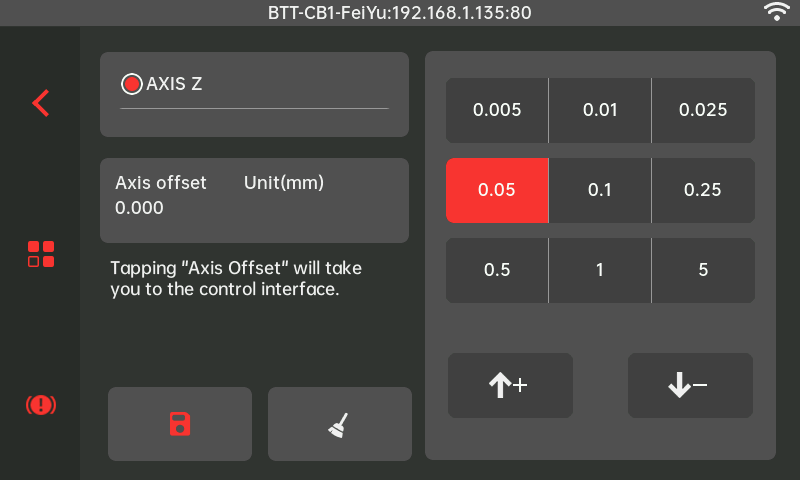
-
Tap the
OKbutton to save the adjusted Z-offset calibration data.
-
Tap the
Clearicon to reset the adjusted Z-offset calibration data.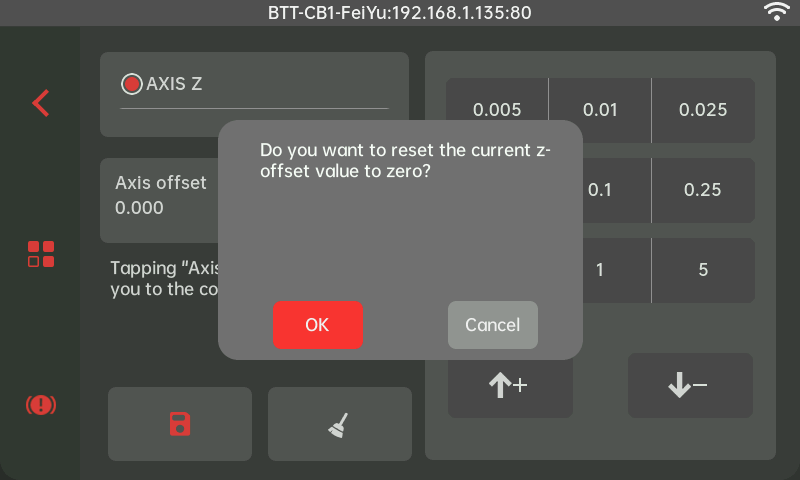
-
Tap the
Axis offsetbox to navigate to theAxis/Temp Interface.
System Settings
- Navigate to the
System Settingsby tapping theSettingsbutton on the main interface.
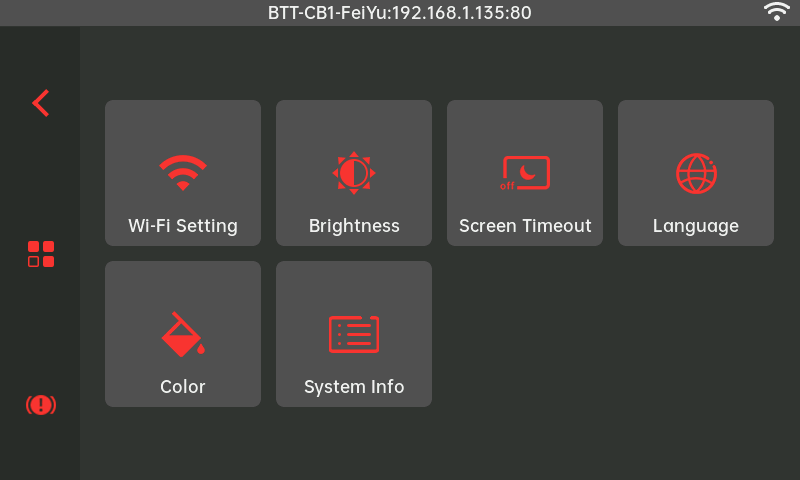
Wi-Fi Settings
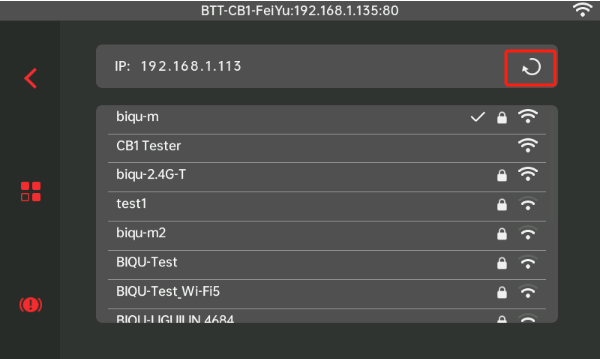
WiFi Connection Status
Connected

Displays the currently connected IP address when connected to WiFi.
Connecting

Connection Failed

Manual Refresh
- Tap the
Refreshicon next to the IP to manually refresh the list of WiFi networks.
Background Auto Refresh
- K-Touch features a
Background Auto Refreshfunction that attempts automatic reconnection when the network is disconnected, with a refresh frequency of60 seconds.
Screen Brightness Settings

- Adjust the screen brightness (default 50) by tapping or long pressing.
Screen Timeout
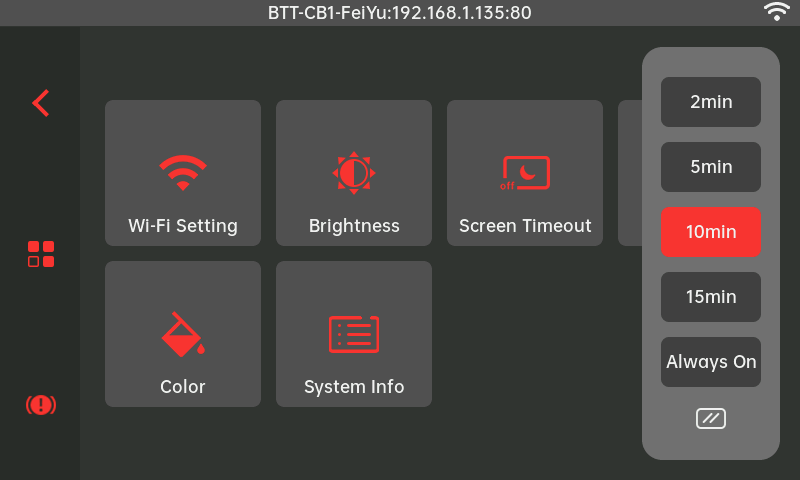
- Select the desired timeout period, default is
10 minutes.
Language Selection

- Choose the desired language, default is
English.
Theme

- Choose the desired theme color, default is
Red.
System Information
-
Access the system information interface by tapping the
System Info.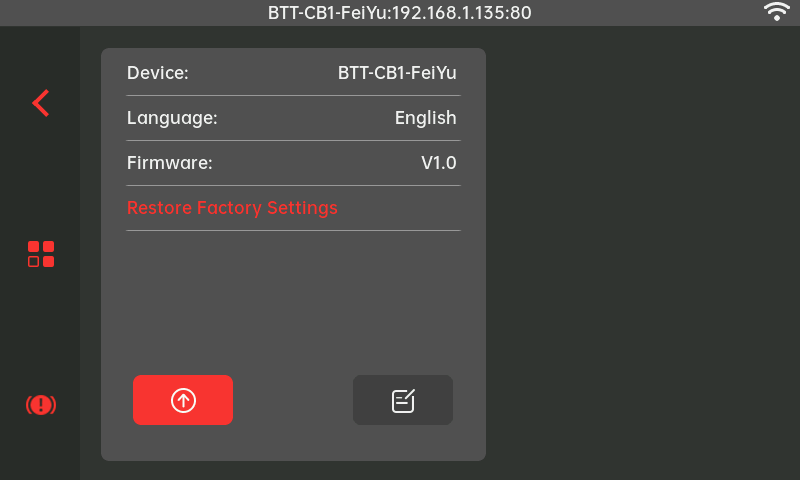
-
Displays the connected
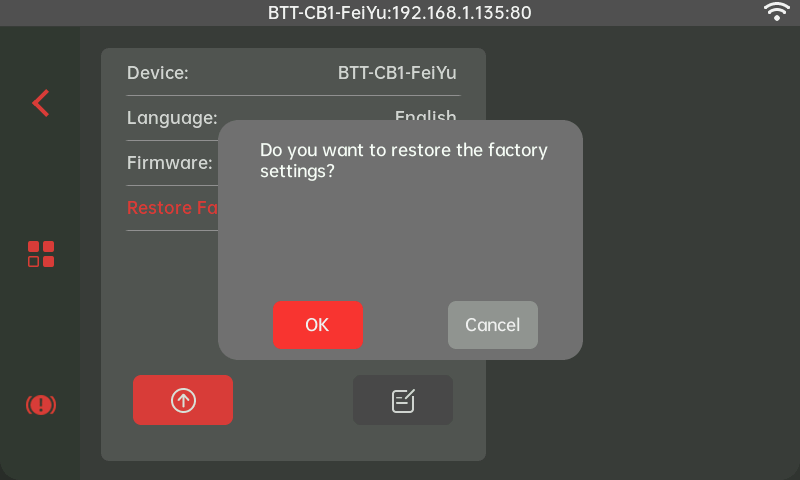
Device ID, currentLanguage,Firmware Version. - Restore Factory Settings (Clears All Data)
-
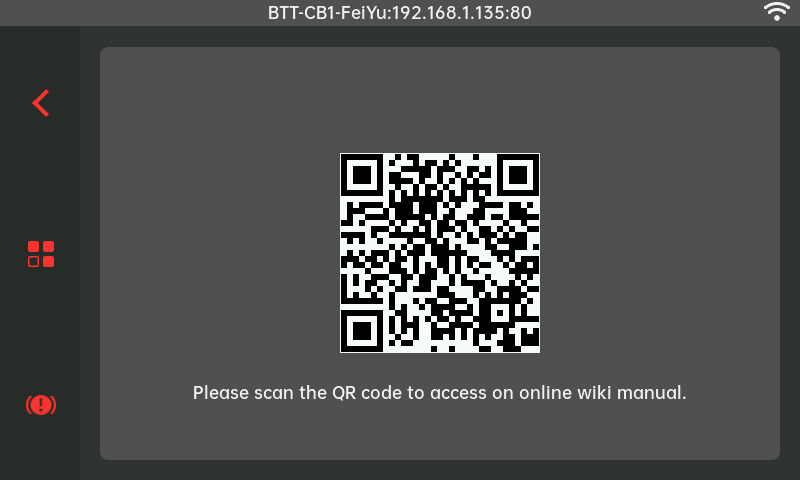
Lower left for OTA upgrade process interface.
-
Lower right for feedback information interface.
Start Printing Interface
-
Tap the
Start Printingbutton to navigate to the print file list interface and refresh the list of print files (up to 50 files can be displayed).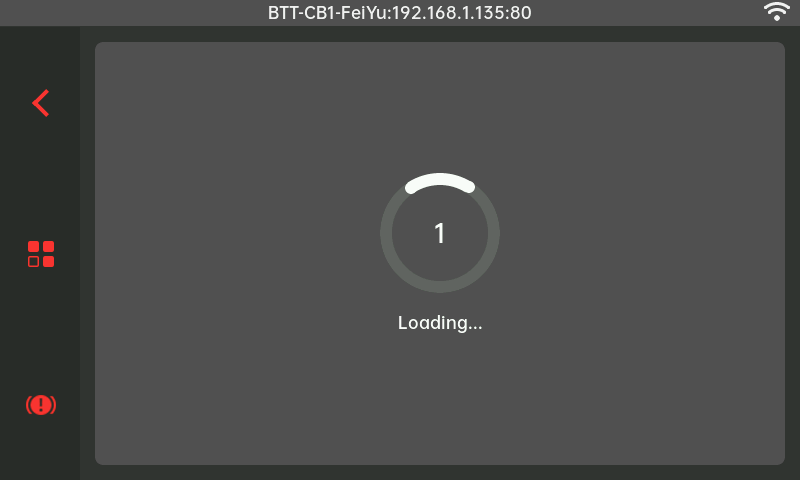
-
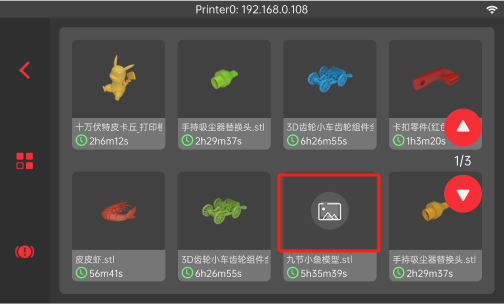
Once scanning is complete, the print file list will appear. The duration of the scan depends on the size of the file list and the images.
-
The red frame indicates the default print image.
-
Select the file you wish to print, click
OK, and initiate the printing process.
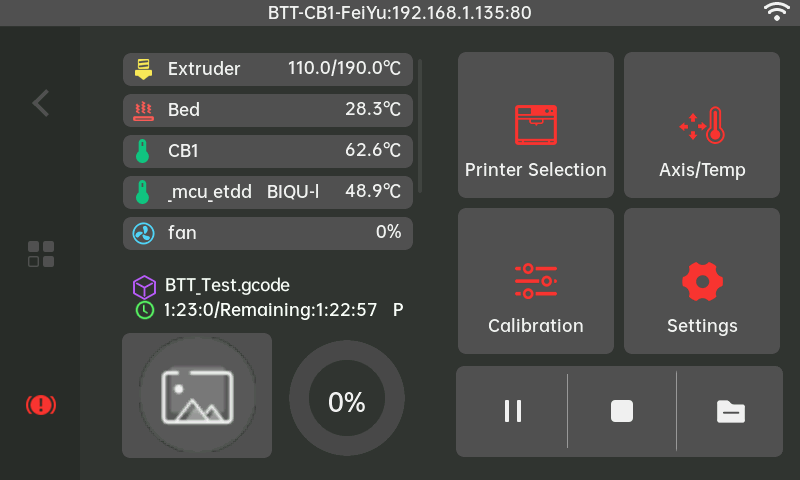
-
The main interface loads the printing information. If there is no print image, the default image below is used.
-
Printing
-
Pause
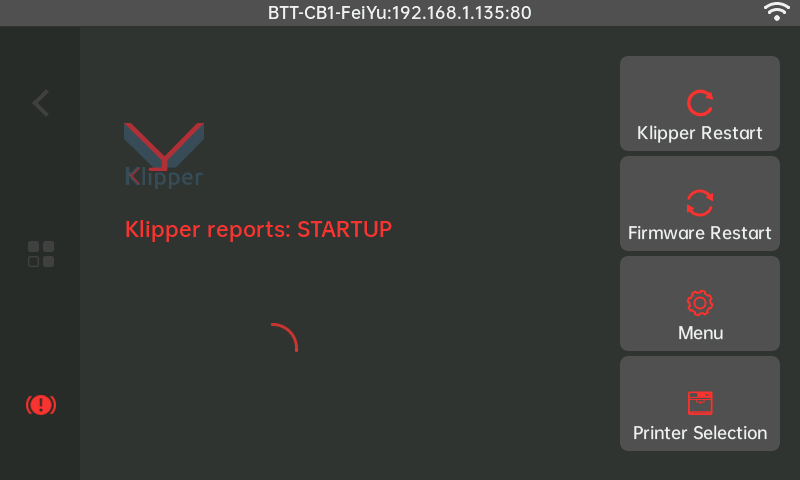
Klipper Termination Page
- K-Touch continuously monitors the printer's status, capturing error messages and anomalies.
- If an error occurs or the emergency stop button is pressed, K-Touch displays an error page.
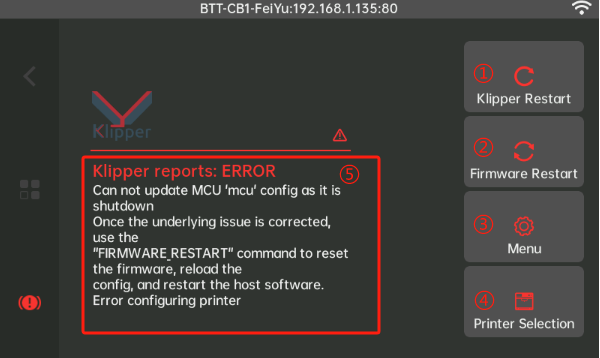

①: Sends the "RESTART" command, similar to the web interface.
②: Sends the "FIRMWARE_RESTART" command, similar to the web interface.
③: Tap to access the System Settings interface, allowing for WiFi reconnection, theme color selection, screen timeout settings, etc.
④: Tap to access the Printer Selection interface to rescan, enter, and select printers.
⑤: Displays the current printer status and error messages.
Pop-up Alerts
Timeout Pop-up
- Displays a timeout warning when network issues such as instability, printer shutdowns, or weak signals occur.

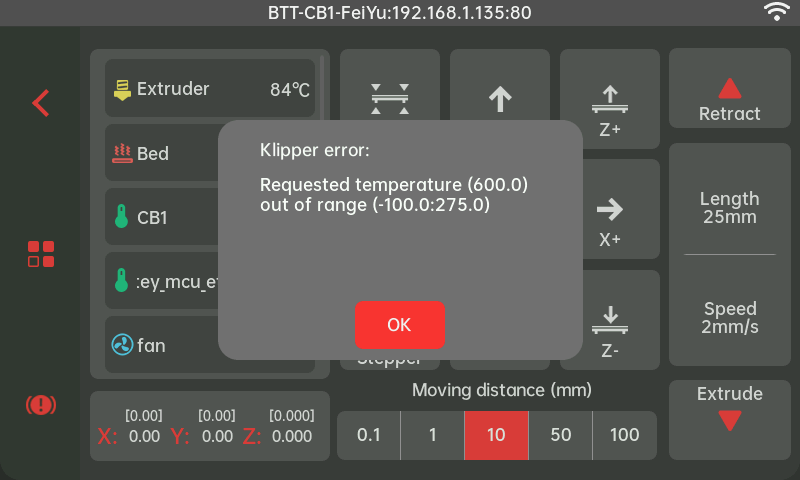
Error Pop-up
- The printer has not been homed, yet X, Y, Z axis movement was performed.

- Triggered if the extruder or bed temperature exceeds the maximum limit.
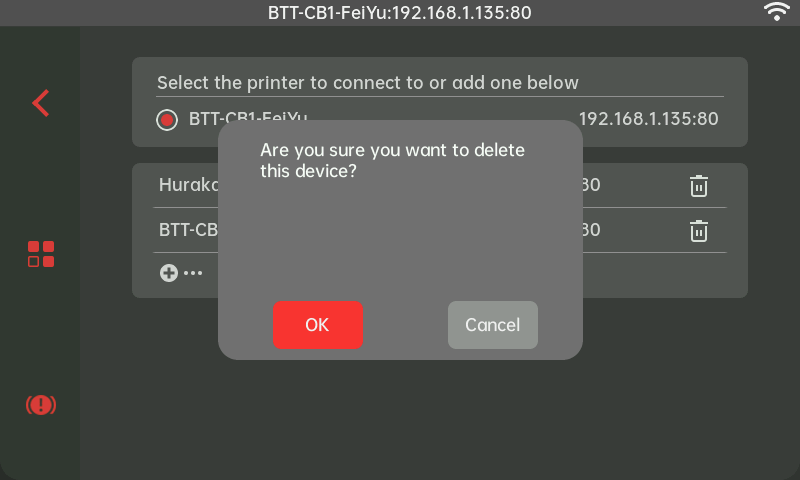
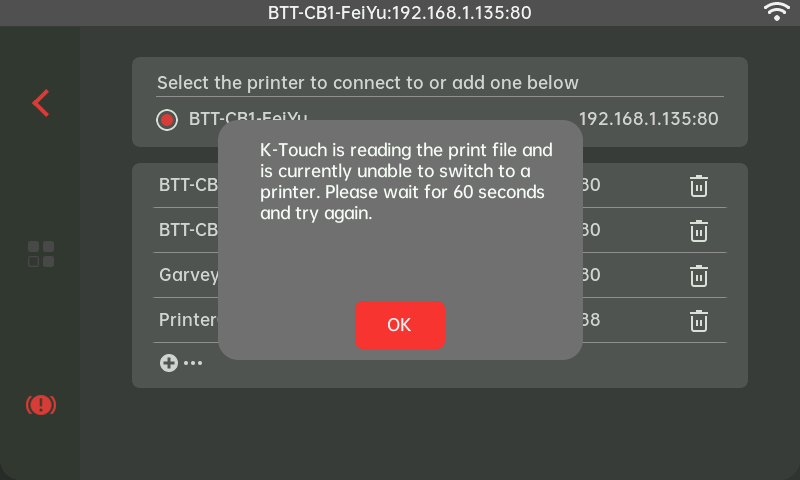
Accidental Touch Prevention Pop-up
-
Emergency stop button:
-
Unlock motors button:

-
Repeat PID:

-
Factory reset button:
-
Delete printer:
-
Prevents switching printers during file search:
-
Prevents accidental file selection:
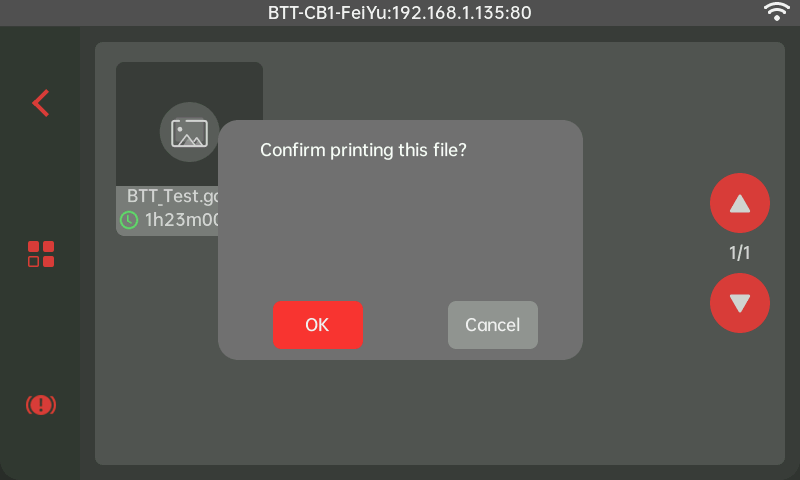
-
Stops a printing file:

Reminder Pop-up
-
Displays when the printer file list is empty or exceeds 50 files.
-
Indicates auto bed leveling completion (
OKbutton saves data):
- Indicates automatic PID completion (
OKbutton saves data):
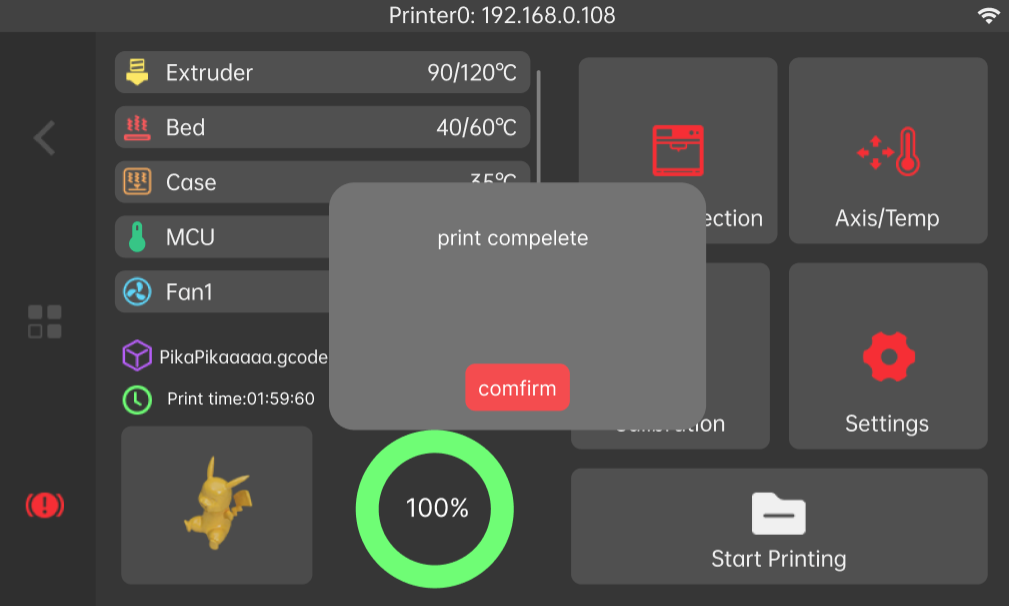
- Notifies when printing is complete.
Firmware
Firmware History
V1.0.0
- The initial release of factory firmware.
V1.0.1
The V1.0.1 version is updated as follows:
- Added functionality for printing via USB drive through the USB interface.
- Introduced the capability to read and set the chamber temperature.
- Refined the temperature setting interface, now featuring a quick-cool button.
- Prioritized the emergency stop command as the top-level command.
- Boosted the loading speed of the print file list.
- Improved the user interface layout of the print file list, which now includes a manual refresh button and a display for storage space.
- Expanded the display capacity of the print file list to support thumbnails for up to 100 files.
- Upgraded the backend algorithm for reading the print file list to handle up to 300 files.
- Enhanced the user experience with improved pop-up notifications for the print file list.
- Improved the printers auto-scan feature, adjusting the IP scan port to "7125".
- Enhanced PID functionality with a new save button for PID settings.
- Fixed an issue where oversized thumbnails in the print file list caused restarts. in the print file list caused restarts.
- Addressed issues related to entering IP addresses and problems with IP length being too long or too short.
- Solved the issue of the message queue not clearing when switching between printers.
- Fixed a problem where screen brightness settings were not retained after switching the K-Touch power on or off.
V1.1.0
The V1.1.0 version is updated as follows:
- Added Compatibility with Panda PWR, support for binding with and controlling Panda PWR.
- Added Klipper console (Console) feature.
- Added printing flow and speed adjustment capabilities.
- Home page widgets have been added to provide one-click access to essential features including Panda PWR and Console.
- A new clock feature has been added to help users estimate the time needed for printing and other printer operations.
- The firmware update WebUI interface has been optimized to display current firmware and IMG versions.
- The temperature adjustment interface has been enhanced with line graphs for each temperature sensor, showing preset values and including a one-click cooling option.
Important Notice: Following the upgrade of the K-Touch firmware to version V1.1.0, it is essential to reset your device to factory settings. This step ensures that new features, such as binding the Panda PWR, are activated. Before proceeding with the reset, please back up all important device data, including manually added printer IP addresses. For instructions on how to restore factory settings, please click here.- Jump to System Information
Feature Requests
If you would like to see specific features in upcoming K-Touch firmware releases, please log your feature requests on the official K-Touch GitHub repository to let us know.
How to Update Firmware
OTA
- Download the firmware binary file from the [Firmware History] section to the device you will use for the update, such as a computer or mobile device running iOS or Android. Here, it will be referred to as
computer.
- Connect K-Touch to the WiFi network that shares the same local area network as the computer.
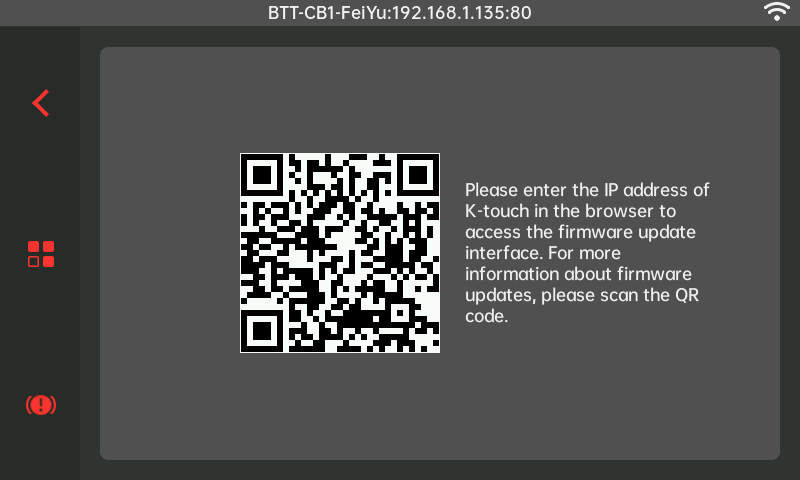
- Locate K-Touch's IP address in the
Wi-Fi SettingsunderSystem Settings.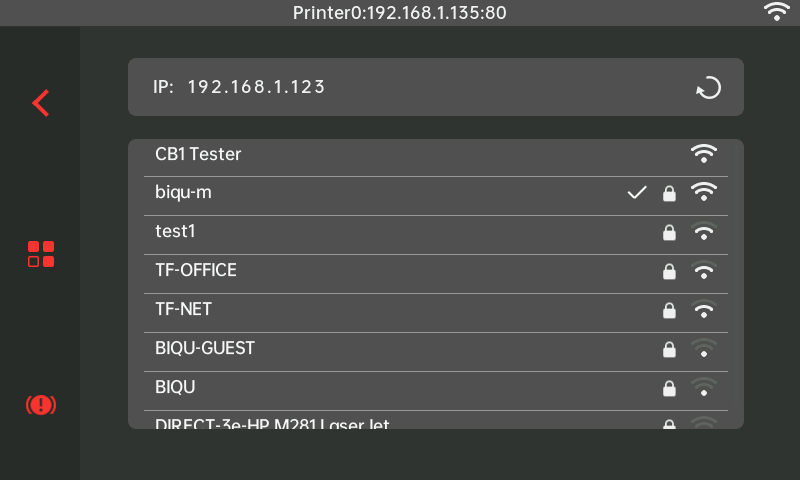
- Enter K-Touch's IP address in your computer's browser to access the web UI, then click the "Update FW" button.
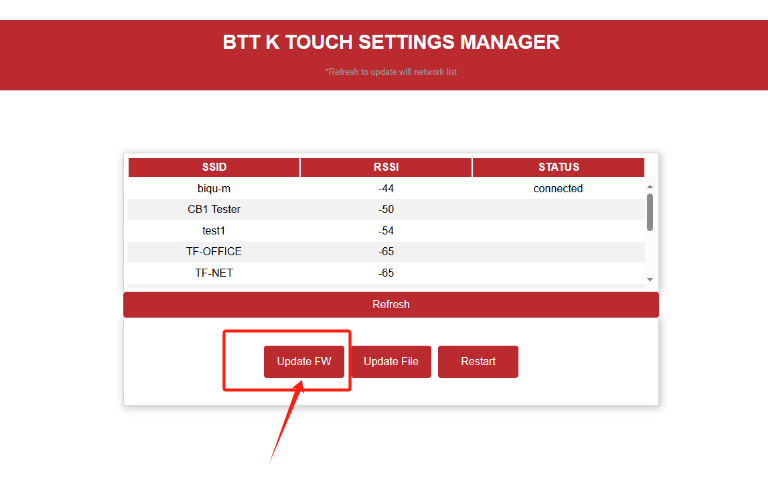
- Click the
Choose Filebutton and select the downloaded firmware binary file. K-Touch will automatically start the update process.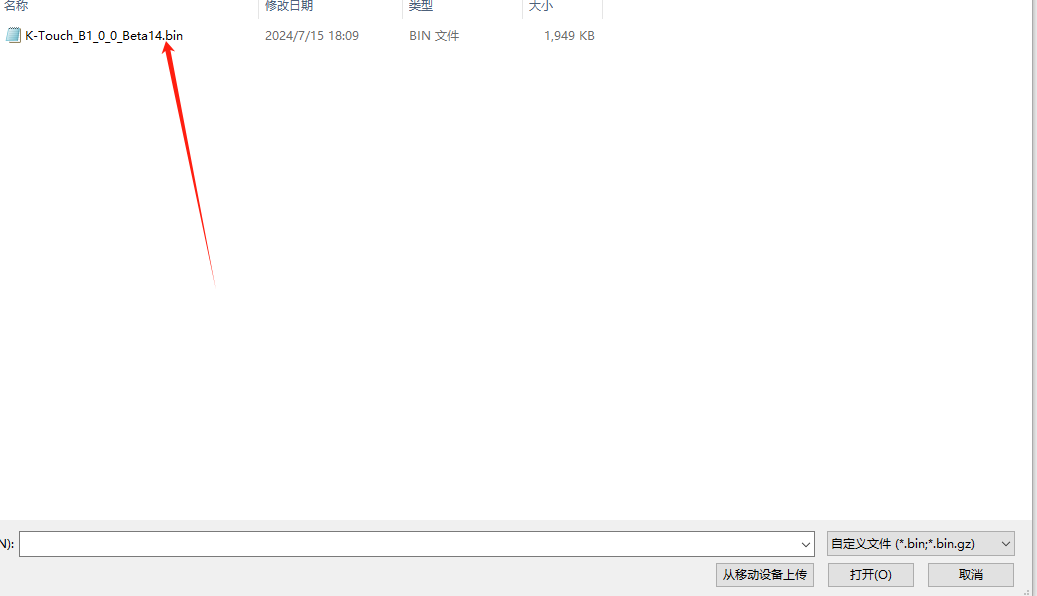
- After the update is complete, K-Touch will automatically reboot and operate with the new firmware.
How to Update IMG Files
-
When the IMG part of the new firmware has changed, updating the IMG file is necessary.

-
Download the IMG file to your computer or mobile device.

- Ensure K-Touch is connected to the WiFi network on the same local area network as your computer.
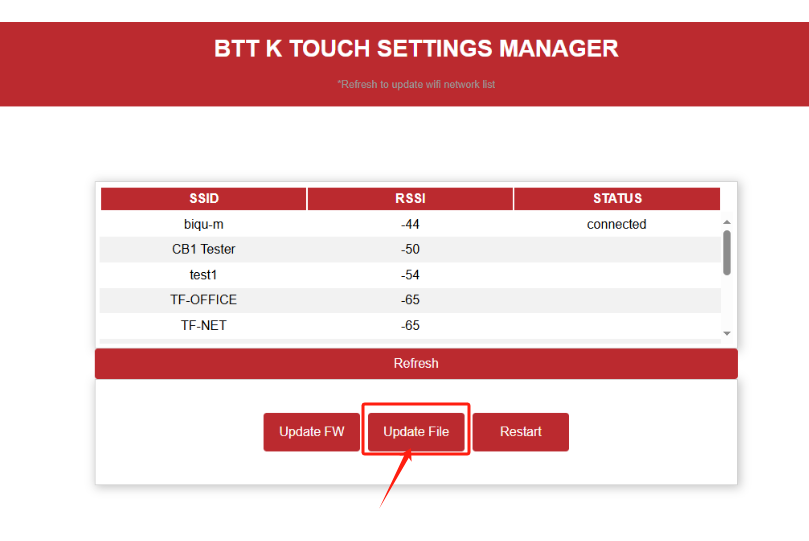
- Enter K-Touch's IP address in your computer browser to access the web UI, then click the "Update File" button.
- Click the
Choose Filebutton, then select the downloaded img file. K-Touch will automatically start the update.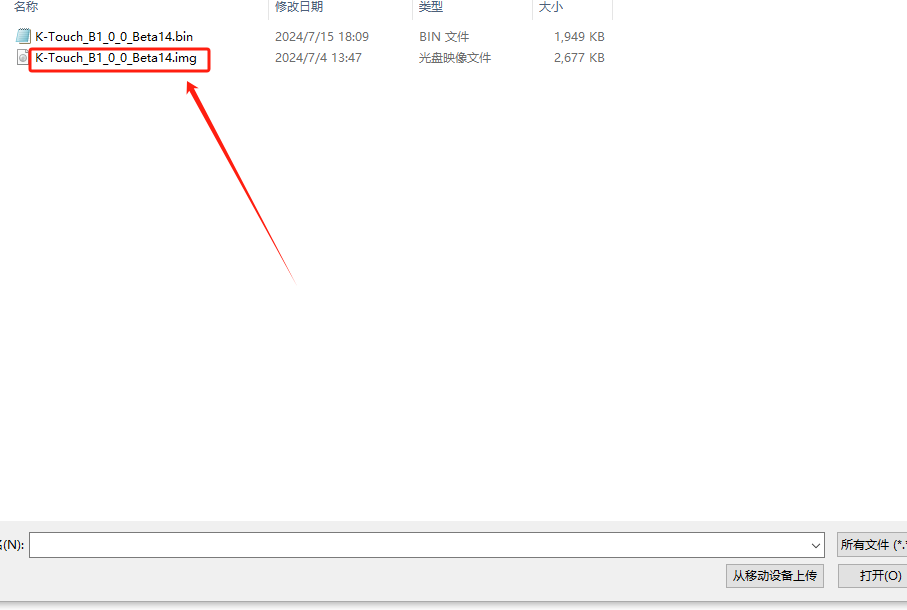
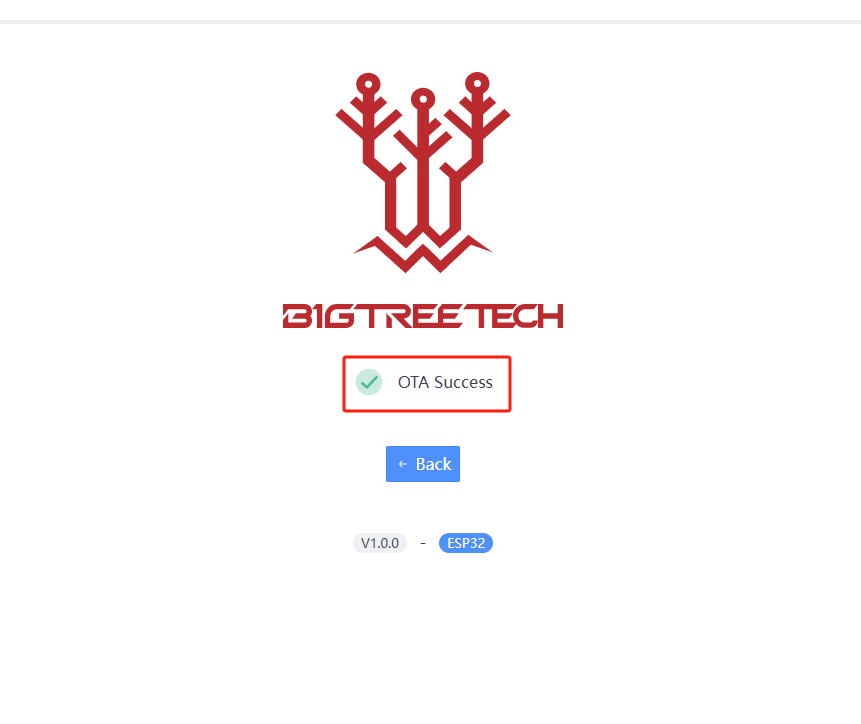
- After the update is complete, K-Touch will reboot automatically and operate with the new img file.
How to Use Different Firmware (Updating K-Touch to Panda-Touch)
-
Note: It is crucial to back up data. Switching between K-Touch firmware and Panda Touch firmware will erase all existing data on the device. Record necessary information like the Klipper or Bambu printer IP, SN, access codes, WiFi network, and password beforehand.
-
Ensure K-Touch is connected to the WiFi network sharing the same local network as the computer to obtain the necessary IP for OTA updates.
-
Visit the Panda-Touch GitHub repository to download the latest firmware version.

- Enter K-Touch's IP address in your computer browser to access the web UI, then click the "Update FW" button.
- Click the
Choose Filebutton, then select the previously downloaded Panda-Touch firmware binary file. K-Touch will automatically start the update.
- After the update is complete, K-Touch will reboot automatically and operate with the new firmware.
- After rebooting with different firmware, the Panda-Touch initialization interface will appear.
- After connecting to WiFi, the left side will display the IP address.

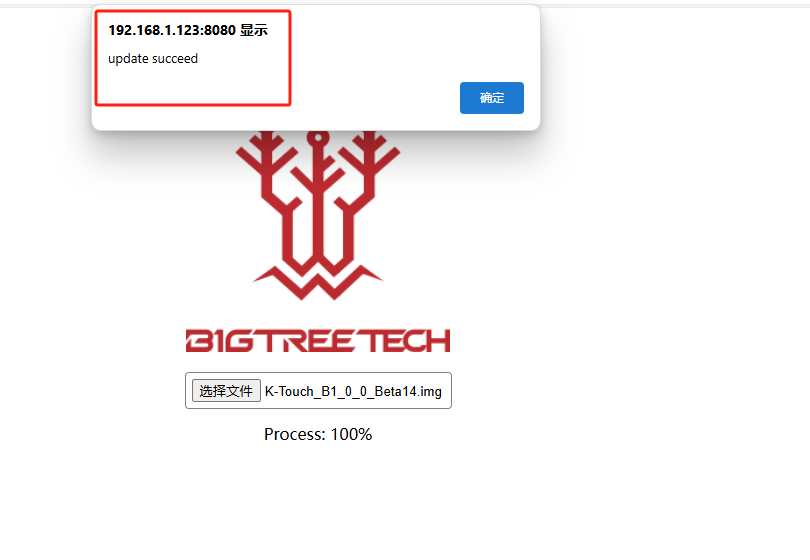
- Enter K-Touch's IP address in your computer browser to access the web UI, then click the "Update FW" button.
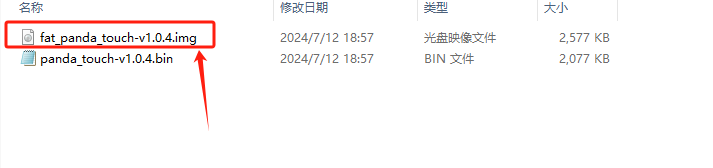
- Click the
Choose Filebutton, then select the downloaded img file. K-Touch will automatically start the update.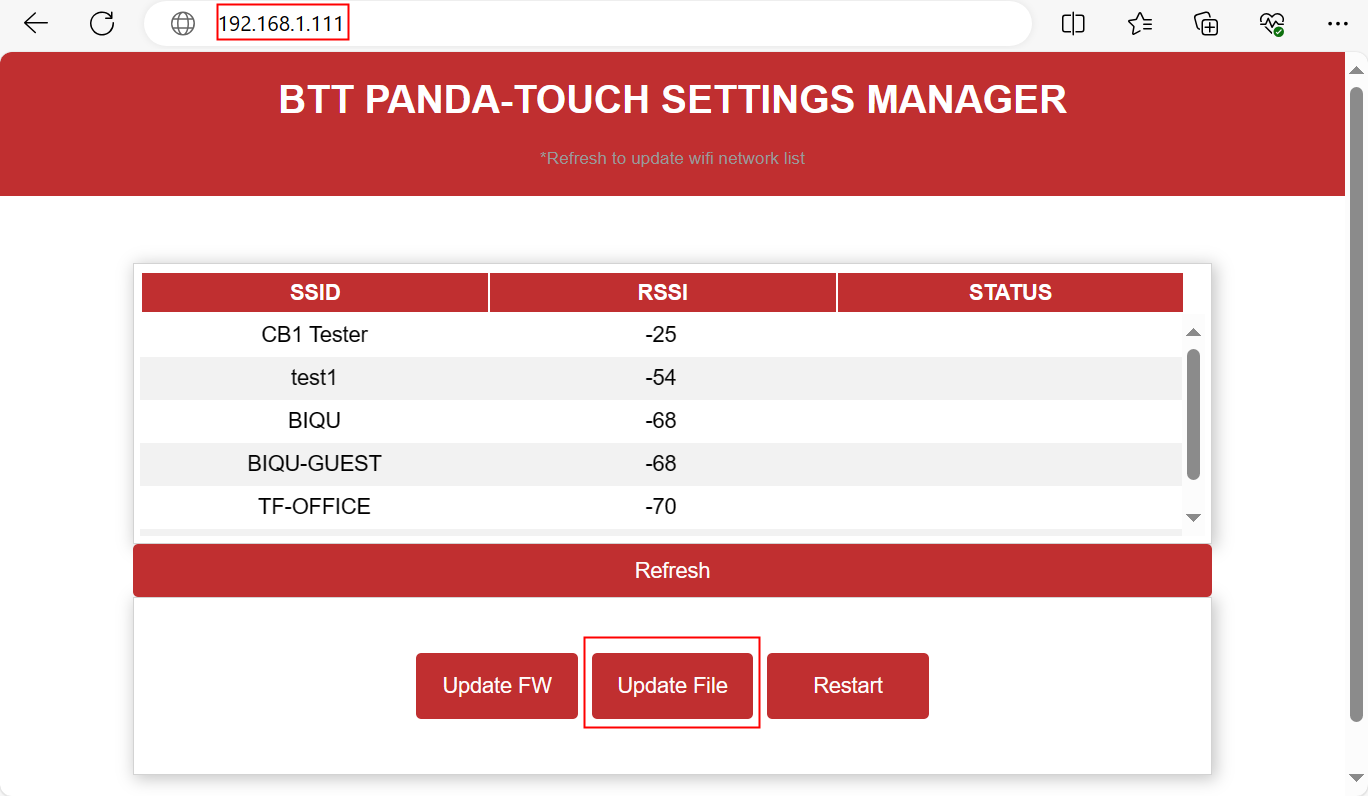
- After the update is complete, K-Touch will reboot automatically and operate with the new img file.
- The update is successful, displaying the Panda-Touch initialization interface.
Flash Download Tool
This method is supported only on the Windows operating system.
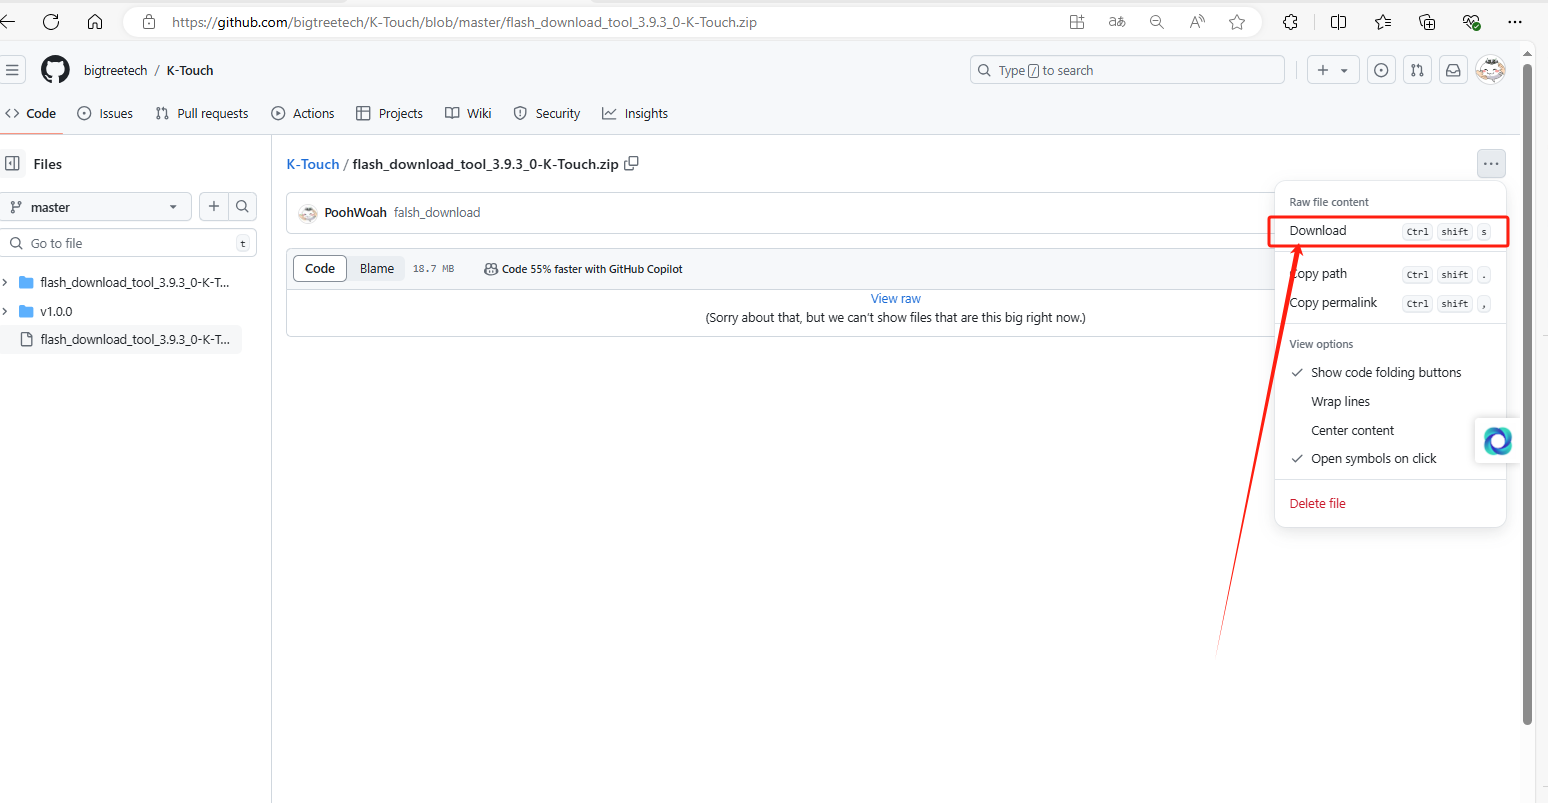
* Visit the K-Touch GitHub to download the required files.
 * Use a Type-C USB cable to connect K-Touch to your computer. Check if a new COM port appears in the Device Manager. If the COM port is not recognized, please install the CH340 driver.
* Download and unzip flash_Download_tool_3.9.3_0-K-Touch.zipto your computer.
* Double-click
* Use a Type-C USB cable to connect K-Touch to your computer. Check if a new COM port appears in the Device Manager. If the COM port is not recognized, please install the CH340 driver.
* Download and unzip flash_Download_tool_3.9.3_0-K-Touch.zipto your computer.
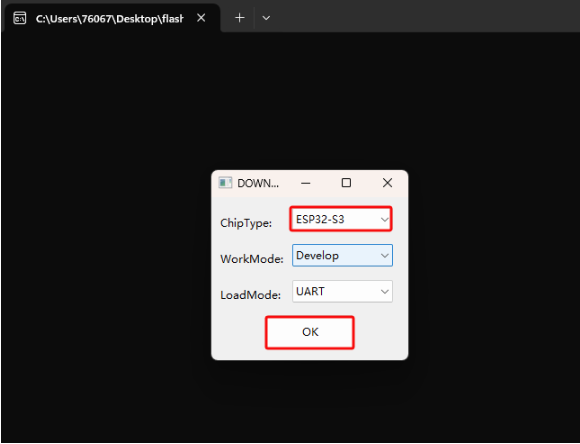
* Double-click flash_download_tool_3.9.3.exe
 * Set the ChipType to
 ESP32-S3 and click the OK button.
 * Adjust the COM port setting to match the port recognized by your computer, then click
 ERASE.
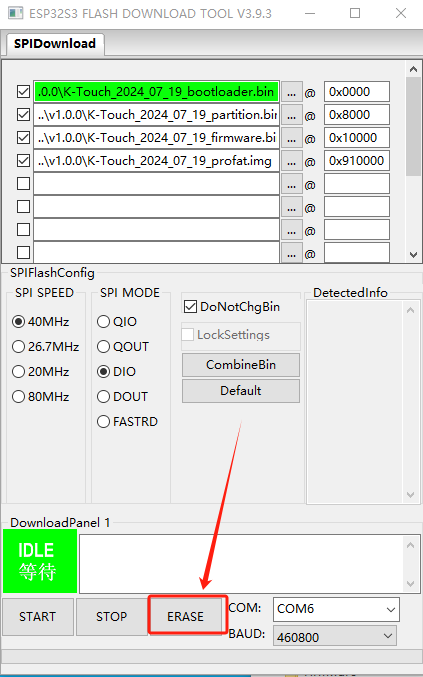 * Ensure the erasing process is completed. Keep the software open and proceed with the firmware writing.
 * Click
 START to begin the firmware writing process.
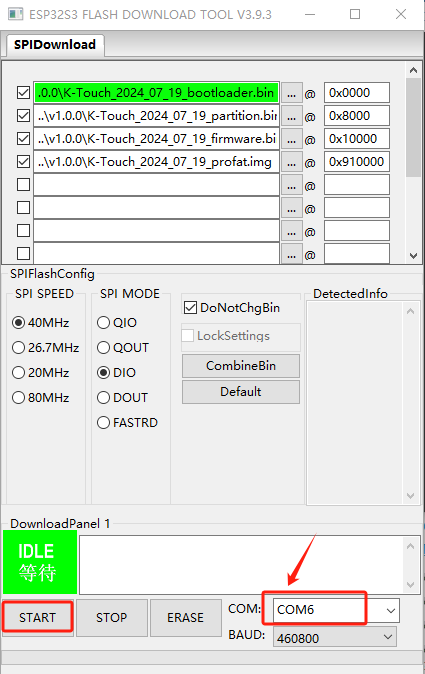 * After the process completes, power off K-Touch, then turn it on to restart.
Technical Support
Was this page helpful? If you have any further questions about product usage or encounter other issues, please email our after-sales team at service001@biqu3d.com.